Pro Tips & Time Saving Ideas

pesto.small.containers.jpg

First and foremost, I hope that everyone is safe, and healthy. These are extraordinary times, which require patience, perseverance, faith and a deep sense of knowing that we will heal and return to a new way of living armed with more knowledge and information, and certainly with more compassion.

Since we are still in a lock down situation, keeping our distance and doing what we can to remain safe, we are finding different ways in which to manage our daily routines. That includes trying to make the most out of the food we are able to buy. I thought I would share some tips and time savings ideas that might help.

In our area, we have not been able to purchase some items, while others we can get in large quantities. And because of that, I’ve come up with ways to make sure I don’t waste anything. Below are a few that I’ve implemented.

Also, because things have been a bit wonky, I haven’t been taking photos with my professional camera. Sure, there is a list of reasons why, but I definitely won’t bore you with those details. Instead I’ve been using my phone, and clearly there is a big difference in quality. So, disclaimer right up front, the images may not be the best but I think the ideas are valuable and worth including the images. As we all know - a picture is worth a thousand words. (And yet I still use words, and lots of them.)

Let’s get started:

Pro Tip #1 - Buy citrus in larger quantities and freeze

How many times have you wished you had just a little squeeze of lemon, or lime? I have often found myself in that exact situation, which is why I started buying huge bags of limes and lemons. With this helpful trick, you will never be caught without. But this tip is not only useful if you buy in large quantities. It is also great to fold into your routine when the citrus you do have will go bad before you have a chance to use it. This method will save you from having to toss and waste it.

First things first, wash them. That’s right. Why wash the outside of citrus when you are using the juice from the inside?

Two reasons:

  1. Even if you are only using the juice, the outside has been touched by many hands and exposed. When you squeeze some of the juice might run down the outside rind, plus your hands are touching the outside rind. I’ve practiced this tip before the coronavirus, but it is especially important now.

  2. If you are going to zest the rind, washing is ESSENTIAL because you are going to consume the rind. It goes without saying that anything you will eat needs to be washed.

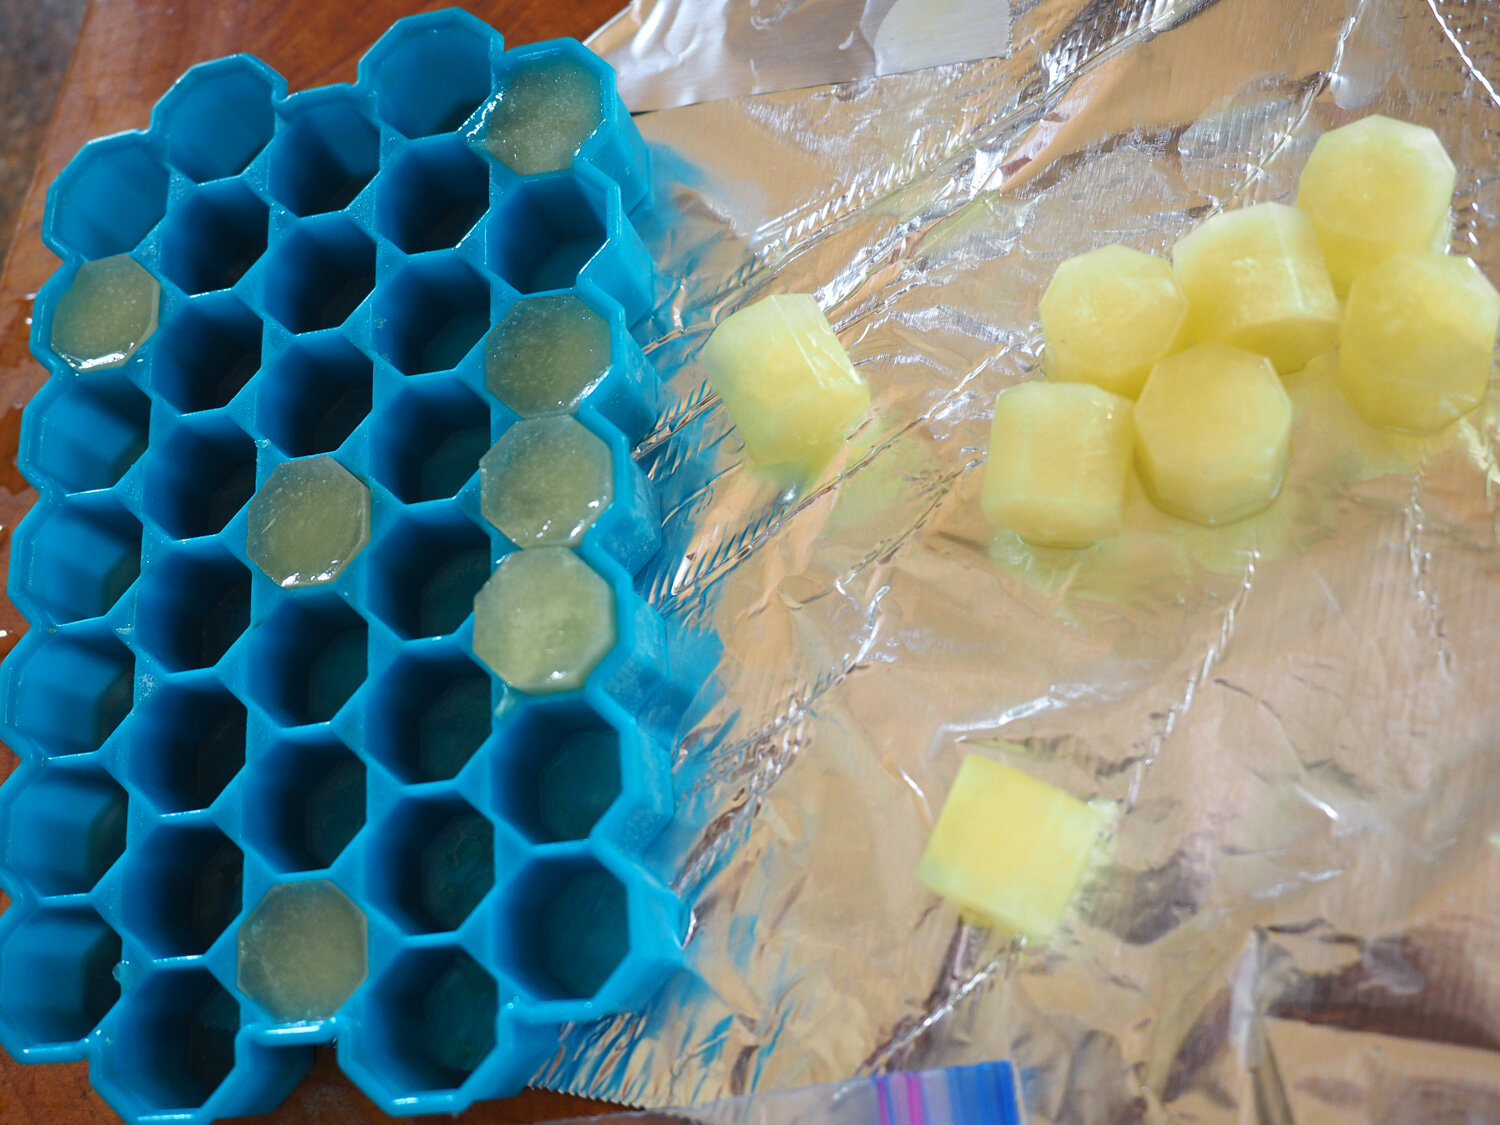
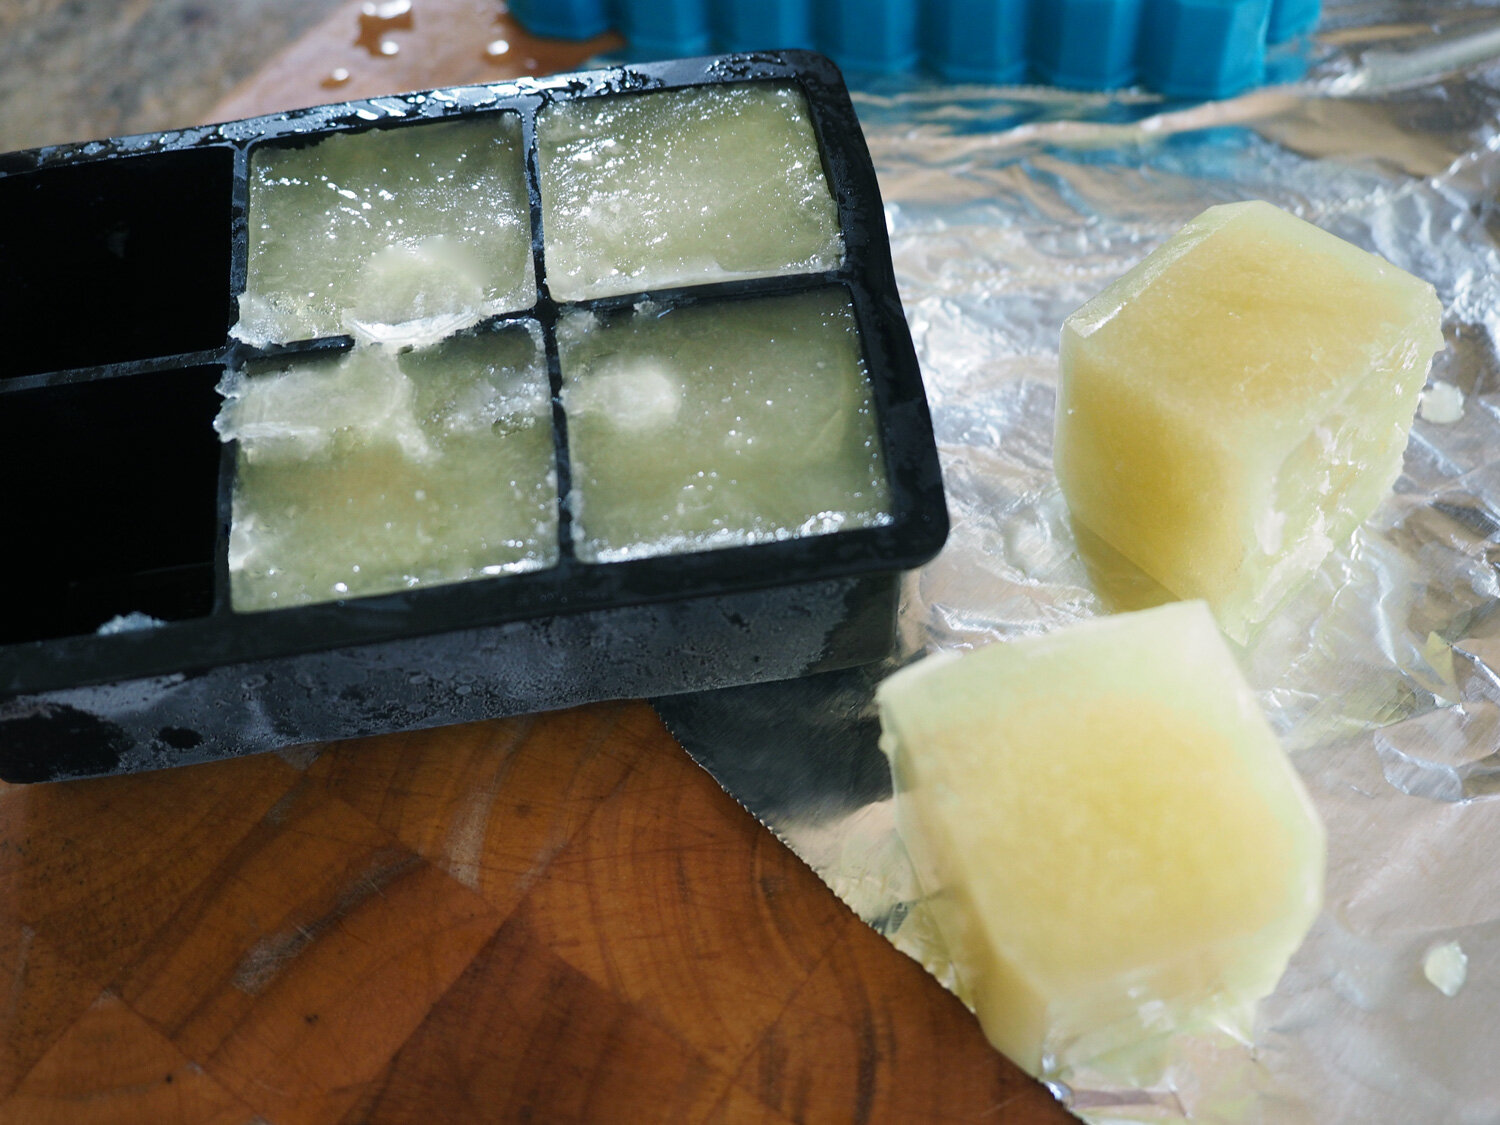
Next, I select several to keep on hand for daily use, placing them in a basket in a cool, dry drawer. The rest I squeeze into a large measuring cup and then pour the juice into silicone molds to freeze. (If you don’t have silicone molds then ice cube trays do the trick. I do find that the silicone makes it easier to pop the cubes out.) You can choose whatever size you want. I use both tiny molds and large oversized ice cube molds so that I have choices.

Once they are frozen, pop them out and place them into labeled freezer bags for future consumption in a variety of ways, such as:

  • Add to your tea

  • Use for cocktails

  • Add to sauces

  • Use for salad dressing

Note: I have also zested the rind and included that in some of the juice cubes, for that extra added tang.

Pro Tip #2 - Herbs Now, Herbs Later

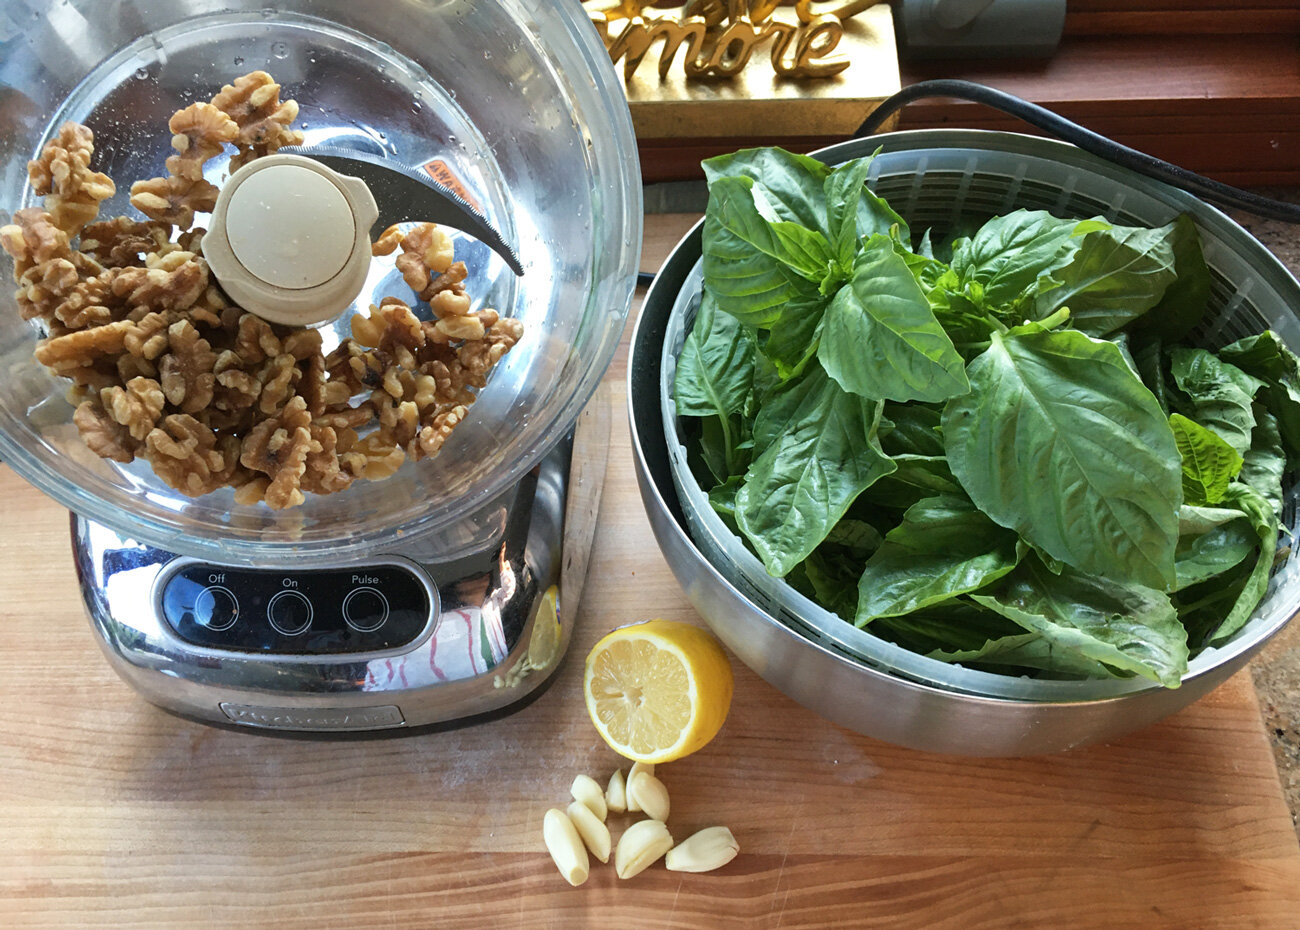
For whatever reason, I haven’t been able to get any other herb except basil, and it comes in 1 lb. size. I love basil, but that’s a whole lot of basil. I decided to take full advantage of having this tasty herb on hand. I used it fresh in several dishes, (which will be featured in my next post), but there was just so much I could use before it was going to go south on me. That’s where this next tip comes in handy.

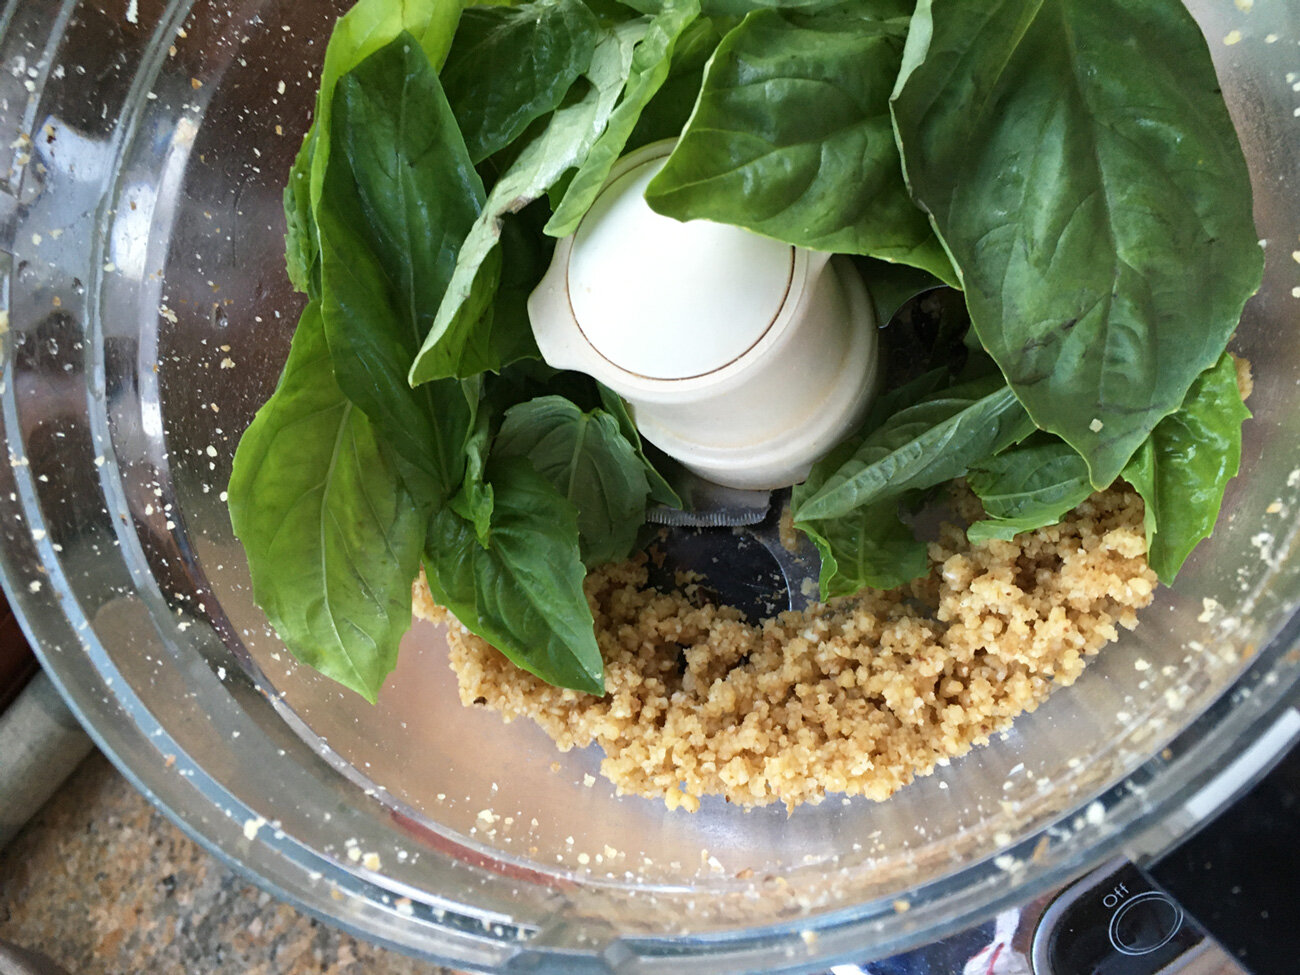
For the remaining abundant leaves, I decided to make a big batch of pesto, using walnuts, garlic, salt, pepper, lemon juice and oil. I then split that amount in thirds, adding Parmesan cheese to only one portion, and leaving the other two without. I will explain why, keep reading. Again, we will be using the same method as with the lime and lemon juice. This time placing the batch with cheese into a larger container with an appropriate amount to be used in the future for pasta. The other ‘without cheese’ portions I poured into the smaller silicone molds, and small plastic containers. You can employ this method using cilantro or parsley as well. For those herbs, you can keep it simple and just blend the herb with garlic, oil, salt and pepper.

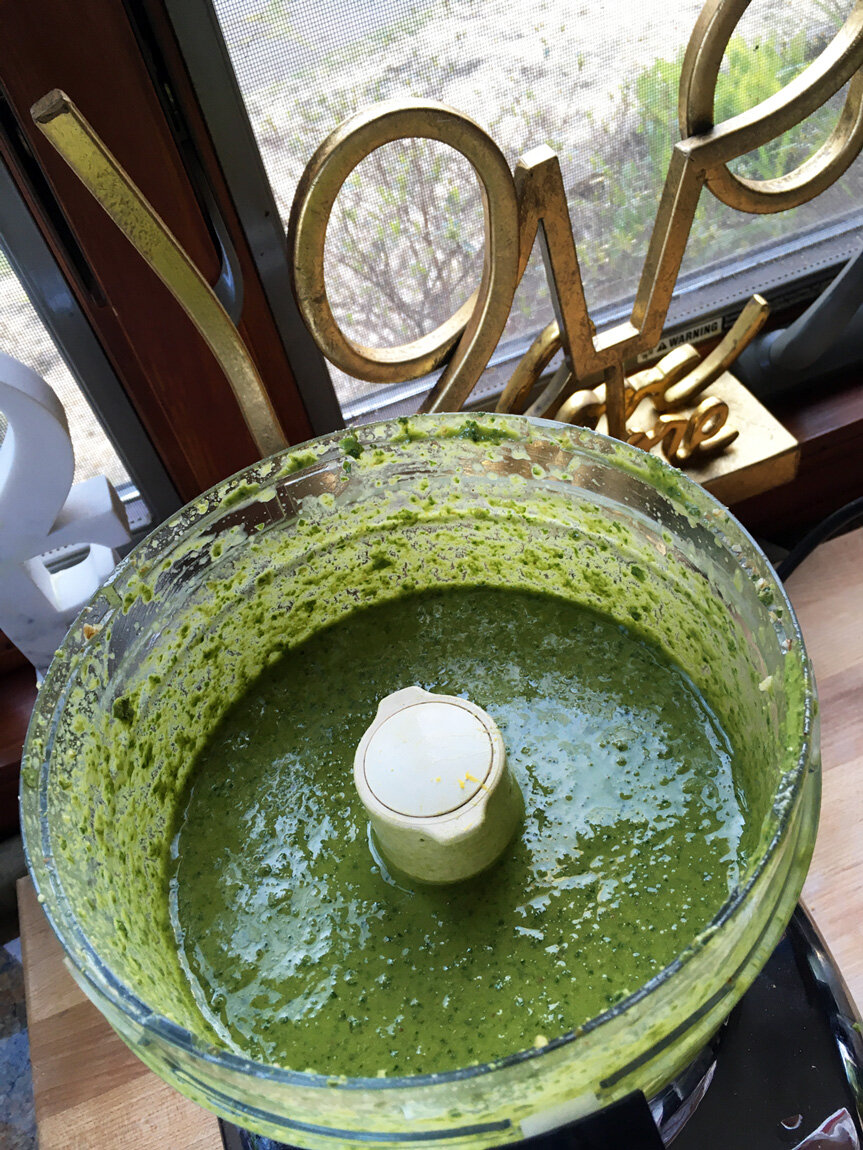
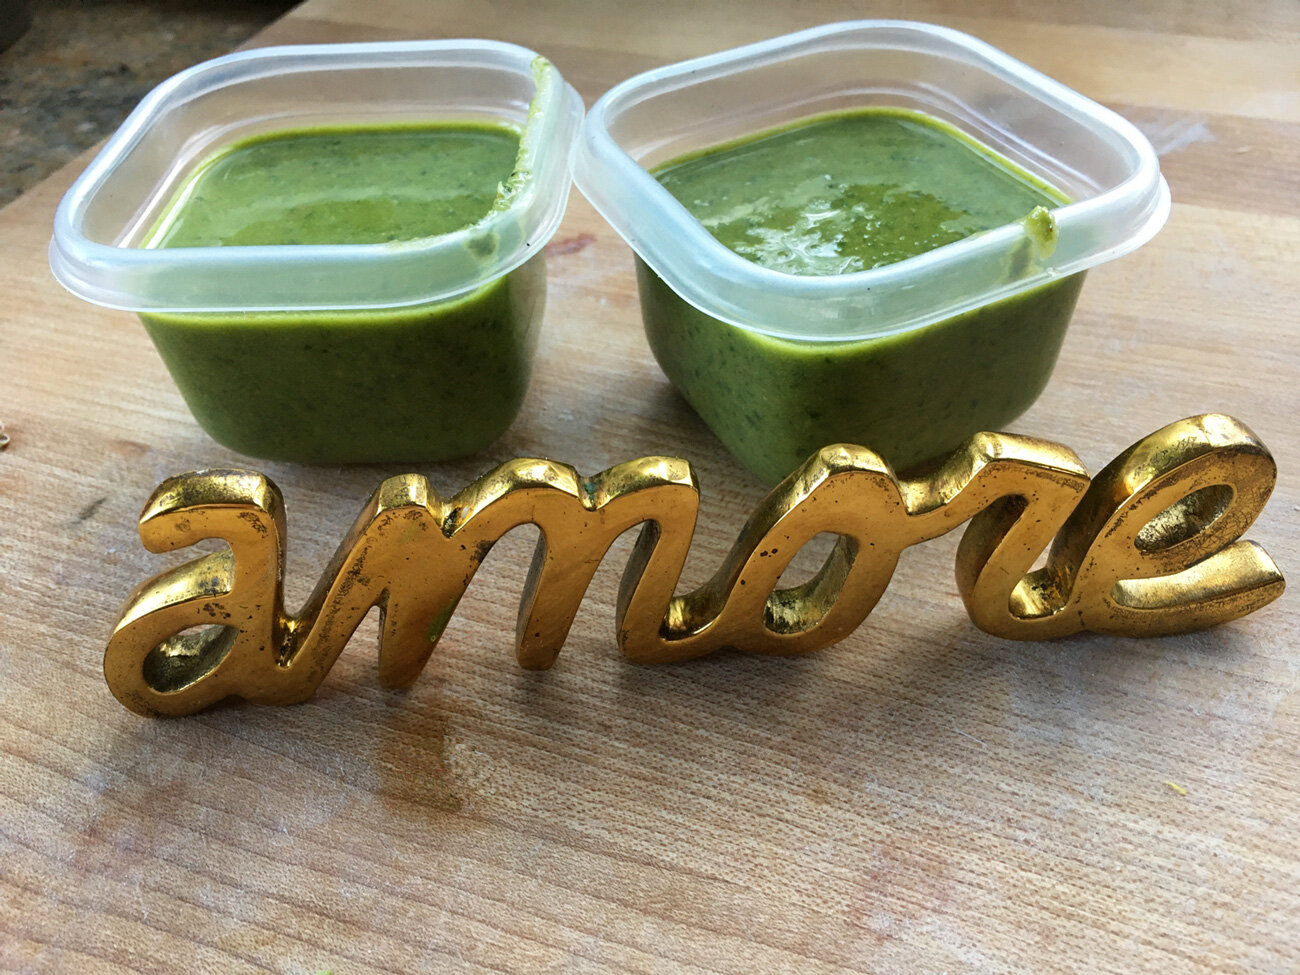
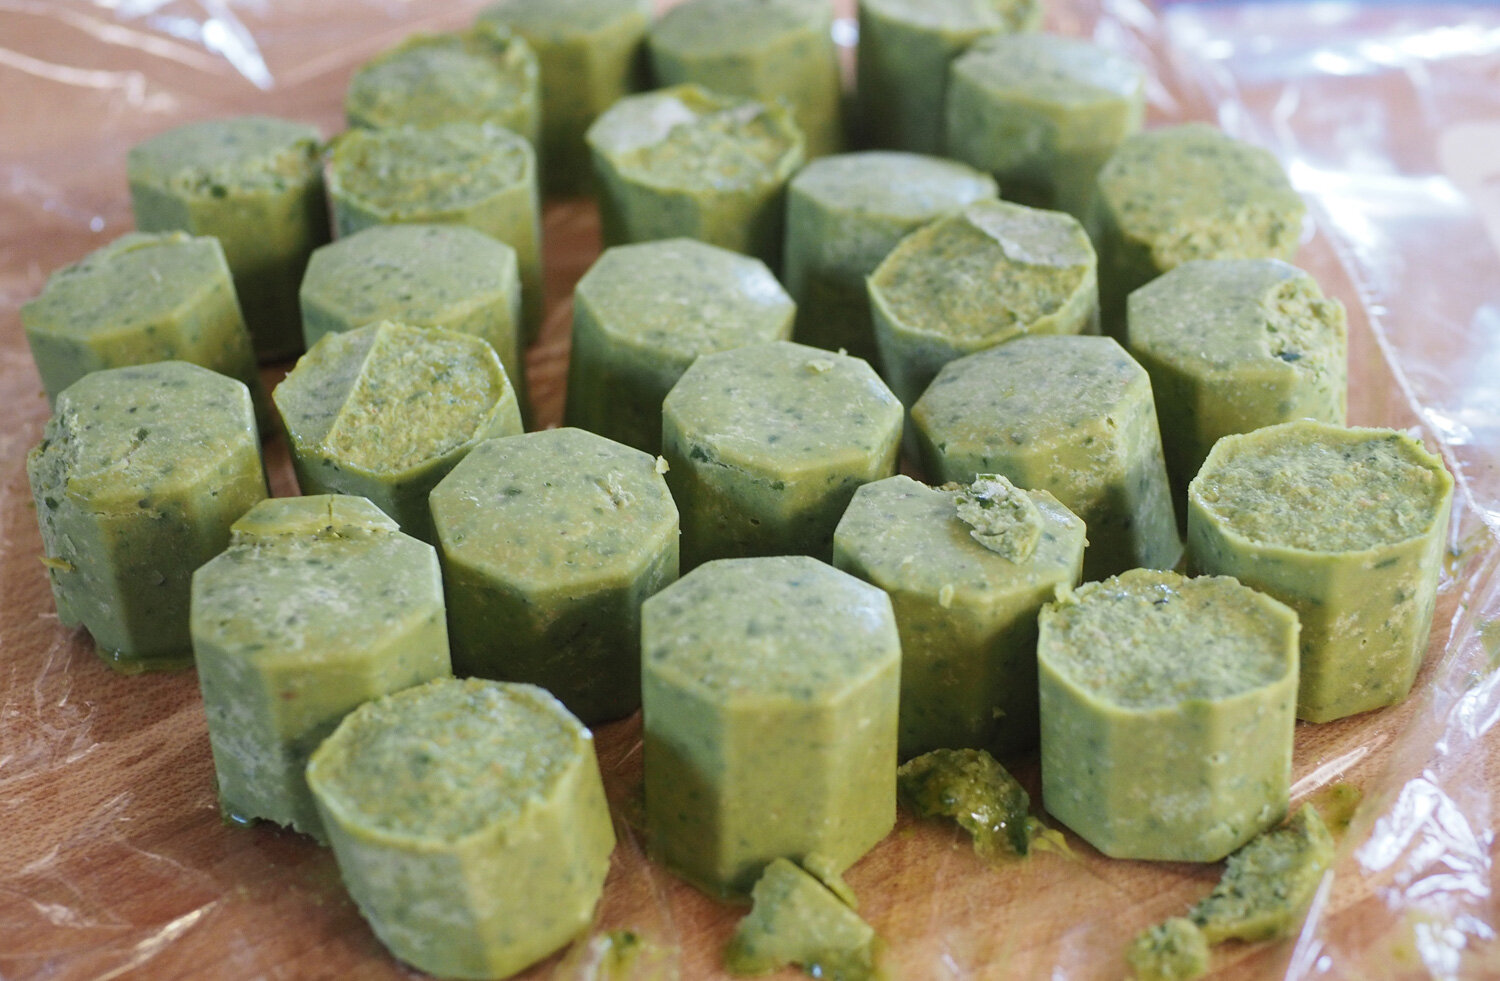
Once the cubes in the molds are frozen, simply pop them out and place in labeled freezer bags. (Note: labeling is key. You may think that you will remember what’s in a container but if it’s been in the freezer for a while you can’t rely on memory. Plus, you do want to put the date so you know how long it’s been in the freezer.)

The reason for not adding cheese to the entire batch is that basil, garlic, walnuts and oil combo is way more versatile than with cheese. This yummy green goodness of a mixture can be used in a litany of other ways, such as:

  • Add basil flavor (when you don’t have fresh on hand) to sauce

  • Baste a roasted chicken

  • Use it to finish a soup for a hint of herbal flavor

  • Place it in any fish en papilotte

Pro Tip #3 - Avoid a Mess: Use of a Container & Multiple Stacked Baggies
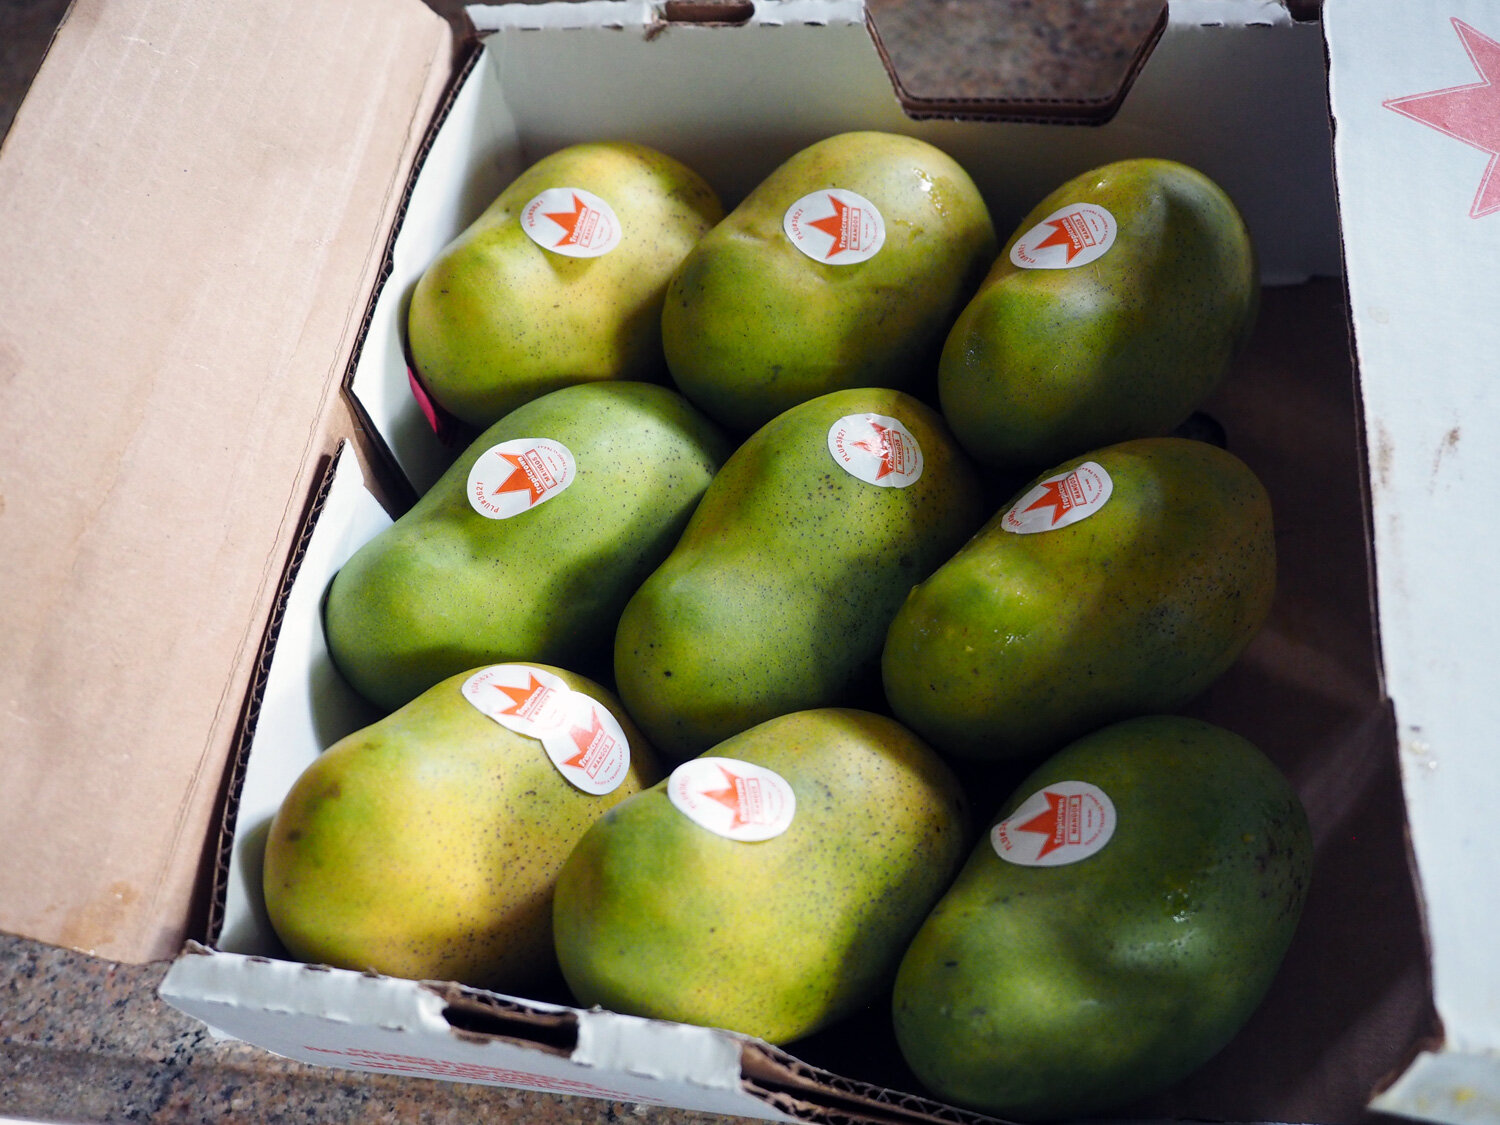
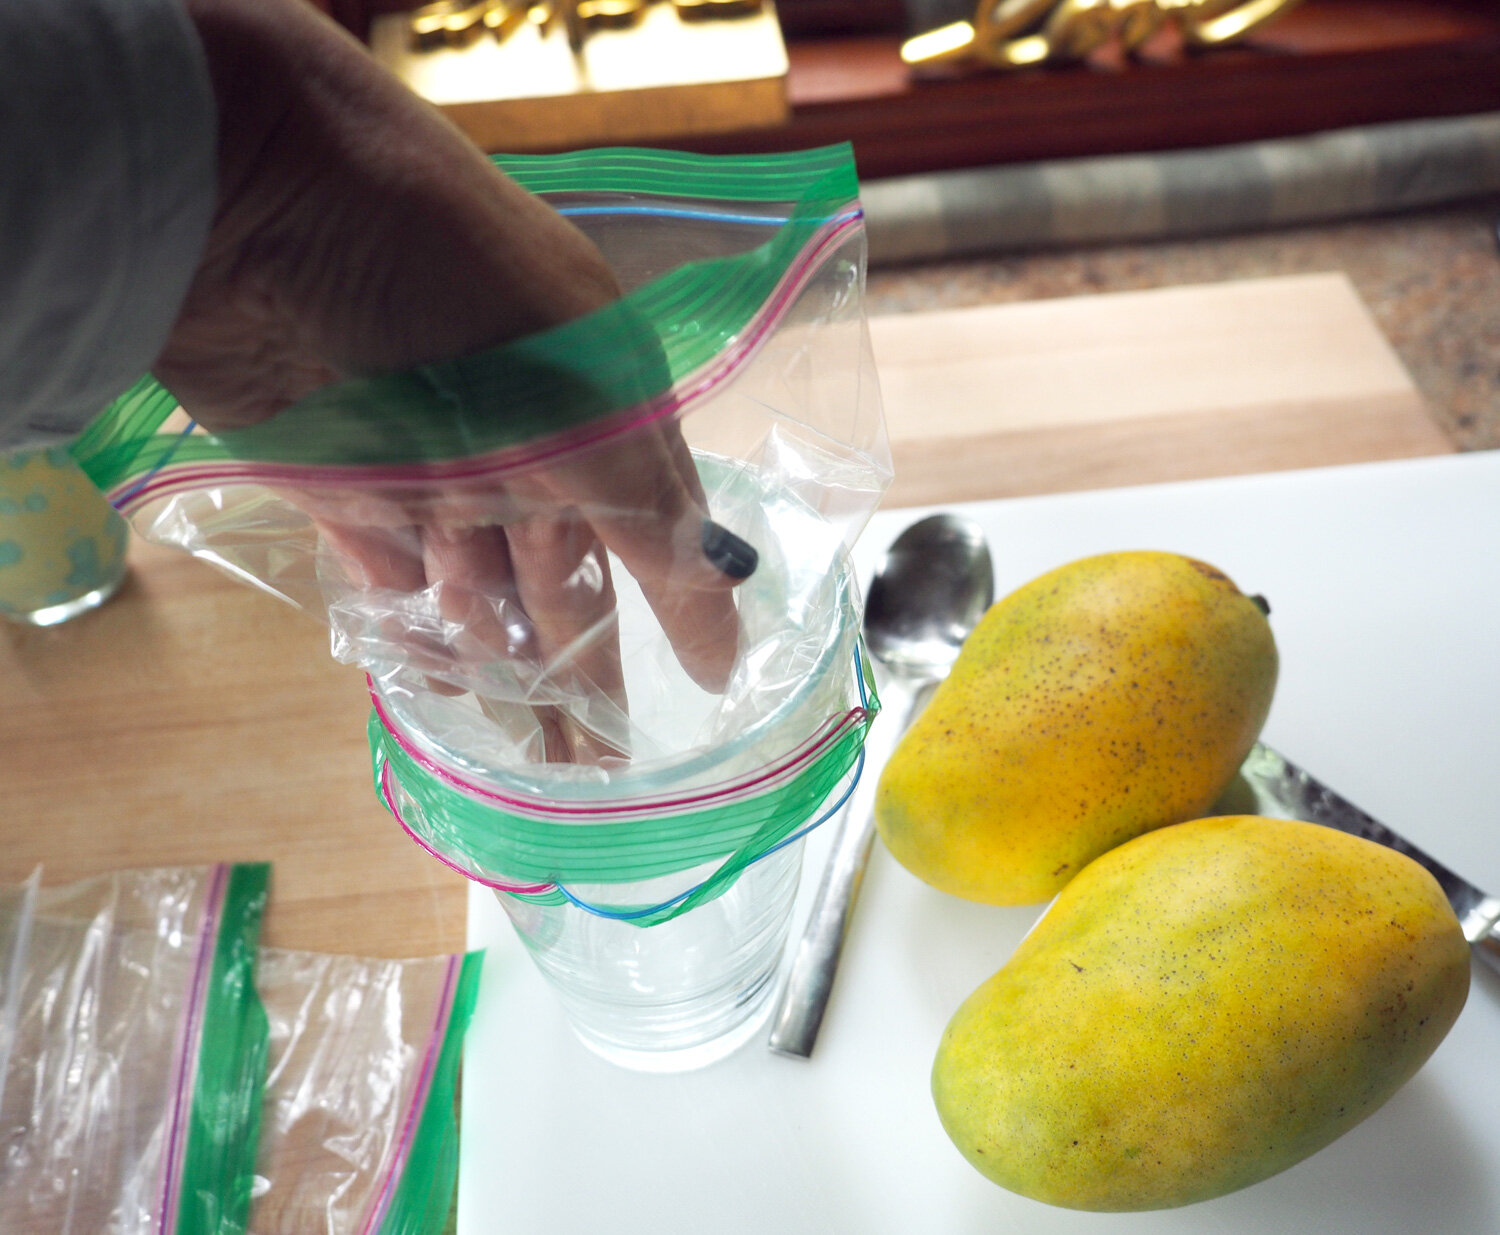
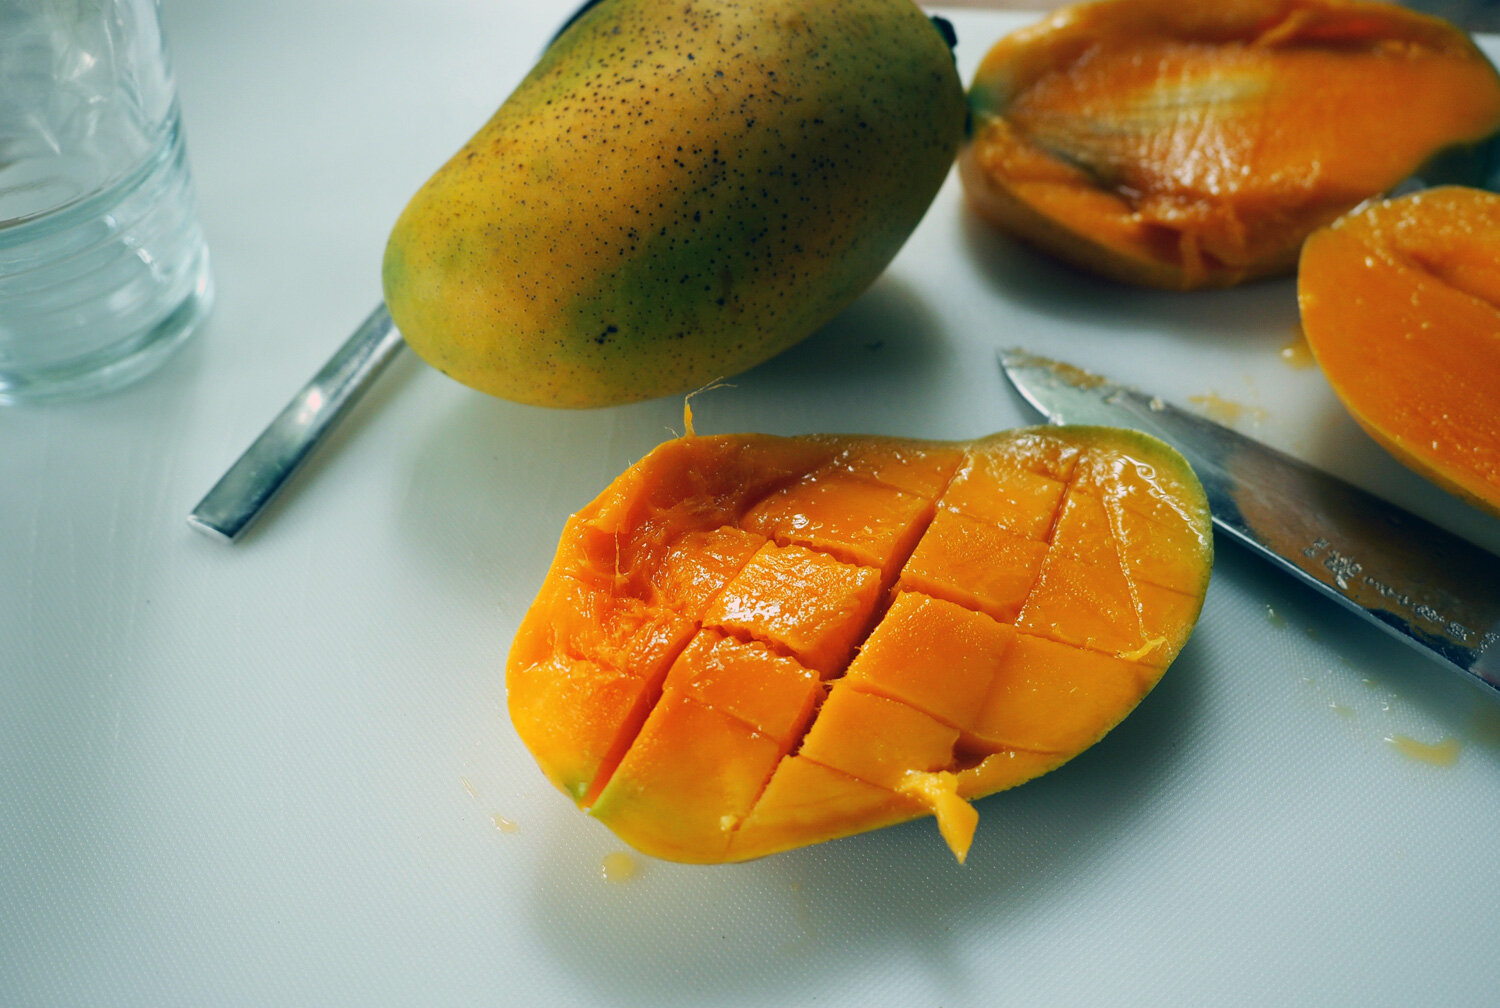
Mango Madness

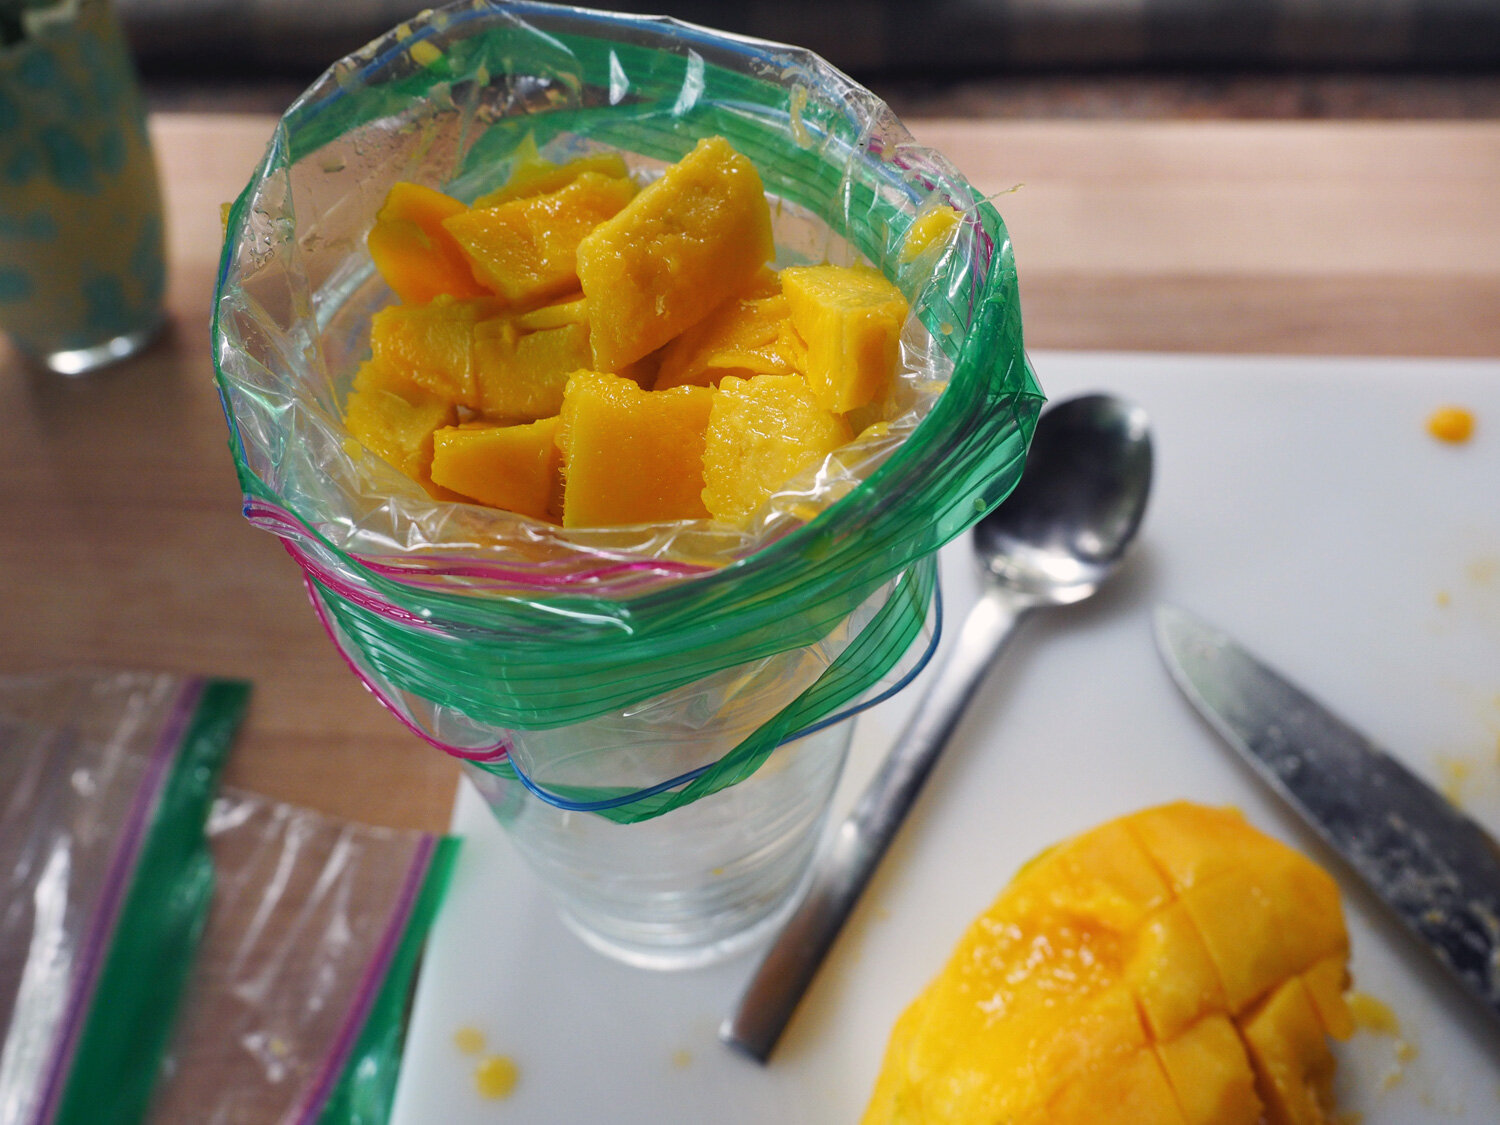
When mango are in season, I buy plenty. Then I cut them up into cubes and freeze. Since cutting and placing them into baggies can get messy, I employ the trick of using a wide mouth glass and pre stacking the bags into the glass one on top of each other. This way once I place the cut mango into the bag, the next bag is there ready to be filled. Not only is this time savings but it really keeps the whole process streamlined, clean and without getting a sticky mess all over. This method can be utilized for any number of foods that you are making multiple packages.

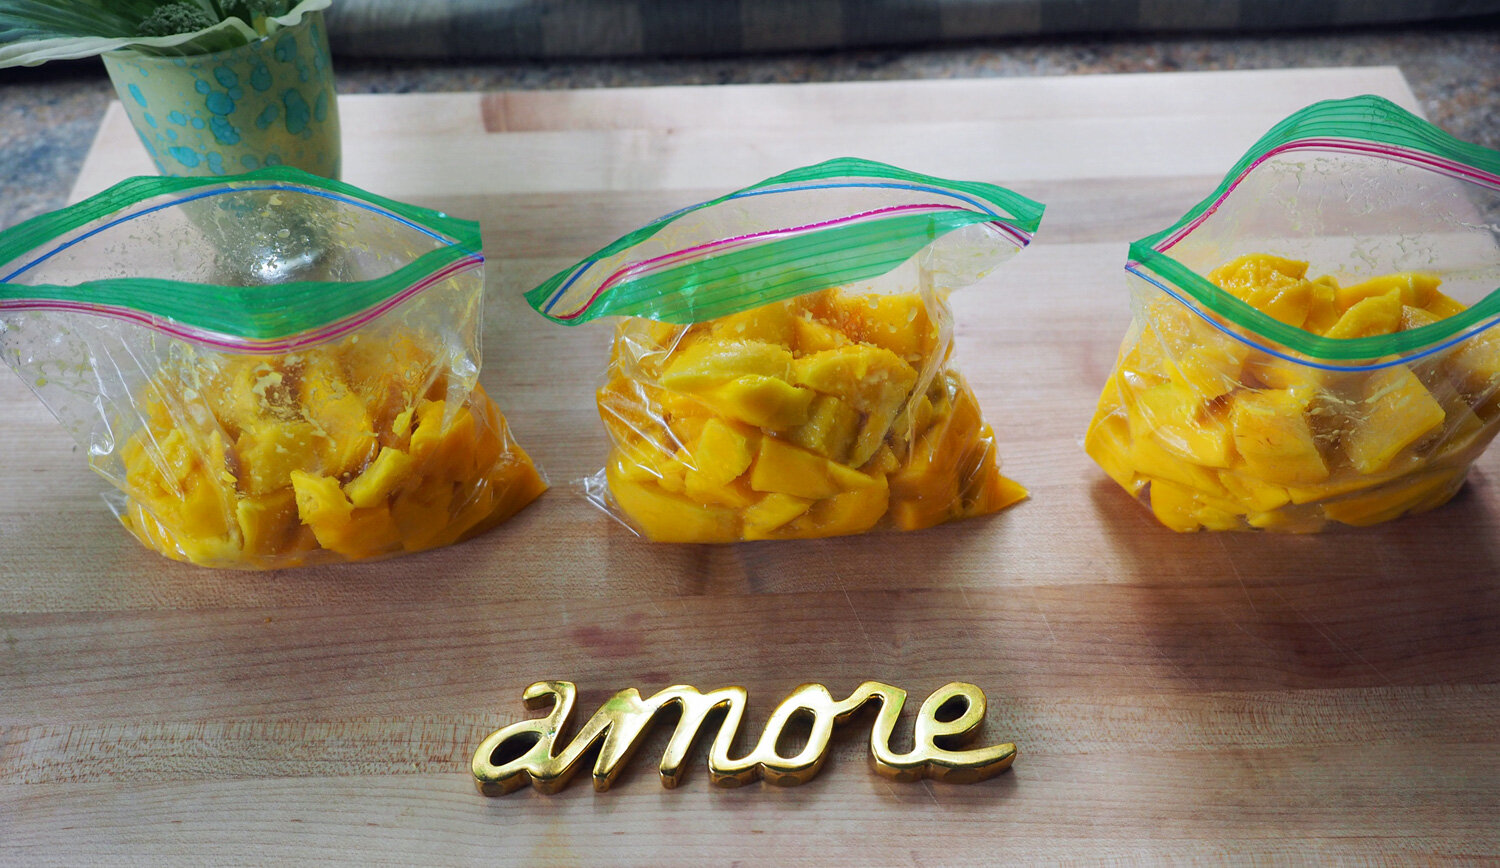
Of course, there are all the obvious uses for frozen mango chunks, but I’ve a given you few more.

  • Sorbet

  • Ice Cream

  • Smoothies

  • Salsa

  • In a salad with nuts & seeds

  • Cocktails

I hope these tips prove helpful, or have even given birth to some of your own brainchild methods.. All of these ideas and tips are really about saving time. It’s about doing the work once and enjoying the fruits of your labors both now and in the future.

Effort Once = Rewards Multiplied

DP-stirredwlove-ID1.jpg


Spicy Thai Style Vegetable Coconut Soup

I really do love soup. I don’t think I ever realized how just how much until the cold Northeast chill kicks in, and then the true appreciation of a soothing hot bowl of soup sets in. That’s exactly the moment I pull out my big dutch oven, open the fridge and get chopping.

It’s February, which traditionally is the coldest month. Naturally, it was frigid outside… truth be told, the inside of our house often times is more arctic than outdoors. If you were to ask my brother, he would definitely have a thing or two to say about that having survived a few winters in our home. So, I knew with certainty that soup would be on the menu in our house.

Normally, I can just open the fridge and cupboards and start creating. But, this time around, I didn’t have much with which to work. If I had any chance of a soup creation that would warm me through and through, I would need to venture outside. We have plenty of Asian markets in our town, so it’s easy to get motivated to stir up something in with that ethnic flare. And that was exactly the direction I would take. I grabbed what I thought would swim nicely together in the pot and headed back home.

Because I don’t seem to know how to make small quantities of soup, I made a boatload. Fair warning, unless you are feeding an army, or like to freeze and save for a later date, I recommend cutting this recipe down. JuanCarlos and I enjoyed this soup for a several days, then I froze two quarts for future yumminess.

As with any type of ethnic food that might be out of your wheel house, I think it’s important at first to keep it simple and use ingredients that will give you the biggest bang for your buck. Sure, you could go out and buy a slew of special items but if you don’t use them often they just go to waste. Plus, I don’t pretend to be an authority on Thai cooking. Quite the opposite, it is a complex cuisine that employs a delicate hand at balance of spice, salt, sweet, etc. For me, I just like to coax as much flavor out of the ingredients that I can. By sautéing and adding ingredients in stages to develop each flavor to the fullness how I built an intensity that kept me wanting more of this soup.

Like with many of my soup creations they start out as a basic soup, which are totally delicious as is, but then can then be added to. Recap examples:
Cauliflower Soup : Add grilled shrimp or chicken. Sautéed mushrooms or roasted cauliflower
Carrot Soup : Use as a puree base for fish
Kale, Potato, Lentil, Cauliflower Soup : Add mini meatballs, or grilled sausage
Roasted Tomato Soup : Grilled cheese sandwich, naturally. Or a Spicy Sausage Sandwich. Add chunks of grilled chicken.

You get the point. So goes for this soup. I added calamari, but shrimp would be great. Chicken would also work nicely.

So here goes the ingredients. This made about 10 quarts of soup.

thai.soup.set.up.jpg

Ingredients


Makes approx. 9-10 Qts.
2 medium onions, sliced (approx. 2.5 c)
4 c carrots, long stripes (loosely packed)
1/3 c ginger, sliced
2 t ginger, grated
4 large garlic cloves, smashed
1 stalk lemongrass, smashed
2 + t salt (taste test, add more if needed at the end)
1/3 c olive oil + 1 T
7 c Chinese cabbage, chopped (or Napa)
5 c Chinese spinach, chopped (or baby spinach)
2 c Enoki mushrooms
1 c Shimeji mushrooms
1/3 c scallions, sliced + 2T for garnish
2 T red curry paste
1/4 c cilantro, minced + 2T for garnish
Mung bean sprouts for garnish
2 qts chicken or vegetable stock
2 qts water
2 13.5 oz cans coconut milk

 
The way the vegetables are cut makes a difference. For this soup, carrot ribbons work best.

The way the vegetables are cut makes a difference. For this soup, carrot ribbons work best.


Instructions

Create depth of flavor by using strong aromatics, like lemongrass, garlic, ginger and onions.

Create depth of flavor by using strong aromatics, like lemongrass, garlic, ginger and onions.

Spinach, cabbage provides the vegetable base, and cilantro zings in some herbaceousness.

Spinach, cabbage provides the vegetable base, and cilantro zings in some herbaceousness.

  1. In a large dutch oven, or soup pot, sauté onions, lemongrass, slice ginger, garlic, salt. Let these cook down a bit, then add the red curry paste and stir to combine.

  2. Push the cooked aromatics to the sides, add 1 T oil in the middle and add crushed garlic and crushed ginger and scallions and let cook until soft.

Softened aromatics with red curry paste.

Softened aromatics with red curry paste.

Grated garlic and ginger, scallions.

Grated garlic and ginger, scallions.

3. Add carrot ribbons and mushrooms, let cook for 10 minutes until softened.

Add carrots and mushrooms and let soften.

Add carrots and mushrooms and let soften.

4. Add broth and water and simmer for 20 minutes. Then add coconut milk, cabbage, spinach and cilantro and simmer for another 10 minutes.

5. Meanwhile, bring pot of water to boil and add rice noodles. Cook for 7-10 minutes until tender. Drain and reserve.

To serve, add the rice noodles to the bowl and spoon a good helping of the soup and vegetables on top and garnish with sliced scallions and cilantro.

thai.soup.finalCU.jpg

If you want to add calamari or shrimp to this soup, add it 5 minutes after the spinach and cabbage and let cook through. You can also grill the shrimp or chicken separately and place it atop the soup.
This soup has a nice kick to it. If I had put more thought to it I might have also added some sliced chili peppers. But, quite honestly, I felt the spice level on this was just right.

My birthday gift to myself is sharing the love of nurturing yourself with good food and the warmth of a good soup that soothes you like a comfy blanket.. Try your hand at Spicy Thai Style Vegetable Soup. It will warm you through and through, and all over - mind, body and soul. Soup is good food.

Squash, Tomato, Peppers & Onion Bake

ratatoulle.final2.jpg

What do you do when you are mandated to follow a food regimen that limits the ingredients you can consume? First, take a sedative. A big sedative. Next, check the food list and start getting creative.

As I mentioned a couple of months back, I started seeing a new naturopath. Among one of my main goals is to try to cure my 3 year sinus issue. Yes, 3 whole years. As we all know, the shin bone’s connected to the thigh bone, the thigh bone’s connected to the hip bone. The hip bone’s connected the backbone. And so on and so on. You get the point. Everything in our bodies is connected and related to one another. Which is why gut health is key. So among one of the paths to curing my sinuses is getting my gut better. To recap, I’ve been following the GAPS* regimen which cuts out all carbs, grains and starchy vegetables. I had been following this diet for weeks, so when I say sedative, there wassn’t enough sedation to calm my aching pasta brain. But I was a trooper, and wanted to get better so I stuck with it and came up with yummy things to eat.

* Links for more info on GAPS at the end of the post.

I decided to visit my happy place, AKA the farmer’s market, where I picked up as many of the things I could eat. Zucchini, Yellow Squash, Onions, Peppers, Tomatoes, Herbs. These immediately reminded me of those baked dishes with swirls of zucchini. So, I thought I would give it a spin.

The vegetable line up. Zucchini, yellow squash, red and yellow peppers and onions.

The vegetable line up. Zucchini, yellow squash, red and yellow peppers and onions.

Now you know I couldn’t just leave it at that. On this ‘diet’, I can actually have goat and sheep cheeses. Thank goodness, or a crime might have been committed without this one saving grace! With curds in hand, this veggie swirl was going to be topped with cheese glorious cheese.

Ingredients

2 medium zucchini, sliced
2 yellow squash, sliced
2 medium onions, sliced
2 red peppers, sliced
2 yellow peppers, sliced
4-5 plum tomatoes, sliced
3 T dry oregano
Salt, pepper, olive oil
3/4 - 1 cup feta cheese & goat

(The first time I made this dish I used a combo of both. Next time I only had feta,
so used 3/4 c)

I like using plum tomatoes for this dish.

I like using plum tomatoes for this dish.

You’ve all heard to talk about the mise en place. And I’m a true believer, but there is a delicate balance between having everything ready, and multi-tasking. Using your time wisely to prep some items while others cook is the perfect harmony of mise en place and smart prep.

Use your time wisely. While one thing is cooking, prep the next.

Use your time wisely. While one thing is cooking, prep the next.

Instructions

1. Thinly slice onions and peppers. Sauté peppers first in a pan with olive oil. Once they start to soften add the onions, salt, pepper and 1 teaspoon of oregano. Let cook slowly over medium low heat until they are completely softened and nicely caramelized. Approximately 45 minutes.

Cook the peppers down first a bit. They take a bit longer than the onions.

Cook the peppers down first a bit. They take a bit longer than the onions.

2. Meanwhile, cut the zucchini, yellow squash, tomatoes in even slices. You can assemble on the board as you go. Or assemble in the baking dish. Whichever you prefer.

Try to make the slices the same width so everything cooks evenly.

Try to make the slices the same width so everything cooks evenly.

Assemble on the board and then just transfer to the baking dish.

Assemble on the board and then just transfer to the baking dish.

3. Once the peppers and onions have cooked down, place them on the bottom of a baking dish (11” x 8”).

Caramelized to sweet goodness. This creates a bottom layer that add both another texture and flavor to the dish.

Caramelized to sweet goodness. This creates a bottom layer that add both another texture and flavor to the dish.

4. Then begin to assemble your vegetables on top. I like alternating one of each in rows. Or if you only have a round baking dish, you can swirl the design around. Drizzle with olive oil, sprinkle with salt, pepper and 1 tsp of oregano. Bake at 400 for 35 minutes.

Beautiful colors, beautifully arranged and ready for baking.

Beautiful colors, beautifully arranged and ready for baking.

Only have a round baking dish. No problem, just create a swirl.

Only have a round baking dish. No problem, just create a swirl.

5. After 35 minutes, pull of out the oven and crumble the cheese over top. Drizzle a bit more oil and the final oregano. Bake for another 25-30 minutes until its golden brown, the veggies are softened and the liquid is bubbly.

Once the vegetables are partially baked, then you can add the cheese.

Once the vegetables are partially baked, then you can add the cheese.

That’s some crumbled yum right there. Back in the oven to get yummier!

That’s some crumbled yum right there. Back in the oven to get yummier!

The first time I made this I inhaled it... I mean, enjoyed it as the main meal. It was a pretty big dish so naturally there were leftovers which I ate for lunch the next day with a piece of sautéed fish. Which is how I ate it the second time, too. Naturally, this dish begs for something starchy to accompany it. Believe me when I say the irony of that thought slays me. Only I would cook up something that pairs perfectly with shit I couldn’t eat at the moment. This combo of flavors would be great with pasta or rice, but my growling stomach thinks that thick slices of roasted or grilled potatoes would the ideal companion. Plate it up alongside a lovely piece of protein like chicken, fish or meat and a complete meal is a done deal.

I like this dish for several reasons. And not because one day soon I’ll be eating it with pasta. But because this recipe is equally suitable for an informal dinner party as it is for a weeknight meal with leftovers for the week. It’s delish piping hot, but I’ve enjoyed it at room temperature as well. I even relished it topped with poached eggs. Which is why I’m posting this right before New Year’s Eve. I think this is a fantastic recipe to make for a New Year’s Day Brunch or even on the buffet table on the eve. And those are just a few good reasons to give this a try. I’m sure there are more. So what are you waiting for?

Ratatoulle.eggs.fina.jpg

For those interested in learning more about the GAPS diet and anti-inflammatory methods below are a few links. As a foot note, I stayed on this regime for 6 weeks, and I although it was difficult, and I truly craved some warm, soft starch in my tummy, I stuck with it and did find that it helped my gut. It is meant to help heal, and not necessarily meant for a lifetime regime, unless of course you have a more serious gut issue.

GAPS Diet
GAPS Protocol
GAPS Overview
GAPS Outline
What is GAPS Diet


Thanksgiving Table Settings - Casual to Elegant

babys.breatheCU3.jpg

Here we are again, right back at the holiday season. Time sure does blow by quickly. But it’s a guarantee that the holidays show up on schedule with all the trimmings, ie: hectic, hustle and bustle with a side order of stress. So since you might be experiencing some of these as you plan your menu, make shopping lists, tidy the house, pull out the turkey platters and hopefully breathe deeply, I thought I might help out in another area; table settings. Thanksgiving is one of those holidays that has very particular food servings. Typically guests want, in fact, they almost demand, the usual suspects. With that in mind, it seemed to me that posting yet another recipe variation on mashed or sweet potatoes wouldn’t be all that helpful. Most people straight up crave those heavy, carb laden dishes aka sleep inducers. So I say, go ahead and make what you know and what they love. Seriously, it’s one less thing to think about, go with tradition.

My goal for this Thanksgiving post is to give you tables-cape options; from the casual to the more elegant. These may be less traditional but festive all the same. And when I say options, brace yourself. I have taken that word to its ultimate meaning, providing a multitude of variations. Another objective for this mind bending table option extravaganza is to use basic items that you might already have, and combine them with inexpensive florals that won’t break the bank. Sure, more heavily Thanksgiving themed tablecloths can be used, but the idea here was to use a neutral palette and add pops of color to create a more subtle holiday vibe. Some of these ideas can easily be used any time during the year by simply swapping out the orange tones for other more seasonal colors. So, let’s just see how you can play with your tableware, since playing with your food is gauche.
(Also, I figure you might like some of the items I used, so I included a few resource links at the end that have similar items.)

First things first, florals. Since the meal can break the bank, I didn’t want the centerpiece to be sacrificed for budget reasons, so all the florals I chose are actually just fillers. That’s right, I only bought fillers which are the least expensive. I picked each one up at Trader Joe’s for $2.99 each. I will show you the various ways you can use these, so you can decide which works best for the way you want to style your table this holiday. In some cases it will only cost you $2.99. Other combinations incorporated several bunches but none of the arrangements I created cost more than $15. Now that is some frugal finagling. Here’s the floral line up.

Various greens

Various greens

The simplicity of baby’s breathe

The simplicity of baby’s breathe

Pops of color

Pops of color

Ok, before proceeding hold onto your hats. There is going to be a ton of photos to demonstrate the various options. As I was writing this piece and pulling together all the elements I knew it needed to be orderly, so to make it manageable I broke up the various options into sections. If you already know that you want something more elegant, maybe jump down to that section. If you want to see all the various, grab a cup of coffee and enjoy.

  • Casual Table Settings with options

  • Centerpiece options

  • Simple Elegance Table Setting with options

  • True Elegance Table Setting with Options

(Truth be told, it was overwhelming for me to decide what to share and what to leave on the cutting room floor. I tried to limit the amount but still show the variations and then grouped them. I hope I’ve made it easier for you to digest all this. Including a new way of displaying imagery through slideshow boxes. This seemed the perfect way to display it all. (Would certainly love to hear your feedback on this way of showing photos.)

Simple & Casual Table

Let’s say you are having a less formal Thanksgiving dinner, but still want to make it feel special.

Option #1 - No Tablecloth | Autumn Colored Plaid Napkins | Burlap Table Runner
The simple use of white plates and bowls right on the table keeps this setting more casual. Balancing the spoon on the bowl makes it fun and whimsical. Giving a nod to the season, the plaid, autumn colored napkins continues the laid back feel while the burlap runner adds a rustic tone and gives a landing spot for centerpieces and candles. I used dark metal candlesticks to blend with the theme.

Option #2: White Tablecloth | Orange Napkins | Floral Runner
Still casual with the ante upped a tad. Use a white or cream tablecloth and the same white dishes. Swap out the plaid napkins for plain orange ones to give an instant pop of color. No formal runner here, just the eucalyptus leaves as a base for one main centerpiece.

Centerpieces for Casual Table

These two casual settings can take on a different tone simply by the centerpiece choice. Here are a few options.

Option #1 - Florals featuring Orange Tones
Since the table settings are more understated, the centerpiece can make a color statement. A variety of green and orange floral fillers can be arranged differently depending on the vases you have or the look you want to achieve. The larger arrangement was actually the most “expensive” of all the options. It used 5 filler florals each costing $2.99 for a total of $15. Impressive.

If you prefer a more low profile approach, choose smaller individual vases and spread them out in the middle of the table. Note the difference in style simply by switching out the vases but still using the same florals. As well the change of feeling from using the burlap runner vs. the eucalyptus leaves. The addition of pine cones also adds a nod to autumn.


Option #2 - Fruit Centerpiece
Don’t want to fuss with flowers, use seasonal fruit to create a colorful centerpiece. By arranging the fruit on a tray, basket or round platter it makes for easy removal if you need the table space. If you don’t have anything or simply don’t need to move it, you can also just arrange it right on the table. Add pine cones, nuts and votive candles to finish off the look. Choose fruits that would like to serve, then this becomes the dessert platter. Now that is cost savings; Pretty, functional AND edible! Here are a few options for fruit.

Wood Tray Base

My parents brought this back from their Mexican honeymoon 58 years ago. It’s my pride and joy.

My parents brought this back from their Mexican honeymoon 58 years ago. It’s my pride and joy.

Use eucalyptus leaves and stalks to line the bottom.

Use eucalyptus leaves and stalks to line the bottom.

Gold Charger & Glass Cake Plate
If you don’t have long tray or you don’t have a long table, choose a smaller platter. I chose a gold charger, but you can really use any platter as long as it is sturdy to hold all the fruit. Place the eucalyptus leaves down (trim if necessary) then arrange and pile up the fruit. Add pine cones and grass stalks. You can even add nuts in their shells. For additional height, place the entire platter on a cake plate. Then you can tuck your candles slightly underneath. The lift creates a more dramatic feel.

Directly on the Table
If you don’t have a platter because they are all being used to serve the mountains of food you are preparing, go ahead and create the centerpiece directly on the table, placing candles in and around. Please note that this version means leaving it there the entire time until you are ready to eat the fruit for desset.

Don’t have a long tray. Use a round charger plate.

Don’t have a long tray. Use a round charger plate.

Want to give it height, place it on a cake plate.

Want to give it height, place it on a cake plate.

Table of Simple Elegance

Option #1: White Tablecloth | Silver Chargers | White Napkins
Again, using some of the basic elements from the casual setting and adding touches of elegance. Start with the white or cream tablecloth. Still using white plates, but changing out the soup bowl for a salad plate and turning diamond shaped adds the whimsy. Grounding the place setting with a silver charger takes this to a more refined level as does adding a water glass. The silver keeps it bright but still not full on formal, as do the simple white napkins tied with raffia.

In keeping with the white theme, the scattered placement of various vases filled with white baby’s breathe creates a simple elegance of singular focus, with the eucalyptus leaves centering it all.


Option #2: White Tablecloth | Silver Charger | Black Placemats & Napkins
Want a little edge? Add sharp contrast with black placemats and napkins. This version is the same as above with those two small changes. Turning the placemat vertically instead of horizontally lends more of a modern touch. A simple roll of the napkin also plays into the contemporary, sleek feel. The white baby’s breathe with candlelight takes it to a romantic elegant space.

Option #3: White Tablecloth | Silver Charger | Orange Pops of Color
If those white and black options seem to stark and not enough holiday bling, then bring back the orange accents. Toss down the runner and add the orange napkins back in but this time bunch them up and place them on the plate. Continue the festive feel with the orange and green florals, this time arranged in a wider, lower glass vase, and now you have a touch of elegance with a splash of color. And don’t forget candles. Bang!

Option #4: No Charger Plates - No Problem
Using the casual orange napkin place setting, add a bright orange runner to the center of the table and watch how that simple addition ratchets up the elegance factor.

The varying height vintage vases filled with baby’s breathe pop off the bright, high contrast runner. But if are not a fan of baby’s breathe and want something a bit more organic, Go Green. The austere use of only filler greens feels like nature itself and a different kind of breathe: one of fresh air.

True Elegance

Option #1: White & Gold | Orange Runner | Cream Napkin
Bringing in gold adds an elegance all its own. Gold equals regal, so simply adding the gold charger takes the same cream colored tablecloth setting to another level. Since the orange runner makes the color statement, keeping the napkins soft and neutral brings true elegance. The simple roll or tuck into the glass makes the napkin not too fussy. You can also simply wrap the rolled napkin with organza, ribbon or twine. For other napkin option, go back and check my post Napkin Folding - 5 Basic Folds - Countless Options.

Option #2: White & Gold | Orange Runner | Gold Glassware & Napkin Rings
If gold adds elegance, then why not add more gold elements. This version piles on the golden accents with the addition of vintage yellow gold glassware and golden silk napkin rings. Swapping the dark metal candlesticks for vintage glass ones brings in sparkle. (Don’t worry if you don’t have vintage, try outlet type stores for bargains, like Marshall’s.
Depending on how much of a statement you want your centerpiece to make, below are three options. Note: I snuck in hydrangeas which were no cost at all since these were cut from our garden as they turned from white to their lovely autumn hues.

I know, I know this was a ton to process. Believe me when I say I know since I had dozens upon dozens of photos from which to choose to demonstrate the many possibilities of using the same basic elements. Sure each one could have been a single blog post, and maybe easier to digest. But this way you can visually see how small changes can dramatically alter the look and feel of your table. My suggestion is to first decide the style you want, Casual or Elegant. Then go back directly to those options and re-review that section. Or if you are like me and absolutely love all the variety, have at it and keep looking and scrolling and tapping to your hearts content. Nothing would make me happier.

I do hope that I have helped and given you inspiration.
Happy table dressing. May your guests appreciate all the efforts you put forth.

Carrot, Ginger, Coconut Milk Soup

Oh the woes of having to eliminate foods from my diet. The struggle is real. Sometimes we forget that our internal body needs looking after. All too often we abuse and mistreat ourselves as if we could go in for spare parts or replacement pieces, or take a pill and get better. It’s not that simple. There are many reasons why our bodies get out of whack. Certainly environment plays a huge role. Genetics another. And then, of course, there is our own care or mis-care. As individuals, our stories vary greatly. As for me, I will attest to the many, many years I worked crazy, long hours, went entire days without drinking anything else but coffee, ate pasta and pizza as quick fill me ups at all odd hours and got little sleep. Bad, bad, and badder. Those were typical days in my life of television production. It wreaked havoc with whole system.

When you are young, you don’t think much about it. You just go, go, go not realizing the damage that is being done. I don’t want to get all preachy. That’s not what my blog is about, but from time to time I do like sharing tidbits of info that show up in my life and are food related. So this is what’s been happening lately. As you may remember I have been eliminating wheat, yeast and handful of other foods from diet after I developed a reaction when consuming those foods. But then a sinus issue has been bugging me. After seeing several traditional doctors to no avail, I knew it must be all related to one thing. The fact is that most of my issues are related to gut health. Now, I can’t be certain that the past misuse of my body is why my gut health is poor right now but I would venture to bet that it has some serious bearing. I also don’t claim to have the answers. Each of us is different and finds cures and results in various ways. I have gone to different types of doctors, naturopaths, Ayurvedic practitioners with minor successes, but nothing major. In an effort to continue making improvements, I starting seeing a new naturopath. I feel confident that I will fix the issues once and for all. In doing so, he asked me to alter my diet by following the GAPS regime for 8 weeks to eliminate all carbohydrates and grains and any starchy vegetables, legumes. All the stuff I LOVE!!

It’s very restrictive, so after one week of following this regime, I thought I would go stir crazy. That’s right, only one week in and I was miserable. My stomach was gurgling and begging for something soft and warm… Like a big bowl of pasta. But alas, I would not give in. I decided that some sort of creamy type of soup would be my salvation and I needed it ASAP! Which meant I absolutely had no time or patience for shopping. I always have beans in the pantry which would make a great soup, but those, too, were a no no on this regime. Seriously, beans? Thankfully, carrots were in copious amounts in my fridge. Thinking, thinking, thinking, carrots and what? Other items in abundance in my house; ginger and coconut milk which seemed like excellent companions. They were on my list of “yes, thank goodness you can eat those”. Thus Carrot, Ginger Coconut Milk soup would soothe my soul.

Since my tummy was feeling delicate, I made this soup very mild in flavors. But this is one of those soups that can be easily altered to up the flavor ante. Much like my Faux Creamy Cauliflower Soup, you can spice this up, adding toppings or make it as thick or soupy as you desire. These types of soups are an ideal base to build upon, as well as just a great soup. I didn’t want anything too spicy, so I held way back on the ginger, but that is one ingredient that you could add more of to really bring out that spicy note.

(I wanted to give you a guide line for the spicer version, so I made a second smaller batch and increased both the ginger and garlic which definitely gave it a kick. I’ve given you both recipes below. Also, you can add ground ginger to fully round out that flavor, I just didn’t have any on hand.)

Simple stars of the show, or should I say soup.

Simple stars of the show, or should I say soup.

Ingredients

Mild Version
6-7 c Carrots, rough chop
13.5 oz can coconut milk
1 c celery, chopped
1 c onions, chopped
1 T heaping ginger, grated*
1 t heaping garlic, grated
2 t turmeric
2.5 t salt
1/8 t ground pepper
3 T olive oil
6 c water (veg or chicken or broth)


Spicier Version/Small Batch

3 c carrots, rough chop
7 oz. coconut milk
1/2 c celery, chopped
1/2 c onions, chopped
2 T ginger, grated**
2 t garlic, grated
2 t turmeric
1.5 t salt
1/8 t ground pepper
3 T olive oil
3.5 c water (veg or chicken or broth)

*Note: It’s important to grate the ginger instead of just cutting it into chunks. Ginger is very fibrous and when you blend it those fibers do not fully break down. Grating it gives you a smoother consistency.
** Note: The smaller batch is half the amount of the milder version yet the ginger and garlic are doubled which is actually 4x more than the mild version. Adjust to your level of spiciness.

Instructions

  1. Chop up all the veggies in chunks. You can make these large or small, it doesn’t matter since everything will be blended together. However, if you want to soup to be ready quicker, cut smaller chunks so they cook through faster.

Funny, the vegetables in this soup are usually the base for any other soup AKA mirepoix or the trinity. In this case, THEY are the soup.

Funny, the vegetables in this soup are usually the base for any other soup AKA mirepoix or the trinity. In this case, THEY are the soup.

2. First sauté the onions and celery in olive oil. Then add ginger, turmeric, garlic, salt and pepper and cook over medium low heat until the spices are toasted. But careful not the burn the garlic and ginger since they are grated.

3. Then add the carrots and let cook for 10 minutes.

4. Add water or broth and bring to a boil then let simmer until the veggies are soft enough to blend.

5. Next blend the soup.

  • If you are using an emersion blender, first remove about 4-5 cups of the liquid and set aside. By doing this, you can decide on the thickness of the soup. If you prefer it thick and chunky, don’t add any more of the broth back in. If you want it more smooth and soupy, then continue to add the liquid until you reach your desired consistency.

  • If you are using a regular blender, use a slotted spoon to remove the veggies and add them to the blender with about 1/2 cup of liquid to start. IMPORTANT NOTE: Remember when using a blender with hot liquid do not completely cover the lid. It is important to let out some of the steam while blending or the top will pop off and burning hot liquid will splatter. Add liquid until you reach the thickness you want.

6. Once you have the desired consistency, add the soup back into the pot, add the coconut milk and let simmer for 5-10 minutes.

Thicker version. More filling.

Thicker version. More filling.

The more cooking liquid you blend back in not only creates a smoother, more soup like version, but also yields more soup.

The more cooking liquid you blend back in not only creates a smoother, more soup like version, but also yields more soup.

As I mentioned earlier, this was a very mild soup which makes it great for kids, too. Because it’s so neutral it can be used in several ways.

  • Hold back on the adding the broth to keep it super chunky, then use it as a base purée for seared or poached salmon, or filet of sole. Top with crispy shallots.

  • Add all the broth and make it super soupy and use it as a sauce for rice noodles, topping it with fresh scallions, cilantro and chopped peanuts.

  • Spoon it over rice, add roasted shrimp and chili peppers.

Black cod with broccoli rabe and the thicker carrot puree.

Black cod with broccoli rabe and the thicker carrot puree.

This is the start of a beautiful carrot crusade. It definitely soothed my achy woes.