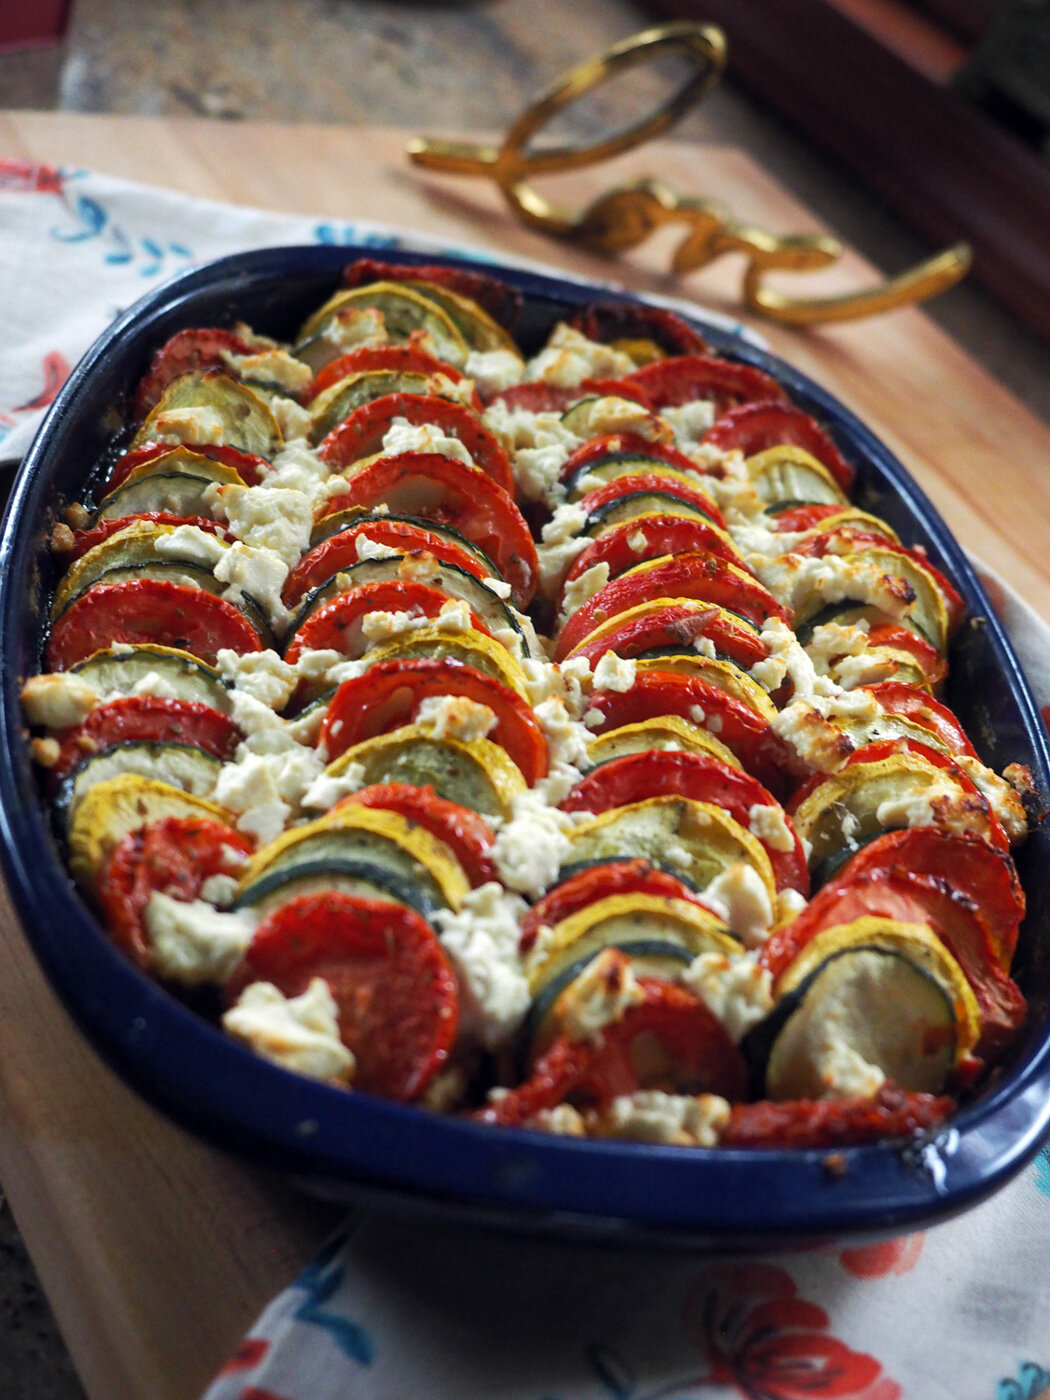
Squash, Tomato, Peppers & Onion Bake

ratatoulle.final2.jpg

What do you do when you are mandated to follow a food regimen that limits the ingredients you can consume? First, take a sedative. A big sedative. Next, check the food list and start getting creative.

As I mentioned a couple of months back, I started seeing a new naturopath. Among one of my main goals is to try to cure my 3 year sinus issue. Yes, 3 whole years. As we all know, the shin bone’s connected to the thigh bone, the thigh bone’s connected to the hip bone. The hip bone’s connected the backbone. And so on and so on. You get the point. Everything in our bodies is connected and related to one another. Which is why gut health is key. So among one of the paths to curing my sinuses is getting my gut better. To recap, I’ve been following the GAPS* regimen which cuts out all carbs, grains and starchy vegetables. I had been following this diet for weeks, so when I say sedative, there wassn’t enough sedation to calm my aching pasta brain. But I was a trooper, and wanted to get better so I stuck with it and came up with yummy things to eat.

* Links for more info on GAPS at the end of the post.

I decided to visit my happy place, AKA the farmer’s market, where I picked up as many of the things I could eat. Zucchini, Yellow Squash, Onions, Peppers, Tomatoes, Herbs. These immediately reminded me of those baked dishes with swirls of zucchini. So, I thought I would give it a spin.

The vegetable line up. Zucchini, yellow squash, red and yellow peppers and onions.

The vegetable line up. Zucchini, yellow squash, red and yellow peppers and onions.

Now you know I couldn’t just leave it at that. On this ‘diet’, I can actually have goat and sheep cheeses. Thank goodness, or a crime might have been committed without this one saving grace! With curds in hand, this veggie swirl was going to be topped with cheese glorious cheese.

Ingredients

2 medium zucchini, sliced
2 yellow squash, sliced
2 medium onions, sliced
2 red peppers, sliced
2 yellow peppers, sliced
4-5 plum tomatoes, sliced
3 T dry oregano
Salt, pepper, olive oil
3/4 - 1 cup feta cheese & goat

(The first time I made this dish I used a combo of both. Next time I only had feta,
so used 3/4 c)

I like using plum tomatoes for this dish.

I like using plum tomatoes for this dish.

You’ve all heard to talk about the mise en place. And I’m a true believer, but there is a delicate balance between having everything ready, and multi-tasking. Using your time wisely to prep some items while others cook is the perfect harmony of mise en place and smart prep.

Use your time wisely. While one thing is cooking, prep the next.

Use your time wisely. While one thing is cooking, prep the next.

Instructions

1. Thinly slice onions and peppers. Sauté peppers first in a pan with olive oil. Once they start to soften add the onions, salt, pepper and 1 teaspoon of oregano. Let cook slowly over medium low heat until they are completely softened and nicely caramelized. Approximately 45 minutes.

Cook the peppers down first a bit. They take a bit longer than the onions.

Cook the peppers down first a bit. They take a bit longer than the onions.

2. Meanwhile, cut the zucchini, yellow squash, tomatoes in even slices. You can assemble on the board as you go. Or assemble in the baking dish. Whichever you prefer.

Try to make the slices the same width so everything cooks evenly.

Try to make the slices the same width so everything cooks evenly.

Assemble on the board and then just transfer to the baking dish.

Assemble on the board and then just transfer to the baking dish.

3. Once the peppers and onions have cooked down, place them on the bottom of a baking dish (11” x 8”).

Caramelized to sweet goodness. This creates a bottom layer that add both another texture and flavor to the dish.

Caramelized to sweet goodness. This creates a bottom layer that add both another texture and flavor to the dish.

4. Then begin to assemble your vegetables on top. I like alternating one of each in rows. Or if you only have a round baking dish, you can swirl the design around. Drizzle with olive oil, sprinkle with salt, pepper and 1 tsp of oregano. Bake at 400 for 35 minutes.

Beautiful colors, beautifully arranged and ready for baking.

Beautiful colors, beautifully arranged and ready for baking.

Only have a round baking dish. No problem, just create a swirl.

Only have a round baking dish. No problem, just create a swirl.

5. After 35 minutes, pull of out the oven and crumble the cheese over top. Drizzle a bit more oil and the final oregano. Bake for another 25-30 minutes until its golden brown, the veggies are softened and the liquid is bubbly.

Once the vegetables are partially baked, then you can add the cheese.

Once the vegetables are partially baked, then you can add the cheese.

That’s some crumbled yum right there. Back in the oven to get yummier!

That’s some crumbled yum right there. Back in the oven to get yummier!

The first time I made this I inhaled it... I mean, enjoyed it as the main meal. It was a pretty big dish so naturally there were leftovers which I ate for lunch the next day with a piece of sautéed fish. Which is how I ate it the second time, too. Naturally, this dish begs for something starchy to accompany it. Believe me when I say the irony of that thought slays me. Only I would cook up something that pairs perfectly with shit I couldn’t eat at the moment. This combo of flavors would be great with pasta or rice, but my growling stomach thinks that thick slices of roasted or grilled potatoes would the ideal companion. Plate it up alongside a lovely piece of protein like chicken, fish or meat and a complete meal is a done deal.

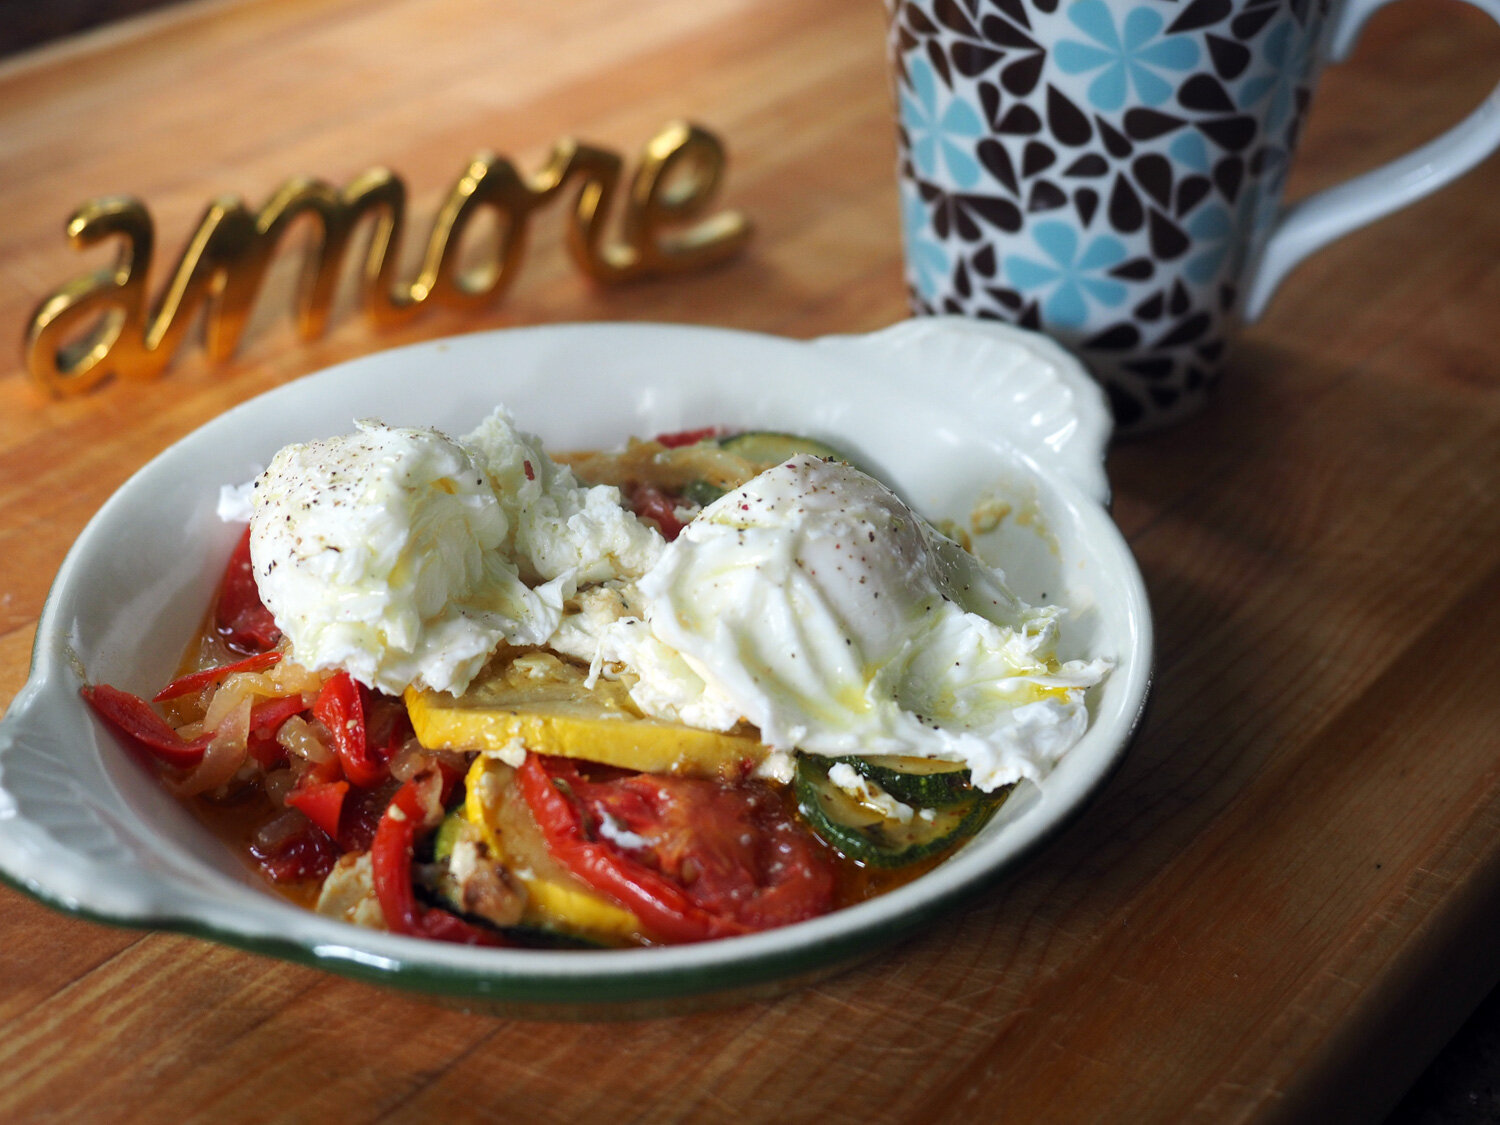
I like this dish for several reasons. And not because one day soon I’ll be eating it with pasta. But because this recipe is equally suitable for an informal dinner party as it is for a weeknight meal with leftovers for the week. It’s delish piping hot, but I’ve enjoyed it at room temperature as well. I even relished it topped with poached eggs. Which is why I’m posting this right before New Year’s Eve. I think this is a fantastic recipe to make for a New Year’s Day Brunch or even on the buffet table on the eve. And those are just a few good reasons to give this a try. I’m sure there are more. So what are you waiting for?

Ratatoulle.eggs.fina.jpg

For those interested in learning more about the GAPS diet and anti-inflammatory methods below are a few links. As a foot note, I stayed on this regime for 6 weeks, and I although it was difficult, and I truly craved some warm, soft starch in my tummy, I stuck with it and did find that it helped my gut. It is meant to help heal, and not necessarily meant for a lifetime regime, unless of course you have a more serious gut issue.

GAPS Diet
GAPS Protocol
GAPS Overview
GAPS Outline
What is GAPS Diet


Ladies Who Lunch

Olivia, my Mom, Elena. The best assistances ever! It goes without saying, good attracts good, and these women are pure good.

Olivia, my Mom, Elena. The best assistances ever! It goes without saying, good attracts good, and these women are pure good.

Last year I had the awesome opportunity to cater a lunch for the lovely ladies of The Women’s Club from my Mom's condo community.  They are a fantastic group of vital women who meet for various occasions. They have a book club. They go to the theatre, take field trips and just enjoy one another’s company.  They regularly host parties and luncheons, and that's where I came in.  My Mom is in charge of organizing one summer luncheon each year.  After hearing about the one she organized last year, I asked if she wanted me to help her cater the upcoming one. My Mom is an amazing woman who is always willing to help others and give of herself. So, naturally I wanted to do something special for her and for her friends.  This particular luncheon is usually a casual one serving up typical summer fare, like sandwiches and potato salad and such. My goal was to up the ante a bit, and so I embarked in creating a menu that they might enjoy.  I sat down with my Mom and her friend, Elena, who helps her with this event.  As luck would have it I was just coming back from working a catering event in the Hamptons and had some leftovers with me.  Call it fate, kismet or just plain damn good luck that I had this nibbles for them to try. It was almost like a wedding tasting. As I pulled out dish after dish for them to taste test, we took notes, jotted down what they liked, what I could slightly change and what I could add, all taking into account the likes of their group.  It was great to have both my Mom and Elena providing valuable feedback so we could tailor the luncheon to offer up some delicious dishes. And so the menu was set, and the plan hatched. 

Tomato Mozzarella Puff Pastry Tartlets

Tomato Mozzarella Puff Pastry Tartlets

Main
Tomato Mozzarella Puff Pastry Tarts
Arugula & Parmigiano Reggiano with Lemon Vinaigrette
Egg Salad
Chicken Salad with Grapes, Apples & Walnuts served with Romaine boats
Turkey Breast & Swiss Cheese Roll Ups
Asian Slaw with Peanut-Tahini Dressing
Israeli Couscous with Sautéd Zucchini & Roasted Tomato with a Roasted Garlic Dressing
Cucumber Salad
French Baguettes

Desserts
Peach Cobbler with Whipped Cream
Lime Zest/Raspberry Filled Cookies
Mini Cheesecakes
Watermelon

Normally they use throw away plastic tablecloths and paper dishes. It was a hard sell at first, but I convinced my Mom that using cloth tablecloths and real dishes would make it feel special. As you all know, I HAVE tablecloths. Enough, in fact, to cover the buffet table and all the seated tables.

The luncheon was held in the condo’s clubhouse, which meant we had to set the room up with tables and chairs for 30 guests. They showed me their usual set up, but in traditional Dana fashion I rejiggered the entire space. Thankfully, I had the help of my Mom, Elena and Olivia.  Especially since I decided that we would seriously need to move most of the furniture around. They were very willing and accommodating to my suggestions. Moving the seating area that was directly in front of the fireplace gave way for a perfect place to set up the main buffet table, front and center. It was August, so no need to have access to that. With this new placement, we were able to better utilize the entire space and the built-in counters next to the fireplace. Which is where I placed the plates, napkins and utensils for a better flow.

Table.utensils.pick.jpg
I was happy that they allowed me to move around furniture so we could set up the buffet table for maximum access. I placed a menu on the table with all the offerings. You can also place cards in front of each dish as a way to identify the food.

I was happy that they allowed me to move around furniture so we could set up the buffet table for maximum access. I placed a menu on the table with all the offerings. You can also place cards in front of each dish as a way to identify the food.

When setting up a buffet table, think about the flow. Think about how people will reach for the food items and make sure you place them accordingly. Set higher items in the back, and group foods together. Bread near the items like the Egg Salad and Chicken Salad, condiments close to the cold cuts, for example.

It’s important to lay the food items out in a way that makes it easy to reach, pretty to look at and in a order that makes sense.

It’s important to lay the food items out in a way that makes it easy to reach, pretty to look at and in a order that makes sense.

Make sure you have utensils for each dish and have any condiments close by.

Asian Slaw gives a nice spice to all the other dishes. And you can’t go wrong with a few cold cuts.

Asian Slaw gives a nice spice to all the other dishes. And you can’t go wrong with a few cold cuts.

Make your platters look pretty. Arrange the food so your guests feel that you took time and care in preparing the meal. It makes them feel special, as they should.

Chicken Salad with Fruit & Nuts is a perfect summer dish. Great with lettuce leaves or on rolls, or just plain by itself.

Chicken Salad with Fruit & Nuts is a perfect summer dish. Great with lettuce leaves or on rolls, or just plain by itself.

Israeli Couscous, it’s fluffy and light but satisfyingly filling. The oven roasted garlic and tomatoes give this dish it’s depth of flavor.

Israeli Couscous, it’s fluffy and light but satisfyingly filling. The oven roasted garlic and tomatoes give this dish it’s depth of flavor.

Peppery Arugula Salad with shaved Parmigiana Reggiano. It may be a simple salad but with just a few ingredients, it is a fresh, flavor punch.

Peppery Arugula Salad with shaved Parmigiana Reggiano. It may be a simple salad but with just a few ingredients, it is a fresh, flavor punch.

Lime Zest Cookies with Raspberry filling. Tart and sweet and delicate.

Lime Zest Cookies with Raspberry filling. Tart and sweet and delicate.

Mini Cheese Cakes. Use the base recipe for the pie but instead of using one pie crust, use crushed graham crackers with melted butter and press into mini cupcake tins. Then fill with batter and bake. These are perfect two bite treats. Champagne grap…

Mini Cheese Cakes. Use the base recipe for the pie but instead of using one pie crust, use crushed graham crackers with melted butter and press into mini cupcake tins. Then fill with batter and bake. These are perfect two bite treats. Champagne grapes give a tart pop.

We used my Soothing Blues theme but gave the tables a vibrant color pop with small centerpieces using Ribbon flowers accented with white hydrangeas cut from my garden.  Simple but striking. The best part was showing Elena, who was reluctant in arranging the flowers, just how easy it is to create a floral arrangement with impact. Hesitant at first, her confidence grew once I showed her color blocking and explained that simpler is better. And with that she finished the rest beautifully. The key; do what looks good to your eye and it will look good to others.

I had to convince them away from paper plates. These outdoor reusable plastic plates were still casual but a tad more special.

I had to convince them away from paper plates. These outdoor reusable plastic plates were still casual but a tad more special.

Strong contrast creates a striking floral arrangement.

Strong contrast creates a striking floral arrangement.

Some featured more fuchsia with white accent. Some reversed.

Some featured more fuchsia with white accent. Some reversed.

It was so lovely to be welcomed into their group and serve them food that they enjoyed.  Everyone seemed to have a good time and loved the food offerings.   

Ladies on the buffet line
Ladies waiting for the buffet
Chatting after a little dessert.

Chatting after a little dessert.

Smiles and good conversation. And yes to regular dishes but plastic cups just made more sense.

Smiles and good conversation. And yes to regular dishes but plastic cups just made more sense.

There is a simple joy in sharing food. In creating an atmosphere where people feel loved by your efforts.  Remember, no matter what we do in life, whether it be the words we speak, or the food we make, the flowers we arrange, or the door we hold open, when done from a place of purity then the world is stirred with love. Thank you to my Mom, Elena and Olivia, and to Rhona and the entire Women's Club for welcoming me to your luncheon last year.  Here’s to all of you, hoping you enjoy these memories and share many more happy adventures and good eating together!

And for the rest of my readers, I hope this brings about inspiration on how and what to serve for Ladies’ Summer Lunch. Ok, Men are welcome, too! In fact, all are welcome. Stir it with LOVE!

If you are interested in my Private Chef services, please contact me directly: dana@2fishinc.com And please feel free to pass along my info. Thank YOU!

Napkin Folding - 5 Basic Folds - Countless Options

orange.tie.jpg

I asked. You answered. Now the ball is back in my court to deliver.

Some of you have requested simple, yet elegant ways to fold a napkin.   Sure, you can just plop a napkin down next to the plate. Why not, what's all the fuss, right?  Guests are just going to place them on their laps anyway.  But I will ask you this one question, and then see how you feel about just plopping that napkin down.

When you enter the home of a host/hostess and see a table set with place settings and napkins lovingly positioned, how do you feel? 

1. Oh Ah, what a beautiful, welcoming setting. I feel special.

2. Oh yeah, that's where we're going to eat

If  you answered #1, keep reading.  If you answered #2 grab some other reading material and forget about scrolling through the rest of this post. I promise next week will bring something of more interest for you.

Setting a table can be as easy or as complicated as you want. The same goes with the finishing touches such as  folding a napkin.  I choose the simple method, but still try to make an impact.  Some of the styles below are quite basic with a twist. They are geared a bit more towards the festive side for the holidays, yet any of them can be used or modified for any occasion.  

The idea here is not to twist yourself up as you fold napkins.  Sure those fancy, schmancy, origami style versions look impressive.  But let's face it, those take a ton of effort and time only to have sadness kick in when your guests pull apart your time consuming creation and place them on their laps.  I'm all for making the table look pretty.  You guys know that about me by now. But I am also practical.  Employing simple techniques for maximum impact.  Whether it's preparing a dish, plating it or folding a napkin.

I pulled out a few items to play with for this episode of how to fold a napkin... Fast but pretty.

I pulled out a few items to play with for this episode of how to fold a napkin... Fast but pretty.

Let the folding, or rolling begin. The best part about these suggestions is that you don't need the exact napkin or ribbon or decor that I show in these examples.  These are guides and intended to motivate you to look around your house to see what you can use.  Any of the ideas shown can be easily refashioned to incorporate what you already have.  In fact, all the ribbons I use are from packages I received, or remnants lingering around just waiting to be given the chance at another useful life.  I also cut the ribbon handles off of nice shopping bags.  These are usually good quality and the perfect size.  Give a good think about what you have readily available.  Need more hints. How about using twigs or acorns, cinnamon sticks or nutmeg rounds. A feather, a flower, chives. 

Although most of these are for individual place settings, I've shown two napkin options for use on a buffet or cocktail setting.

The Simple roll

This method is a no brainer.  The art comes in how to finish it with a little extra flare.

  • Fold the napkin in half and in half again.

  • From the open edge side of the napkin, begin rolling towards the folded edge of the napkin. This helps to create a cleaner finish.

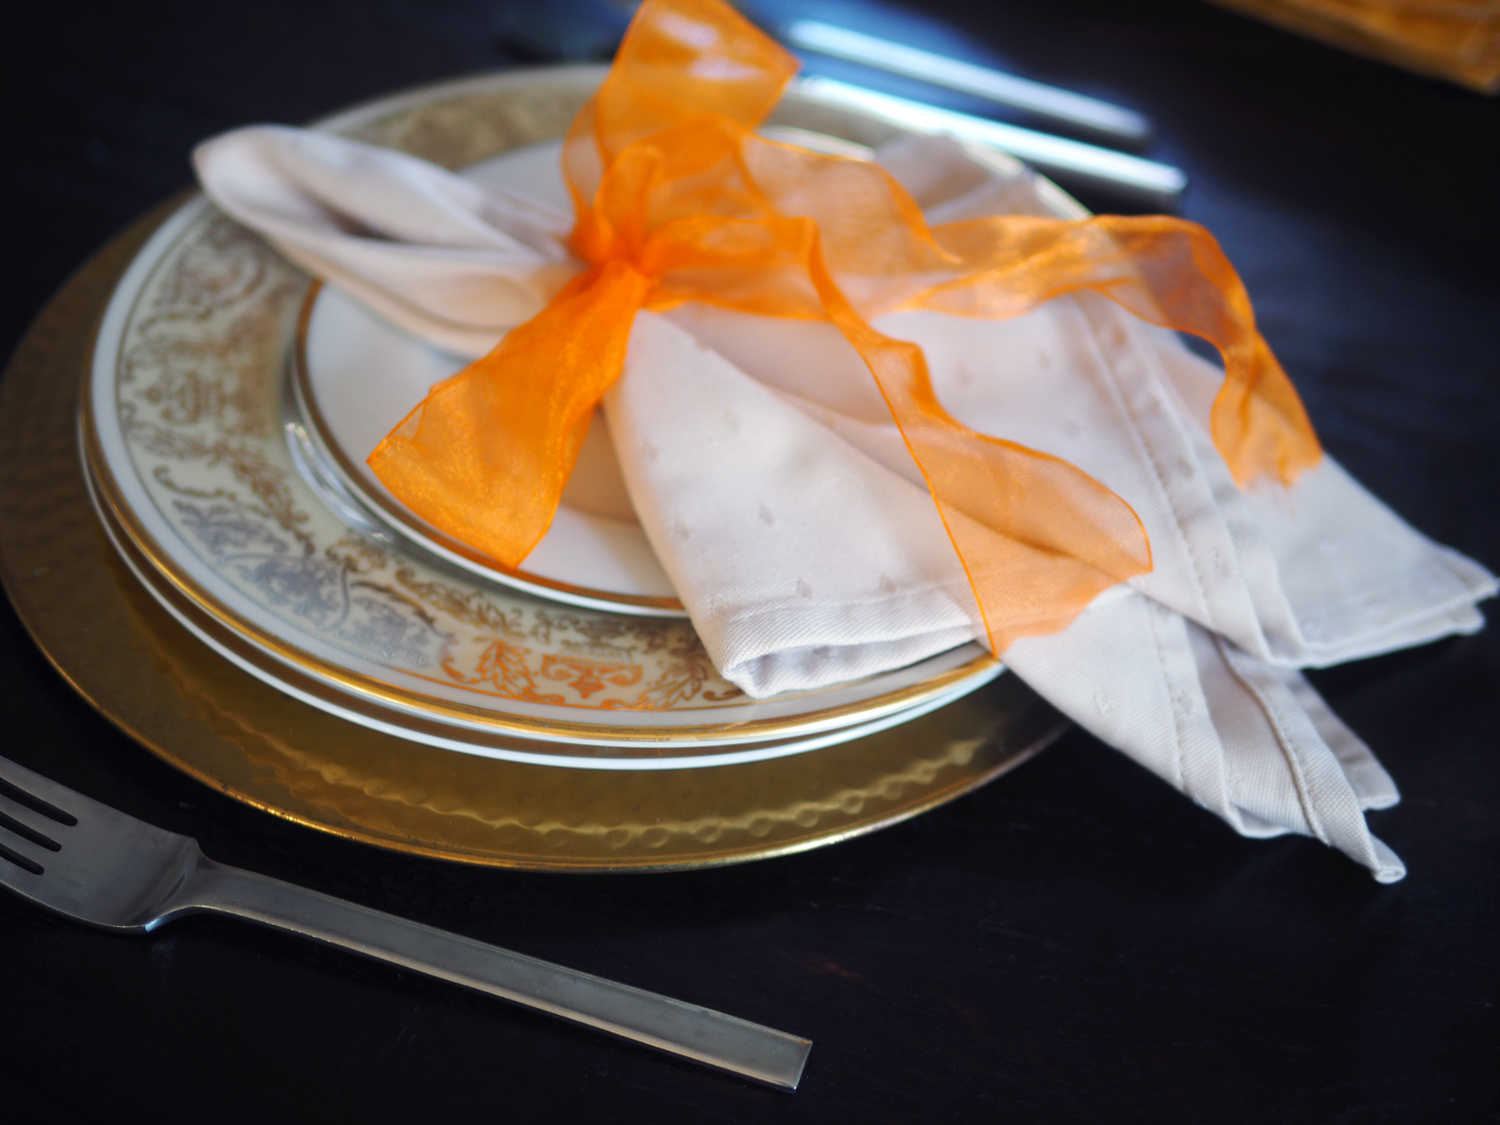
  • Tie a 3/8" ribbon around the mid section and finish with an adornment.

Once you have rolled the napkin up, tie a ribbon, knot it, place an ornament down and tie a bow. Place in the middle of the plate.

Once you have rolled the napkin up, tie a ribbon, knot it, place an ornament down and tie a bow. Place in the middle of the plate.

3/8" ribbon + ornament

3/8" ribbon + ornament

Note the folded edge on the left side is where you want to roll to.

Note the folded edge on the left side is where you want to roll to.

The Simple roll - Candy Caned

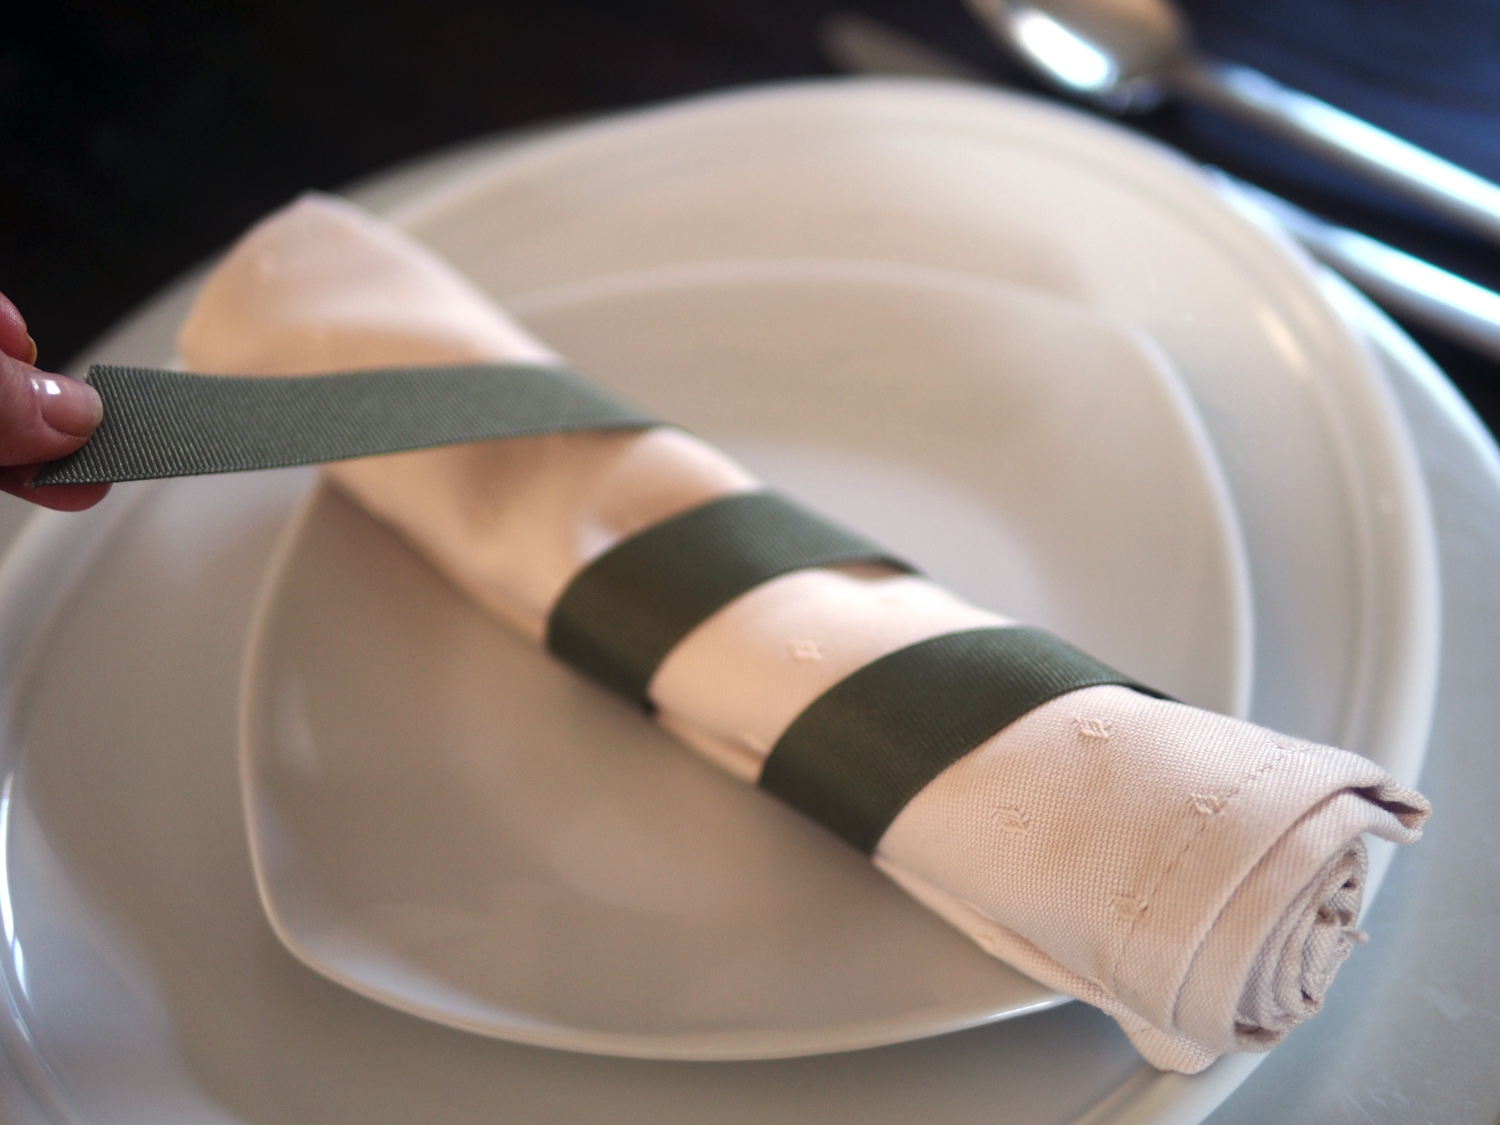
Using the same simple roll technique, wrap the roll with a wider ribbon to create a candy cane or striped effect.

  • Tuck one end of the ribbon under the bottom right side of the napkin

  • At an angle begin to wind it around leaving equal amounts in between.

  • Tuck the edge under.

Chic, simplicity

Chic, simplicity

Roll the napkin

Roll the napkin

Using 1/2 grosgrain ribbon, tuck on end under the napkin and wind it around leaving equal amounts in between. Tuck the edge under.

Using 1/2 grosgrain ribbon, tuck on end under the napkin and wind it around leaving equal amounts in between. Tuck the edge under.

The simple roll - Crisscross

Can this simple roll be more versatile?  Duh, of course, it can.  If you don't want to spiral the ribbon around, why not create a straightforward crisscross effect.

  • Place the ribbon midway under the napkin, then crisscross in front placing the ends across the plate.

Modern, simple and elegant.

Modern, simple and elegant.

The buffet Roll

Using the roll technique, find a vase or bucket or even a wide bowl that coordinates with your table theme.  Then place all the rolled napkins in an orderly fashion. Place your napkin bucket near the flatware and dishes on your buffet table for easy access for your guests.  

buffet.napkins.bucket.jpg
I didn't have enough black napkins so I used a cream/green one to coordinate. The way to make it look planned is to concentrate the colors. I choose to use the darker color for the circular perimeter with the light colored center. It feels like a fl…

I didn't have enough black napkins so I used a cream/green one to coordinate. The way to make it look planned is to concentrate the colors. I choose to use the darker color for the circular perimeter with the light colored center. It feels like a flower.


The Simple fold

I know you are saying, "What the heck? This is a napkin folded over in a rectangle.  Is she serious?"  Yes, I am.  This is a straightforward approach but by turning the napkin horizontally it feels slightly different.  Don't worry, keep scrolling. There are more plays off this easy technique.  

Is there anything easier than folding a napkin and placing it in the middle of the plate. I think not. But we can pump it up. Read on...

Is there anything easier than folding a napkin and placing it in the middle of the plate. I think not. But we can pump it up. Read on...

The Simple Fold Doubled Wrapped

You see.  The rectangle fold slightly jazzed up. (Fun tip: The sage green, crinkle organza ribbon is from our wedding.  Yes, you read that correctly.  I saved the ribbon from our wedding 16 years ago, and just like our marriage, it's still going strong!)  

  • Using a wide ribbon, starting on an angle tuck one end under the bottom left hand side.

  • Wrap the ribbon around twice, slightly overlapping in the middle so there is no gap.

  • Leave enough ribbon for the tail to poke out on the bottom right hand side. You may need to adjust as you go.

The simple rectangle napkin has a more powerful impact with a doubled ribbon wrap tail peeking out.

The simple rectangle napkin has a more powerful impact with a doubled ribbon wrap tail peeking out.

Fold napkin in half, then half again, than half yet again.

Fold napkin in half, then half again, than half yet again.

The wide ribbon is what makes this angled wrap have more presence.

The wide ribbon is what makes this angled wrap have more presence.

The Simple Fold & Half Knot

Same rectangular fold, same ribbon but with a bit more sass.  

  • Place the wide ribbon under the napkin in the center with the top portion of ribbon being slightly longer than the bottom.

  • Bring the the top portion of the ribbon to lay down over the napkin.

  • Take the bottom ribbon and cross over front.

  • Then tuck that piece under and flare the tail out to the right.

Once you pull the short side through to the right, make both tails lie flatly down.

Once you pull the short side through to the right, make both tails lie flatly down.

The top portion of the ribbon rests across the middle of the napkin while the bottom/under portion gets crossed over front.

The top portion of the ribbon rests across the middle of the napkin while the bottom/under portion gets crossed over front.

Tuck the ribbon under the midsection and pull to a loose knot.

Tuck the ribbon under the midsection and pull to a loose knot.

The triangle

Yes, this is another no brainer fold, but one that also has versatility.  

  • Fold the napkin in half and half again

  • If you have a nice finished edge like the one shown below, fold the point down only to the trimmed edge. (You can also use this approach even if you don't have a fancy edge. It will actually make your triangle fold a bit more special.

  • You can also just fold it point to point.

yellow.quarters.jpg
yellow.foldover.jpg

Simple Triangle & Ornament tuck

Tuck an adornment under one side.  Use a cinnamon stick, or a flower stem or this stem of pearl like buds.


The Triangle Tower - Buffet Style   

Using the same triangle technique but folding edge to edge, you can then stack them to create a uniformed row for a buffet table

yellow.napkins.jpg
yellow.triangle.jpg

The fold & hold

Easy fold in half fashion and tying in the middle.

  • Lay the napkin right side down and fold each edge into the middle

  • Flip the napkin over placing a ribbon midway. Add an adornment

  • Tie one knot to secure and place onto the plate

yellow.napkin.setup.jpg
yellow.napkin.folded.jpg
yellow.napkin.green.ribbon.jpg

The Drape

The more elegant dropping of a napkin. 

  • Fold the napkin in half

  • Grab the middle folded edge and let the napkin naturally drape

  • Place the napkin on the plate. It will create pretty folds

cream.drape.jpg
Fold the napkin in half and grab the folded edge.

Fold the napkin in half and grab the folded edge.

cream.drape2.jpg

The Tied Drape

Just add a ribbon tied 1/3 the way down from the top

As I mentioned, none of these are ground breaking.  They are simple techniques with a little extra pizzaz, which is what I believed you asked for.  I hope I sparked your creative spirit using the napkins and odds/ends pieces in your home to create a festive, happy landing place for your guests.