Feta Stuffed Yellow Squash Bake

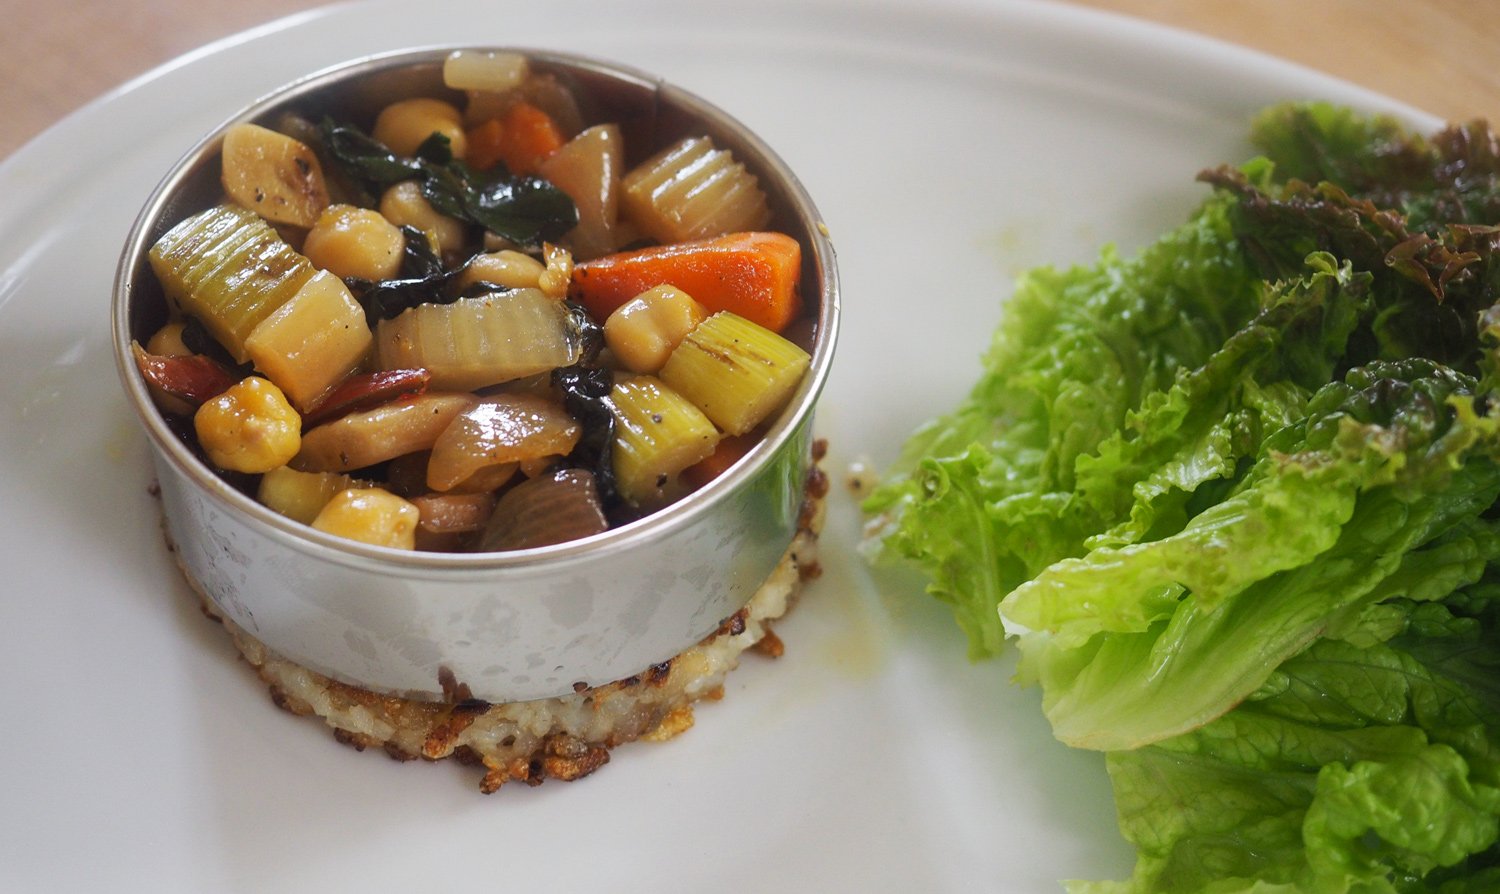
For awhile now I’ve been making a stuffed zucchini over quinoa with roasted tomato dish that has been very popular with my customers. So when my longtime friend, Dianne, said she was coming for lunch I thought that might be a good choice. However, as I started to look through what I had just hauled home from the grocery I realized I didn’t have all the ingredients and didn’t have time to shop again. So, improvisation was in order.

The grilled zucchini version I mentioned above is stuffed with goat cheese, sautéd kale & onions served over quinoa with roasted grape tomatoes and roasted garlic oil. Although I didn’t have most of those ingredients, I was hell bent on rolling something. What I did have was yellow squash, red onions, vine ripe tomatoes, feta and leftover herb/garlic salsa. Sounded like a solid line up to me with rolling potential. I also knew I would be short on time the day of the lunch, so this was a test to see if parts/all of this dish could be made ahead of it.

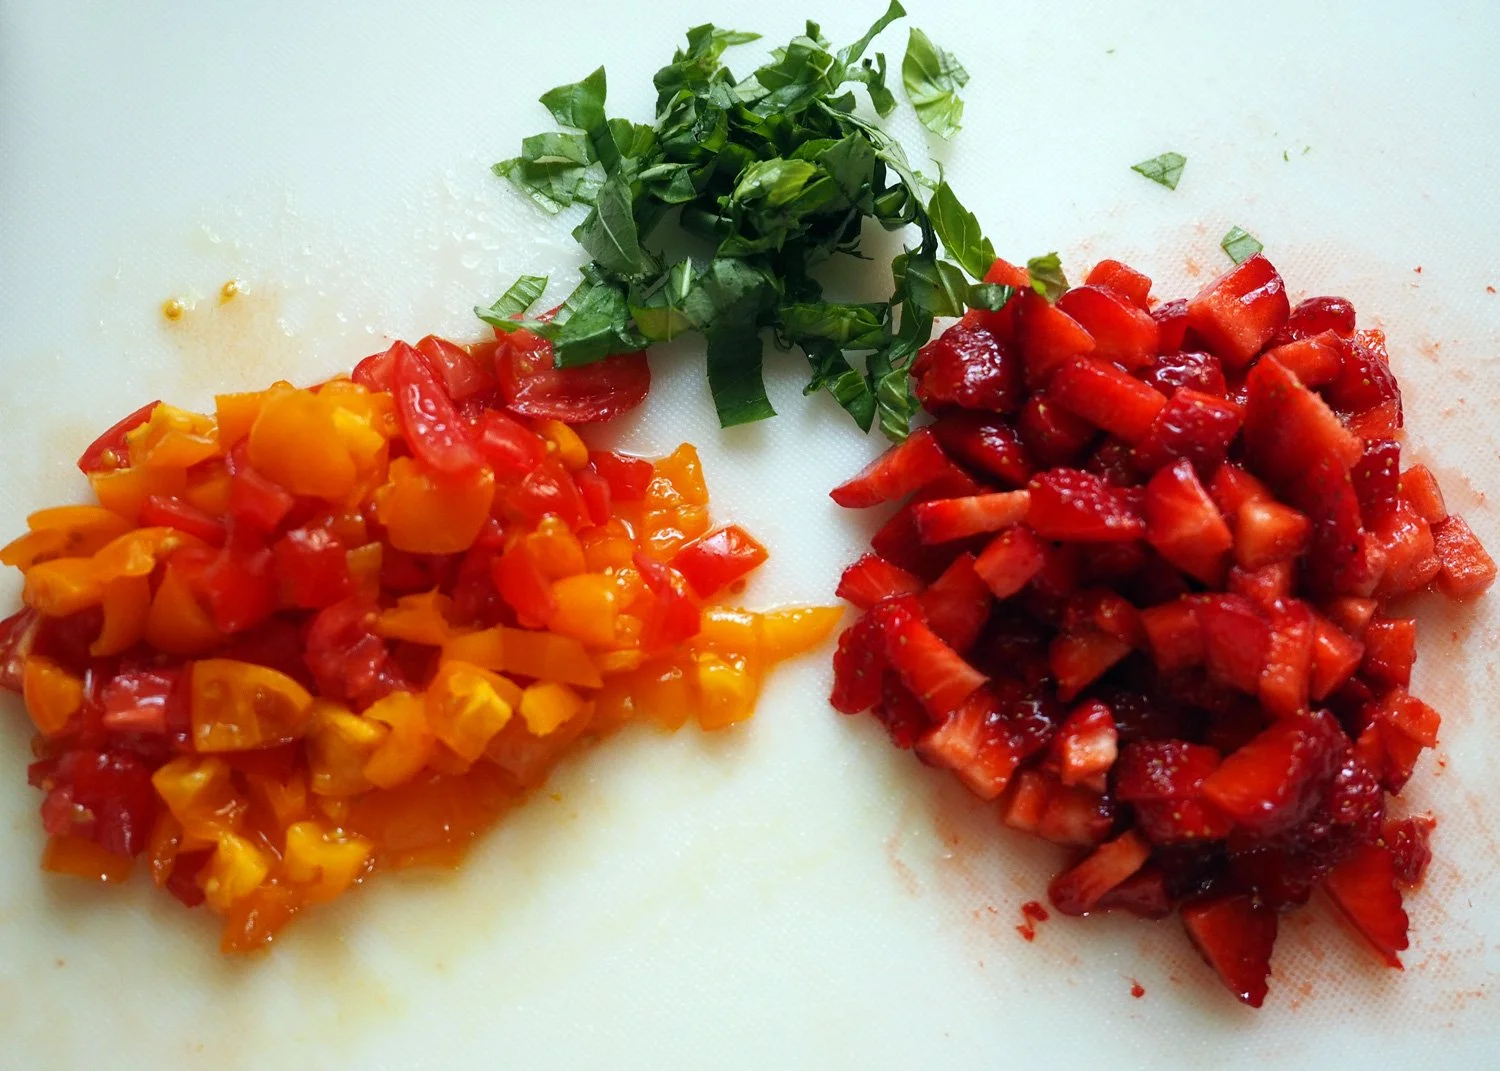
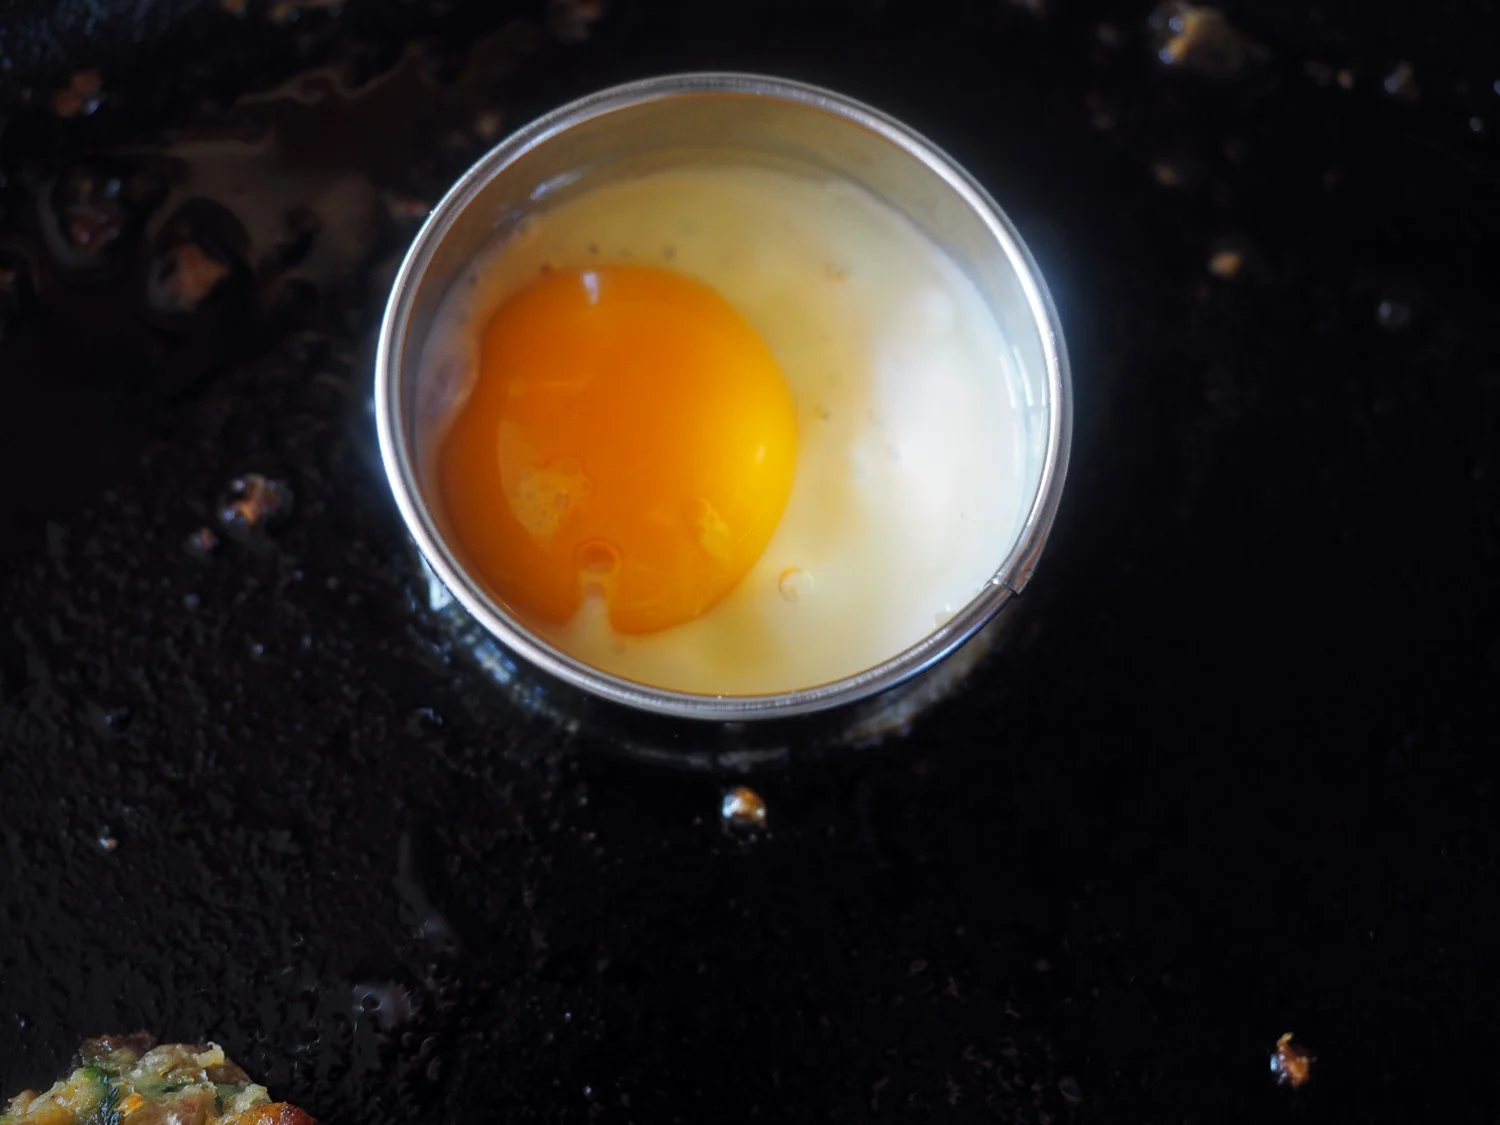
Feta, Tomatoes, Red Onion, Yellow Squash, Herb/Garlic Salsa.

This recipe was me getting back to my roots. My something from nothing style. My cooking comfort zone. Basically, my typical method of inventing a recipe; see what I have, think about how to combine them with other available items, and then use only the quantities I have on hand. This is why sometimes I am delayed in sharing recipes ideas with you. Often times I get halted by having to measure ingredients and be precise so I can properly write them up in a post. Other times I think the recipe might feel like too much of a hodgepodge dish to share. But honestly, those turn out to be some of my best creations. Which is why the intention of this post is to encourage you to experiment with the ingredients available in your fridge and pantry, and use them to the best of their ability. In that spirit, the below ingredient list will be approximations.


Ingredients

1-2 Yellow Squash, sliced thinly
2-3 Tomatoes, thick slices
1-2 red onions, thick slices
Herb/Garlic salsa*
Feta
Magic 3: Olive Oil, Salt, & Pepper

*Herb/Garlic Salsa: finely mince parsley, cilantro, basil, crush garlic, salt, red pepper flakes (optional), Olive Oil
You can also use the salsa I use for my Marinated Feta


Instructions

  1. Thinly slice and grill the yellow squash in a cast iron pan with just a tad of oil so they don’t stick. Note: Do not put too much oil because they will soak it up and get soggy instead of browned. Brown on each side then set them aside on a paper towel.

2. Cut the tomatoes and red onion into thick slices and add them to an oiled roasting pan, season with salt & pepper. Roast at 400 degrees for 15-20 minutes.

Cut nice thick slices.

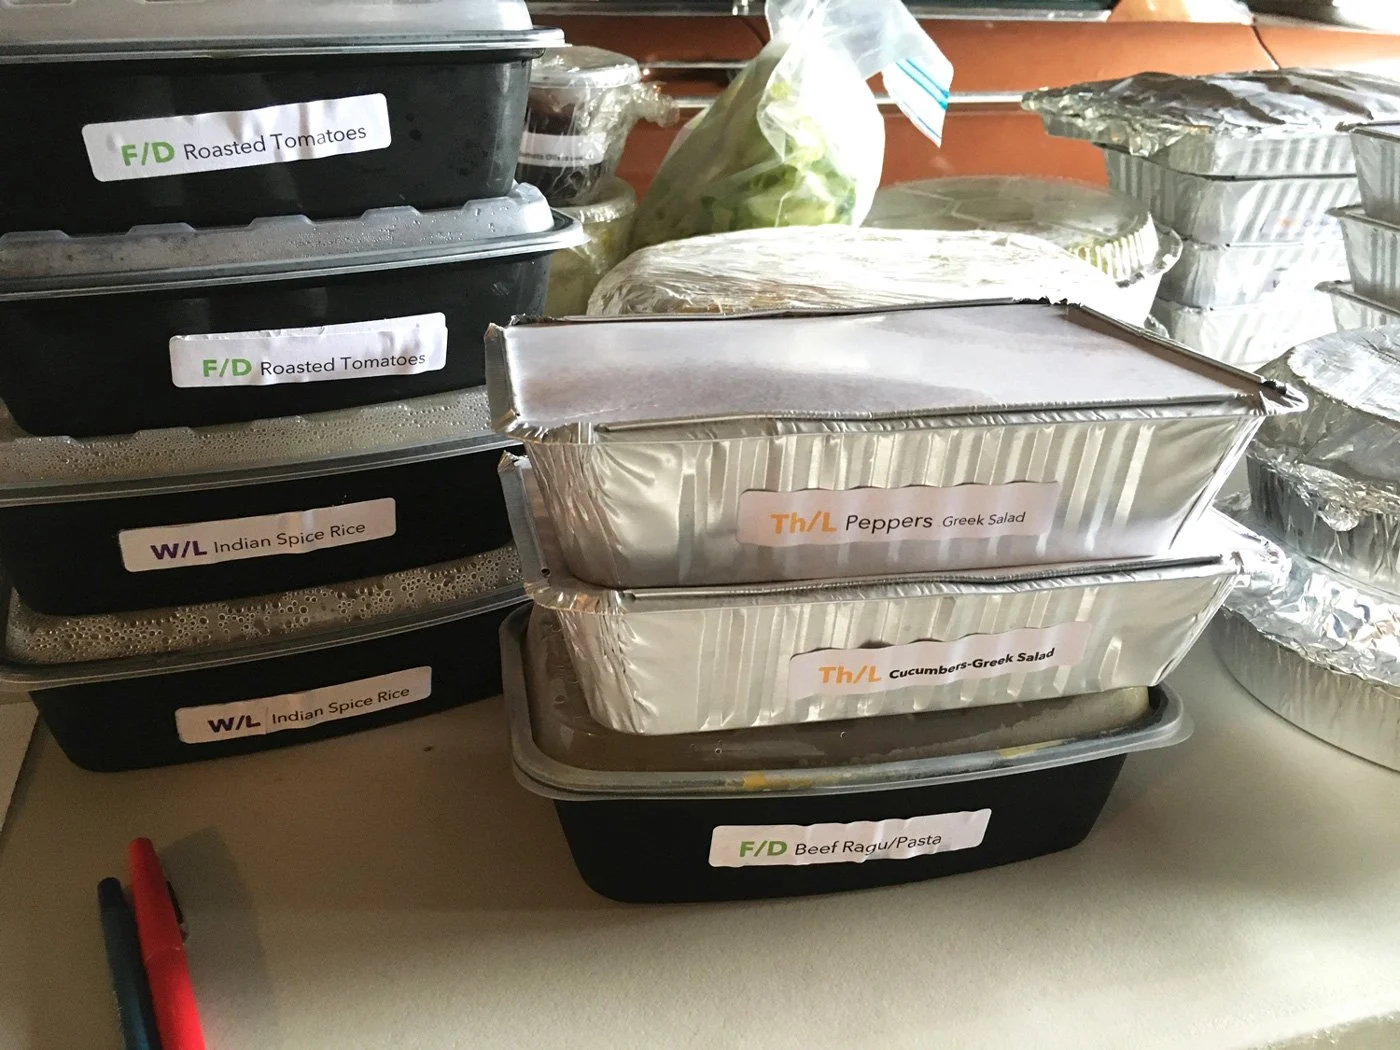
I made this the day before, covered and refridgerated until the next day.

3. Meanwhile, cut chunks of feta cheese and place one piece on each end of the squash then roll it up.

The amount of feta you use is up to you. I used a healthy teaspoon for each.

I also made these the day before and stored them in a glass container. Then added them to the roasted veggies and baked together on the day of the lunch.

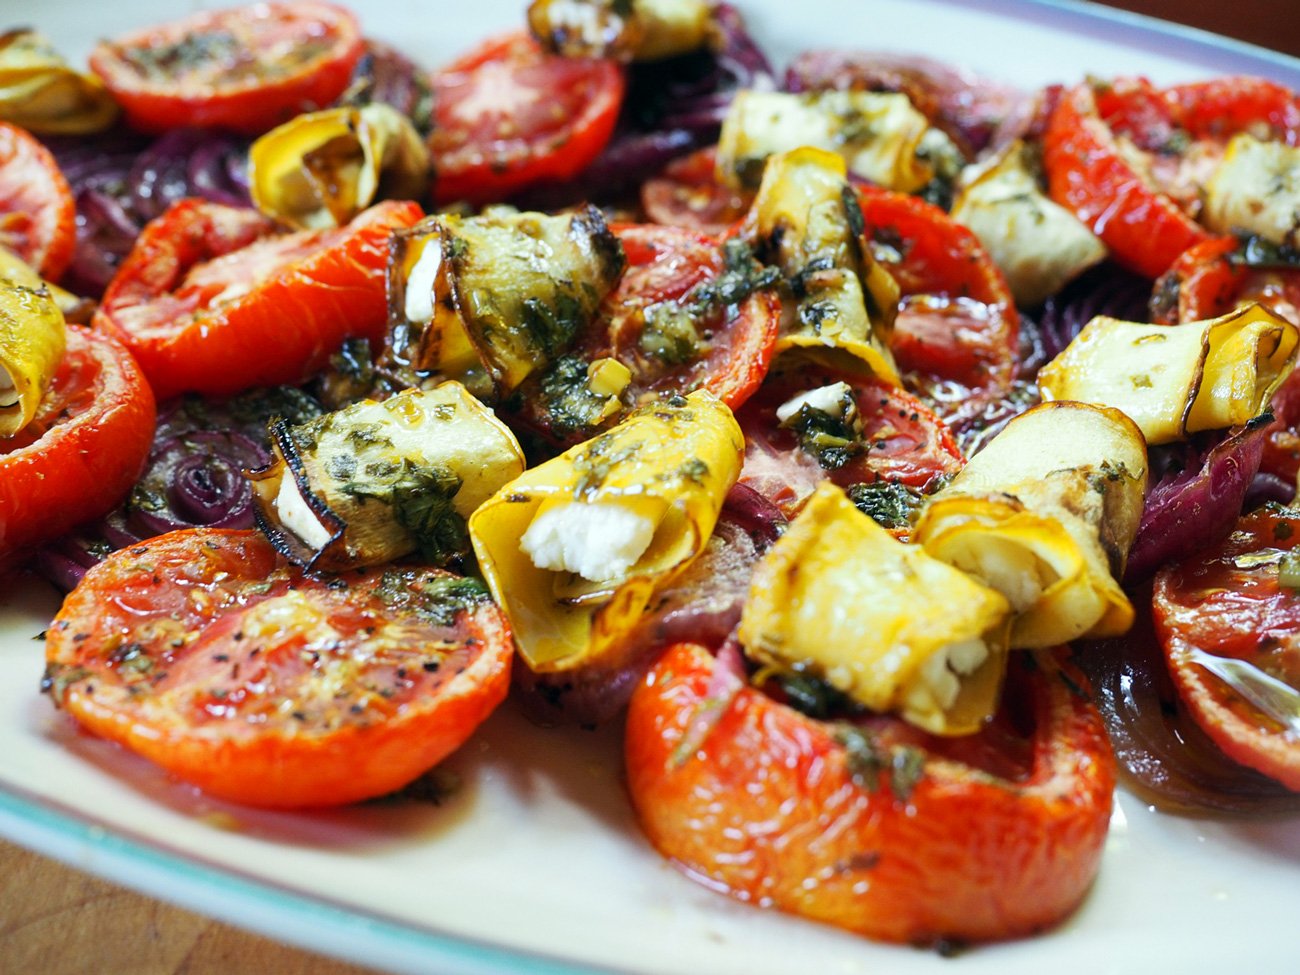
4. Once the onions & tomatoes are roasted on one side turn them over add the rolled squash and brush everything with the herb/garlic salsa. Roast for another 10-12 minutes

If you are making this the day of, follow the directions above. If you are making it the day before, then roast the onions and tomatoes but do not add the squash. I did grill and stuff the squash, then kept the rolled up pieces in a glass container. I added them to the pan right before I warmed up the entire dish. I added some extra salsa.

All the flavors blend so beautifully together. This is a great side dish but also can be used in several other ways.

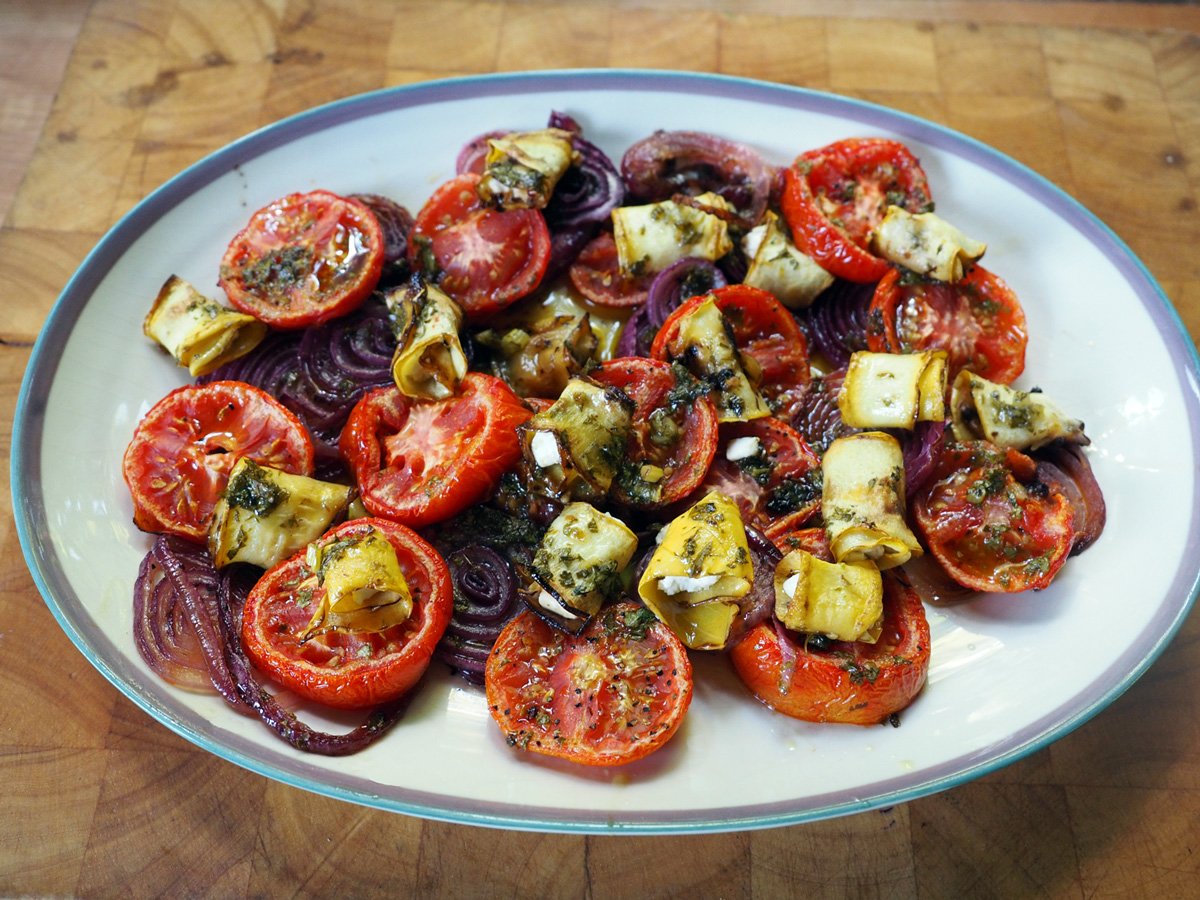
Here are a few ideas how to serve it up.

  • Toss the tomatoes and onion over pasta then place the rolled squash on top. Maybe crumble more fresh feta on top.

  • Add fried eggs on top and serve with crusty bread for a breakfast or brunch.

  • Place in a shallow bowl, add more oil or herb oil, and serve it with crostini

I’m sure there are other uses. I’ll let you come up with your own, and hope that you share your ideas. This was a nice improv from my usual stuffed zucchini dish. I’m actually glad I didn’t have zucchini because I wouldn’t have been forced to think of something new. When life gives you yellow squash, stuff it and roll with it.

As I mentioned, this post was to encourage you to think of your usual recipe box. And let’s say you didn’t have on hand the above ingredients to make this recipe as is. Here are some substitutes to help get your creativity engine going.

If you don’t have red onion:

  • yellow onion

  • Shallots

  • Scallions

If you don’t have yellow squash:

  • zucchini

  • Eggplant

  • Sweet potato

  • Potato

If you don’t have feta:

  • goat cheese

  • Ricotta

  • Mozzarella

  • Cream cheese

  • Any cheese, but you may need to modify how you cut it. If you have a hard cheese, maybe grate it. If a softer cheese, then spread it over the grilled vegetable.

    I hope these help jumpstart some ideas of how you can switch up the main ingredients yet still keep the basic premise in tact. Continue creating and stirring your food with love.

Endless Endive: Strawberry, Tomato, Basil and Peas, Shallots

Years back I posted Winter Fresh Endive Boats and promised that I would post about the variety of other ways to stuff endive.  And although it's been quite some time since that posting, I like to make good on my promises, even if it takes me years to come through. So here is my first round of fillings.  And I promise, there will be more, especially since the title is Endless Endive.

Endive seems to have been specifically made as the perfect carry vehicle for fillings.  I know most people cut them up and toss into salads, but I much prefer them as a big spoon! They are great for dipping and are literally the ideal shape to fill so guests can easily pick up and enjoy. Why in the world would anyone cut them up when their true purpose seems clear? Well, at least to me. That’s why I fill them, endlessly.

I entitled this Endless Endive because quite honestly the list of fillings is just that. The only limitation is one's lack of imagination.  But I know that together we can invent tons of fillings. I’ll do my part to start us off. For this post I’m keeping it to two different fillings that are perfect for Spring and Summer Time.

But first some tidbits about Belgian endive. It’s like a small head of lettuce but instead of being round like Boston lettuce it has a cylinder shape usually around 6 inches long. The most typical has pale yellow leaves that are tightly packed together with one end more sturdy (the filling end) and the top end feathering out to a more delicate whisper. There is also a purple toned version, Red Belgian, which when combined with the greenish yellow version makes quite a stunning plate. Being part of the chicory family, it has a mild bitter taste, but not nearly as much as radicchio. I find endive to be mild and neutral. You can actually cook endive and it mellow out the flavor to a more nutty tone.

Ok, onto the fillings.

As I mentioned, there are two different toppings but both versions use the same cheese filling. You can use any combination of cheese fillings or a single cheese. The most important part is that it is whipped so that it is light and fluffy.

Ingredients

3-5 Endive*
12 oz Cream Cheese**
10 oz Goat Cheese
**

Strawberry/Tomato Filling

1 qt Grape Tomatoes, chopped
1 qt Strawberries, chopped
1/4 c Basil, chiffonade

Peas/Shallot Filling

2-3 T Mint, chopped
1- 1.5 c Peas, frozen
1 small shallot, fine dice
Pea Shoots, for topping
Magic 3 (olive oil, salt, pepper)

* Depending on the size will determine how many leaves each one will yield. I always buy an extra one to be safe, especially since as you get closer to the center the leaves get smaller and smaller.

** You can use both cream and goat cheese combined. The cream cheese balances the tang of the goat. You can also use ricotta cheese with is lighter.


Instructions

  1. Whip cream cheese and goat cheese together until fluffy. Season with salt and pepper to taste. Place in a pastry bag or large Ziplock bag and refrigerate until ready to fill.

You can certainly stir it together but I find using a hand mixer creates a smooth, creamy consistency.

Fill a pastry bag or plastic bag for easy filling.

2. Carefully separate the leaves from the core. I like having a clean edge, so I cut the bottom until leaves naturally release. Then continue to cut across the core releasing more leaves. This method helps to have even clean edges as well as ensuring not to tear the leaf. Let them dry on a paper towel.

Look as those lovely natural boats.

3. Wash, core and chop the strawberries. Wash and chop the grape tomatoes, and chiffonade the basil. Set aside. Combine everything in a bowl, season with salt, pepper and a drizzle of olive oil and set in the fridge to marinate. Note: I recommend a small dice so you can get several pieces of each when you fill the endive

When you use fresh ingredients, you only need a few. Just let them shine and show their natural glory.

So appetizing.

4. Blanch the peas for 1-2 minutes and shock them in cold water to stop any further cooking.

Quickly blanch the peas. They don’t need much time.

Placing them in an ice bath stops the cooking and helps retain their vibrant green color.

5. In the same saucepan, sauté the shallots until softened. Season with salt and pepper

Shallots are milder then red onion and don’t overpower the sweet, tender pea. They also do not take long to sauté and soften.

6. Remove the peas with a spider, draining all the water and add them to the shallots. Taste for seasoning, and adjust if needed.

A tasty mixture.

7. Arrange the endive leaves on a platter and using the piping bag squeeze a hefty tablespoon amount of cheese into each leaf.

I like to arrange some greens on the bottom of the serving platter to finish the presentation.

Fill to your hearts content. If you like more cheese filling, then put more. I feel like a heaping tablespoon amount is just right.

8. Then fill with the leaves with each of the two toppings, separately.. Finish the pea version with pea shoots. I liked alternating the versions next to one another. But you can also arrange it so one side of the platter has the Pea/Shallot version, and the other side has the only the Strawberry/Tomato version.

So vibrant and fresh.

These can be made up to 1/2 hour prior to serving. However, you could prep all the components ahead of time (day before) and store airtight in the fridge. You can even fill the endive with the cheese filling hours ahead. Cover with plastic and then fill before serving.

A festive, refreshing Spring or Summertime appetizer.

I absolutely love the freshness of this appetizer. So crisp, so clean. So refreshing. The best part is it requires no dishes, no utensils. These are ‘pick up and devour’ apps. I hope you give these a try. With Spring sprung, we need a few fresh, cooling appetizers up our sleeves.


Cauliflower, Sweet Potato, Chick Pea Curry

As with many of my recipes, they come to fruition out of chance, hence the moniker ‘something from nothing.’ In this case, it just so happened that chance came in the way of an enormous cauliflower.  As much as I love my Faux Creamy Cauliflower Soup (and I highly recommend you try it), I was dreaming of another dish from the past.  When I used to travel into the NYC for work my commute took me through Grand Central Station.  For those NYers, you know that pre-pandemic there used to be a plethora of food choices on the bottom floor, convenient for those of us running for a train.  I would sometimes frequent the Indian take out joint for their vegetarian options.  One of those was a cauliflower curry, which sometimes had chick peas.  (Side note: I would try to eat my Indian food before boarding the train or wait until I got home.  Because quite frankly the deep curry aromas, although alluring to me, would be overwhelming to others as they perfumed and permeated the entire train.)

My luck, I always stock my pantry with various beans. Chick peas: checked.  I also had some sweet potatoes on hand, and they seemed like a likely player in this mix.  Plus they would add some much needed color to this dish.  (Cauliflower: white, Chick peas: beige, Coconut milk: white. Sweet potatoes - happy orange!)

Now, you know that I do not proclaim to be an expert in Indian cooking or spices. Far from it.  I stick to what I know and use my instincts on quantities and combos.  That said I feel like I’ve been batting 1000 on my Indian dish experiments thus far. So, I was feeling pretty confident I could make this dish tasty.

Since I only had the germ of an idea on how to bring this dish to life, I was working through the prep and cooking method as I went along.  Typically, I try to make most of my recipes fairly simple without too many steps or without a laundry list of ingredients.  Nothing turns me off from trying a new recipe from another chef as 20 ingredients, or a choreographed dance of steps.  This one does require a few more than my usual but still all quite manageable.  And I’m sure it will go faster for you since while I was riffing on how to do make this I also had to measure, write it down, photograph and then make sure I didn’t get any curry on my camera lens.

Admittedly, the amounts I made were for a small dinner party or a large very hungry family.  It’s been just JuanCarlos and I round these parts, so we might be eating this for breakfast, lunch and dinner.  It made a ton.  When I wanted to use up the cauliflower I didn’t realize how enormous it was when I added the sweet potato and chick peas.  But you can either cut it down by a quarter or make a large vat of this and freeze it, as I did. It held up pretty well.

Also, you will note that I cut the onions and ginger in two ways. Sometimes the different sizes not only add a texture but it also delivers another flavor depth.

Ingredients 

1 lg (1000g/35oz) Cauliflower 
5 c (523g/19oz) Sweet Potato, cubed
2-3 med (431g) onions (half diced 1.5c/half large cubes 1.5c)
2 29 oz cans of Chick Peas
1 Qt Vegetable Stock or water (I used the water I cooked the cauliflower/potatoes in)
2 13.5 oz cans Coconut Milk
1/2 c oil
100g ginger 5-6 t grated, rest sliced
2t turmeric
2.5 t cumin
3 t cumin seeds
3 t rounded curry
1/2 t red pepper flakes (add more or less depending on your heat level)
4-5 t salt
1 c Aquafaba (chick pea liquid)
2 heaping T tomato paste

Instructions

  1. Measure out all your spices.

Top row: Salt, Curry Middle Row: Turmeric, Cumin, Tomato Paste Bottom Row: Cumin Seeds, Red Pepper Flakes

2. Prepare all the vegetables: Break cauliflower into large florets. Peel and cut sweet potatoes into cubes. Dice and slice onions, grate and slice ginger so you have everything ready.

Now you can more clearly visualize the Happy Orange that the sweet potato brought to the party.

3. In salted boiling water, cook both cauliflower & potatoes until semi soft.  Not mushy, you want them to still have a firmness to them.  Strain and place on a baking tray to let cool. Keep the water to use as stock.

Remember to not overcook these. They should be tender but still slightly firm. You can also add an onion and celery to the water to create a veggie stock to use later.

4. Meanwhile, sauté diced onions in oil with salt until soft, approx. 10-12 minutes.

5. Add all the spices and ginger and let toast together 3-4 minutes.

Once the onions are softened, add all the spices and ginger.

6. Add tomato paste, let lightly brown then add cubed onions and 1 c of aquafaba.  Let this cook until softened for 5-7 minutes.

You can really start to see all the deep flavors developing. Building up flavors at each level creates a much more flavor packed dish.

7. Add chick peas, stock, coconut milk to the pot and stir together and bring to a soft boil.

I love coconut milk. And in Indian spiced dishes it adds a cooling agent to all the spice.

8. Cut the larger cauliflower florets into smaller bite sized pieces. Then add the cauliflower and sweet potatoes to the pot and simmer to let all the flavors merge.

Taste for additional seasoning.

Serve with rice, add pepitas to top for crunch.  The first time I made this dish I opted for paella rice instead of Basmati because I wanted more of a chew the to starch. Short grain rice definitely offered that chubby quality I was looking for.  Plus I needed to experiment with it for a dish I’m offering up to my customers. So win win on that front. The second time I made this was for a small dinner party with my sister and brother in law. I serve basmati rice and it was equally delicious. How can any type of rice be bad when it’s goal is to soak up goodness?

Chick Pea Fritters - Gluten Free Treat

You know why it’s important to learn baseball when you are younger? So you can hit life’s curveballs when you are older. You never know when the universe is going to toss one at you. But rest assured, a few will be pitched your way. Some are serious and life altering, Some are less severe but still require adjusting. Some curveballs are disguised as opportunities. Actually, let me rephrase that. Most of life’s curveballs actually ARE opportunities.

This past summer, I had an awesome gig come across my plate. I was hired to cook for a family of 7 adults, providing lunches and dinners for a two week period. (The family ended up loving what I provided that they extended it for entire month.) This was a huge undertaking in every sense of the word. And there were plenty of fastballs and curveballs pitched my way.

Curveball #1: Refrigerator and freezer needs. I have 2 refrigerators with 2 regular freezers plus 1 full freezer. Yet that was not going to be enough. But as luck would have it our neighbors sold their house, moved out and the new owners weren’t moving in for a month. Coincidence or Fate? I say lifesaver as I packed their fridge and freezer to the brim.

Curveball #2: The clients many food restrictions which required a complicated menu planning.

Curveball #3: The management of each meal, heating instructions, and color coded labeling system. With so many containers being delivered, the only way they would know what to heat up was having a color coded labeling system so they knew what dish went with what and for when. They would also need instructions for re-heating and for sauces/dressings. M/L = Monday Lunch, F/D = Friday Dinner and so on.

Other challenging parts of the gig was that I had to deliver the food over an hour away twice a week which required a well orchestrated shopping-cooking- delivery schedule, using various coolers and pack out lists to ensure nothing was left behind. Add to that the various food restrictions which included what proteins some of the guests ate and others did not. This meant that I had to come up with two mains for every meal. Ensuring that every person had sufficient protein was like solving a Rubik’s cube. Oh, did I mention, gluten free? That part is easy for me since I’ve been gluten free for over a decade. So, I won’t even count that.

There were other curveballs but I think you get it.
Big, Big, Big. And I’m always up for a challenge, especially one that requires logistical thinking. I have the detail oriented mind to tackle this type of task. All bragging aside, it’s actually one of my super skills.

I am a very visual person. In order to tackle this monster, I needed to see it. At first, I starting handwriting the menu and the to do lists. Then I typed it into the computer. But soon realized that it was a living, breathing beast which needed to be shifted and modified constantly. Moving items around on the computer wasn’t as effective since all the columns kept getting out whack. I knew the only way to confront this monster of a task was the old fashioned method of sticking it up on a wall. I needed a system that would allow flexibility, full visibility and the ability to easily move food offerings around without shifting others out of place (as what happens in a Word Doc). This could be the next new meaning of a Moveable Feast.
I printed out each offering, cut them into small strips and added painters tape to the back. It was the only way to switch out an item easily after staring at the entire menu and realizing that I might be serving rice 3 days in a row. Or that if I moved a dinner to another night then I wouldn’t have the spicy slaw as a leftover for lunch 2 days later. Rubik’s cube or mathematical conundrum? Anyway, this system worked beautifully and allowed me to see the whole scope of the project and ensure the client was happy with the diversity of offerings. I left it on the wall as art!

My moveable feast. A ‘place and stick’ menu system that kept me from going batty.

I literally used it everyday to keep me on track

Everything was going along swimmingly until one day the client made a late decision switch which left a protein hole for the vegetarian in the family.

Curveball # I lost count: Need an additional protein but no time to go shopping.

So, how do you sneak in extra protein at the last minute using only what you have available? Legumes to the rescue.

I decided the fastest, easiest solution was to make chick pea fritters. Don’t ask me why I thought this would be fast and easy since I had never made these before. But the idea seemed similar to other pancake like food, so that equaled a decent plan. Naturally, it had to be gluten free. This really wasn’t that earth shattering of an idea. It only felt dramatic because I had less them 8 hours to solve the problem and make the food using only available items, in order to make it for the next day’s morning delivery.

Here’s how it went down.

But just a few ingredients: Chick Peas, Gluten Free flour, jalapeño, egg, scallions and cilantro.

Ingredients

(Makes 14 - 3” round Fritters)

1 39 oz can Chick Peas
3 T Gluten Free Flour (or Chick Pea flour. If you aren’t concerned with GF, then regular flour can be used)
1 Egg, beaten
2+ Tbsp Jalapeño pepper, minced (add more if you like more heat)
1/3 c Cilantro packed leaves, 3 T chopped
1/2 c Scallions, sliced
1 t Salt
1/4 t black pepper
1/8 t red pepper flakes, optional
coarse sea salt to finish

Tahini Dipping Sauce
1/2 c tahini
6 T ice water
3 T Lemon juice/zest
2 T scallions, sliced
1 t jalapeño, minced
salt to taste

Instructions

  1. Slice, chop and mince the aromatics.

Mise en place: Chop, slice and have all ingredients ready.

2. Mash the chick peas, leaving some larger and smaller pieces for texture.

3. Add the jalapeño, cilantro, scallions and mix.

4. Then beat egg with salt, pepper and red pepper flakes and add to chick pea until combined.

5. Add the flour 1 tablespoon at a time and mix until the egg is absorbed but still it wet enough to hold it together.

Squeeze a bit into a ball to ensure it holds together.

6. Using an scoop, choosing the size you desire. If you want them as appetizers make smaller ones. If you want them as a side dish, make them larger. Depending on your style and also how you will be serving them, it’s up to you whether you scoop and free form them or scoop and press into a cutter for perfectly equal fritters. Once you decided, scoop, flatten and place them on the sheet tray for fast work. Again, you can choose super flat so they are crispier, or slightly fatter for the thicker more substantial bite. Your choice depending on your needs/desires. Remember, my recipes can be followed exactly or simply be a guide for you to create and make your own modifications. However it is important that when forming these pack them tight so they hold together.


Choose your tool

Scoop for free form, or scoop into a mold

Size matters…

7. Refrigerate for 1/2-1 hour or freeze for 15-20 minutes. This step helps to get the fritters together then frying.

Prep makes easy work. Plus I do recommend placing them on tray to refrigerate or freeze before frying.

8. I like using a cast iron pan when I frying. The heat from the pan allows for a good sear. If you don’t have cast iron, use your best fry pan or grill pan. Working in batches so as to not drop the pan temperature, add oil and about 6 of the fritters. Turn with a small spatula. When done, remove and place on a paper towel and sprinkle with coarse sea salt.

I prefer thinner fritters because I’m a sucker for crisper, crunchy food.

Golden brown and crispy. The paper towel absorbs any excess oil.

I made a tahini dipping sauce to go along with these. A little extra protein from the sesame. Below is the tahini sauce process.

Tahini

Whisk in ice water, and you can see how the water not only changes the consistency but it lightens up the color as well.

Add lemon juice, zest, scallions, jalapeño and whisk together.

Creamy topping. Try it on other foods.

The client immediately texted to let me know that her husband consumed almost the entire batch himself. Huge success. Happy customer, and now I have another little appetizer/side dish to add to my collection and to share with you.

A yummy combination.

You know me, my dishes are never just one use. They usually do double and triple duty. Serve up as an appetizer, or a side dish. You can even swap out toast and use them as a base for eggs. I made one poached egg and one fried egg to place on top of my fritters. I added a dollop of yogurt and some fresh parsley. A few apple slices rounded out this breakfast. I’d say I hit this curveball out of the park.

I fried my egg in a metal round the same size as the fritter to make it nice and tidy. If you use this method make sure to oil the inside of the mold so the egg removes more easily.

Left side fried egg, right side poached egg. Delicious, nutritious and packed with protein. Apple slices added a lovely crispy, freshness.

A happy husband


A Pot of Versatile Veggies - Refrigerator Remnants


I know it’s been awhile since I’ve posted a new recipe.  Between making sure I provided a few posts with helpful tips and holiday entertaining, and focusing on fulfilling orders from my customers, I let a period pass without dedicating time to share recipes. Although those may be some reasons, truth be told, the more obvious one is that without our usual entertaining schedule, I’ve been less motivated to experiment and haven’t had the need to invent new dishes to serve guests.  That part makes me a bit sad. Ok, a lot sad.

Even though we haven’t been entertaining doesn’t mean I haven’t been cooking.  On the contrary, I’ve actually been cooking up a storm, doing more than ever since I starting providing weekly meal service to select customers in my local area, plus baked goods via shipping.  Plus, I’ve had some catering opportunities pop up as well.  So cooking has been firing up my kitchen, it just didn’t feel like there was anything to blog about.

Or so I thought. As life often does, it shines a light on a topic and then energy is sent forth which appears in full bloom. Here’s a clear example of what I’m talking about. Did you ever think about a friend and then suddenly that friend calls you? It’s like sending out a smoke signal, and you get a return response. That energy swirls around us constantly. It happened just like that to me recently. I had been talking to three friends about the fact that I have not blogged about a recipe in quite some time, and expressed my mixed emotions about it. So, imagine my surprise and thrill when I got the spark to create again. That particular day while I was doing my usual refrigerator ‘cleanse and see what’s still viable’ exercise, I felt a sudden reminiscent pang of my old something from nothing style.  It dawned on me that I have been creating dishes for JuanCarlos and myself all along but just hadn’t been focused on photographing, documenting and writing about them.  When I looked at this batch of veggies that needed some love and attention, I thought this could be worth sharing if nothing else but to motivate you to clean out your fridge. Admittedly, this recipe is not earth shattering. In fact, it’s quite basic. But it’s significance is greater than the recipe itself. One, it motivated me to photograph and document again. And two, hopefully it will inspire you to go through your fridge and figure out what to do with your miscellaneous food items. I should create an ongoing series entitled: Refrigerator Remnants.  You see, inspiration is everywhere.

Veg.Setup.jpg

Fennel, Celery, Rainbow Chard, Garlic, Onions, Carrots. The absolute basics.


Basically, this process is nothing more than pulling out all those unused items in your fridge that are at their last hope for use, and then coming up with a plan on how they all play together.  As I mentioned, this ‘recipe’ isn’t rocket science.  It’s actual a pumped up mire poix or soup base but without the liquid.  But it is hearty, tasty, versatile, and most of all met the requirements of using items that might have ended up in the trash a few days from now. 

This pot of veggies can be used as a side dish to any protein: meat, chicken, fish, beans or tofu.  It can be a main with a heaping helping of rice or couscous or even piled on top of a baked potato.  Or can even be part of a taco filling or quesadilla.  I’m sure there are plenty of other ways to serve up this veggie packed plate. Feel free to use any of my suggestions but I’ll let you figure out how you want to serve them up.  For now, I encourage you to go through the exercise of rummaging through to find your Refrigerator Remnant Recipe. Remember, these were the items and amounts that I had in my fridge. The goal here is to inspire you to create with whatever you have, and balance the flavors with the amounts you have. For instance, even though I had a ton of celery, the fennel was what was most pronounced in the combo below.

Here’s mine:

Ingredients

2 med onions (approx. 2.5 c )
4 lg carrots (approx. 3.5 c)
4 c celery
3c fennel
2 garlic cloves
12c red Swiss chard
Olive oil, salt & pepper

Instructions

  1. Cut all the vegetables into large chunks.

Chopped.Veg.jpg

As I said, a pumped up mire poix.

2. Cut and discard the ends/toughest part of the Swiss Chard. Then cut the remaining ribs out and chop them into smaller pieces..

3. Cut the leafy part of the Swiss Chard into strips.

4. Pour oil, salt and pepper into the pot to heat up then add all the vegetables except the leafy parts of the chard. Add whatever spice combo you desire. See below of different combos to try.

Raw.Veg.pot.jpg

5. Cook for 20-25 minutes, until tender but still al dente. You don’t want these to cook down so much that they become mush. You want a tooth bite to them.

6. Add Swiss Chard leafy parts, cover and cook over low flame for 5-8. minutes until wilted.


I didn’t add any additional spices since I made such a big batch I didn’t want to commit to one spice profile. I figured I would enhance it each time I warmed it up. This worked out fine as the anise from the fennel really flavored the dish to the point of not needing anything else.  But this is one of those dishes where anything goes.  Make it your own.  Here are some spice combos to try.

Italian Flavor: Dry Thyme | Oregano | Red Pepper Flakes | Cannellini Beans

Indian Flavor: Turmeric | Cumin | Cinnamon | Cloves | Curry | Coconut Milk

Middle Eastern: Cumin Seeds | Fennel Seeds | Sumac | Cardamom | Chick Peas

French: Herbs de Provence | Tarragon | Chives | Chervil

Spanish: Saffron | Pimentón de la Vera/Paprika | Cayenne Pepper

Mexican: Cilantro | Chili Pepper | Cumin | Allspice | Coriander

And here is how I served it up.

I had leftover ginger/red onion paella rice so I shaped it into a large patty and fried it up.  Then topped it with veggies.  For JC I added the leftover chicken thigh he had from the night before.  I know, I know, nothing earth shattering here, but I know I have some viewers who get overwhelmed with trying to figure out what to do.  This is just one way of culling everything together.


Leftover ginger/red onion paella rice. Perfect for making fried rice patties.

Note about the rice patty. Since this was leftover paella rice that had been previously sautéed with oil, ginger and red onion it had a natural stickiness to it that allowed it to hold the shape without any binder. If you only have long grain rice then you will need to add a binder of egg and flour in order to hold the patty together.

Why make one when you can make two. This fried rice patties are so delicious.

Use a cast iron pan with oil and high heat to get a crispy exterior.

Golden brown perfection.

Use the same ring for the veggie mix placement makes a nice, neat presentation.

The bigger chunks make this a more hearty side dish.

Using the same ring mold that you used to make the rice patties, place on top and fill with the veggie mixture, and pack tight.

I added chick peas to my mixture to add protein.