Seasonal Summer Lunch with Lifetime Friend

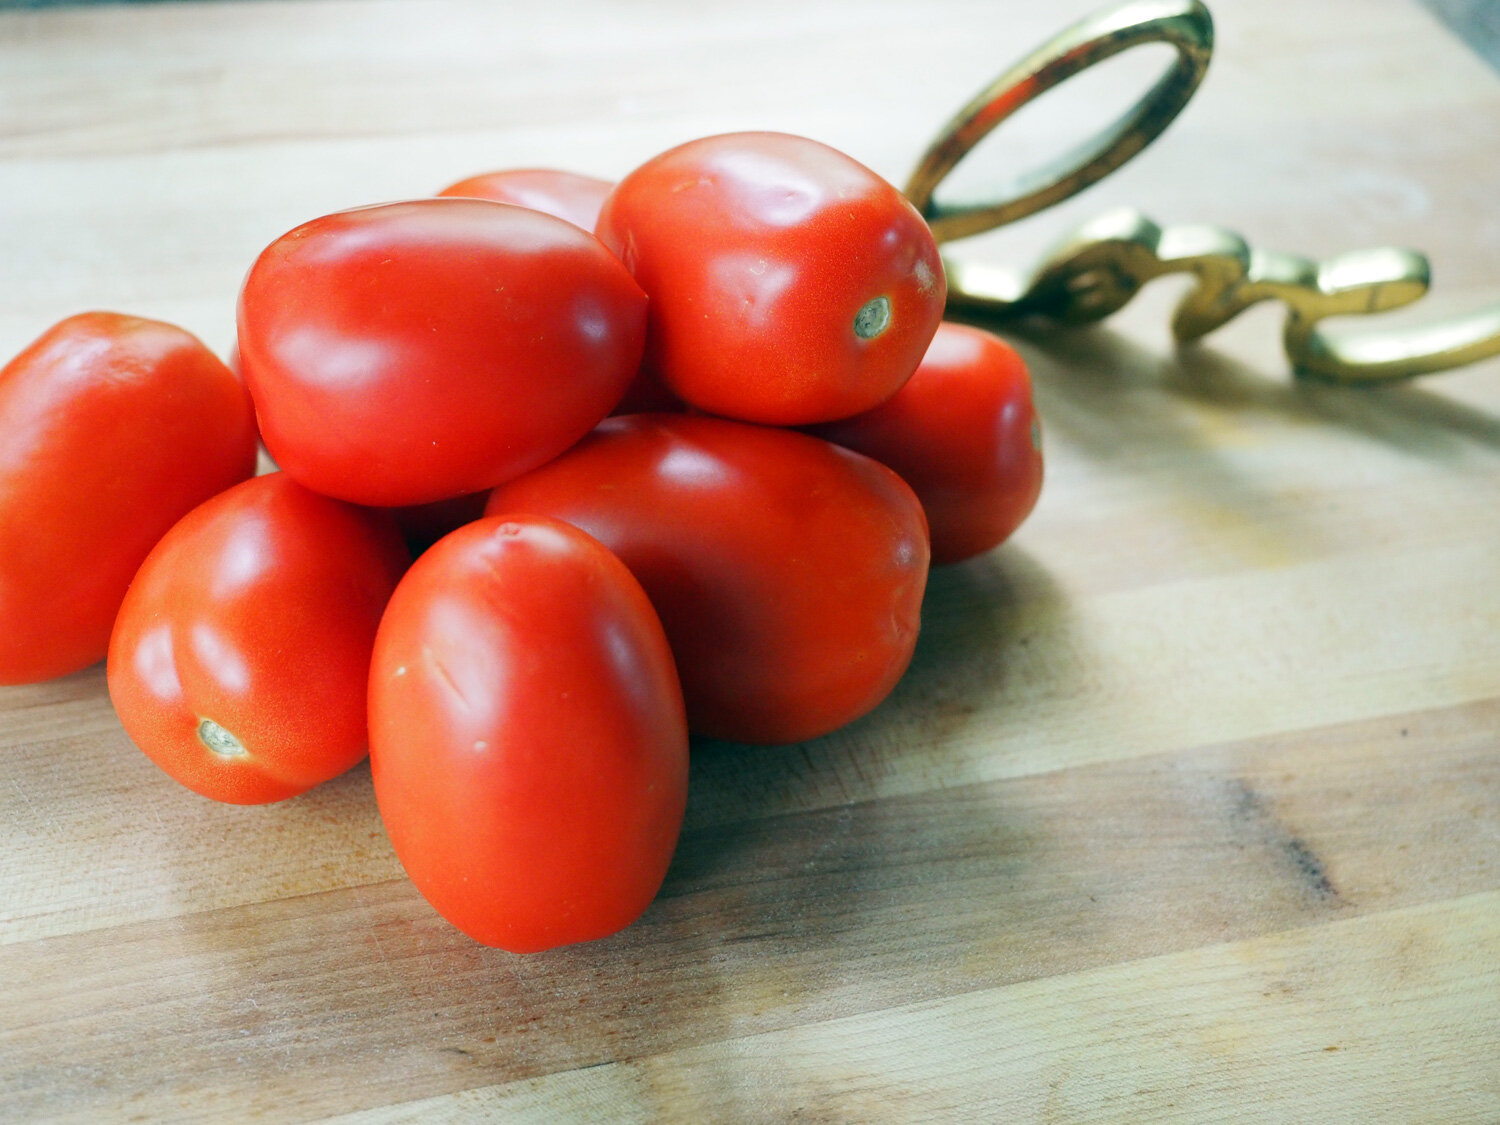
Now, I know that this post is long over due with a title of Season Summer Lunch. But even though this menu features some seasonal items, you can still get most of them or swap them out for ones that are in season. I felt this post was important to share not just for the food but for the sentiment of friendship, and the enduring bonds built from long ago. One of life’s great gifts is having friends. Even better, is a lifelong friend. So as luck would have it one of mine happened to be passing through Westchester. Dianne and I have known each other since Junior High. We even went to the same college, Binghamton University. Without dating ourselves, trust me when I say that we have been friends for a very long time. Busy lives, crazy work schedules and distances have kept us from seeing one another but lifelong friendships are just that… forever. So, the only logical thing to entice her to not just drive past my house on her way to Connecticut was to offer up a summertime lunch. Some of my picks; Tomatoes (both from our garden & farm stand), yellow squash and other greens would be the feature. Thankfully Dianne is a foodie too and so the enticement worked as well as the timing. With initial menu ideas in the works, I moved on to setting a simple yet pretty table.

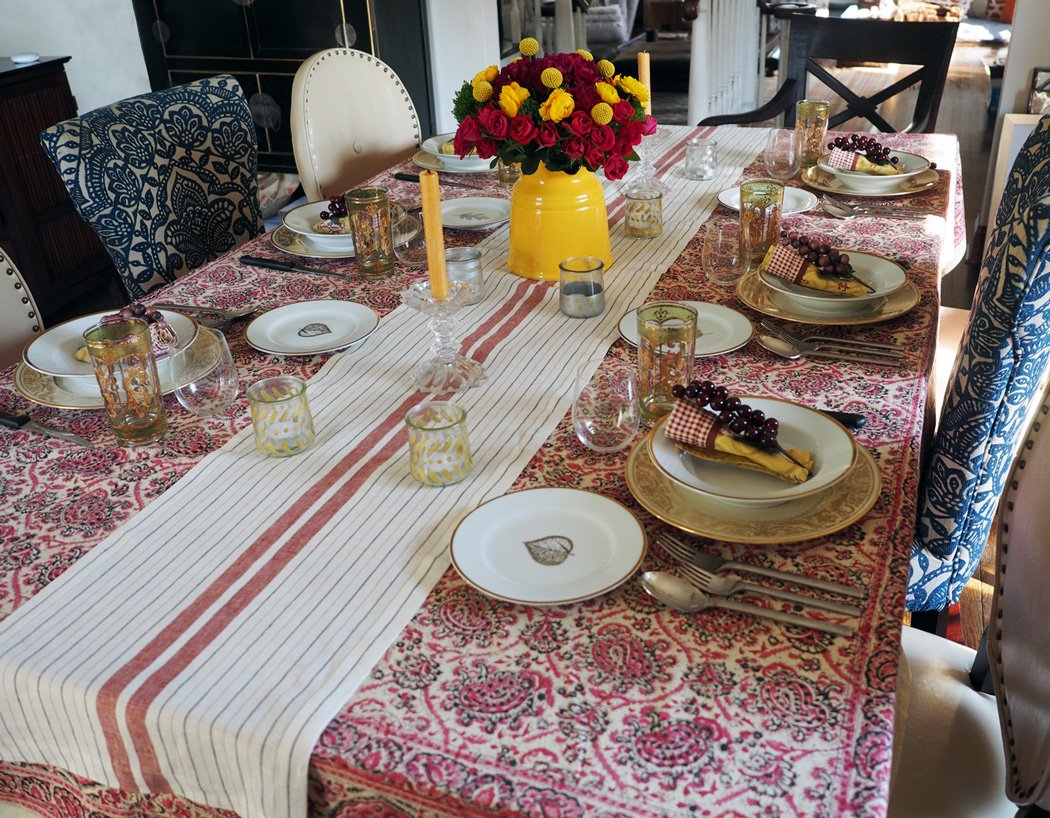
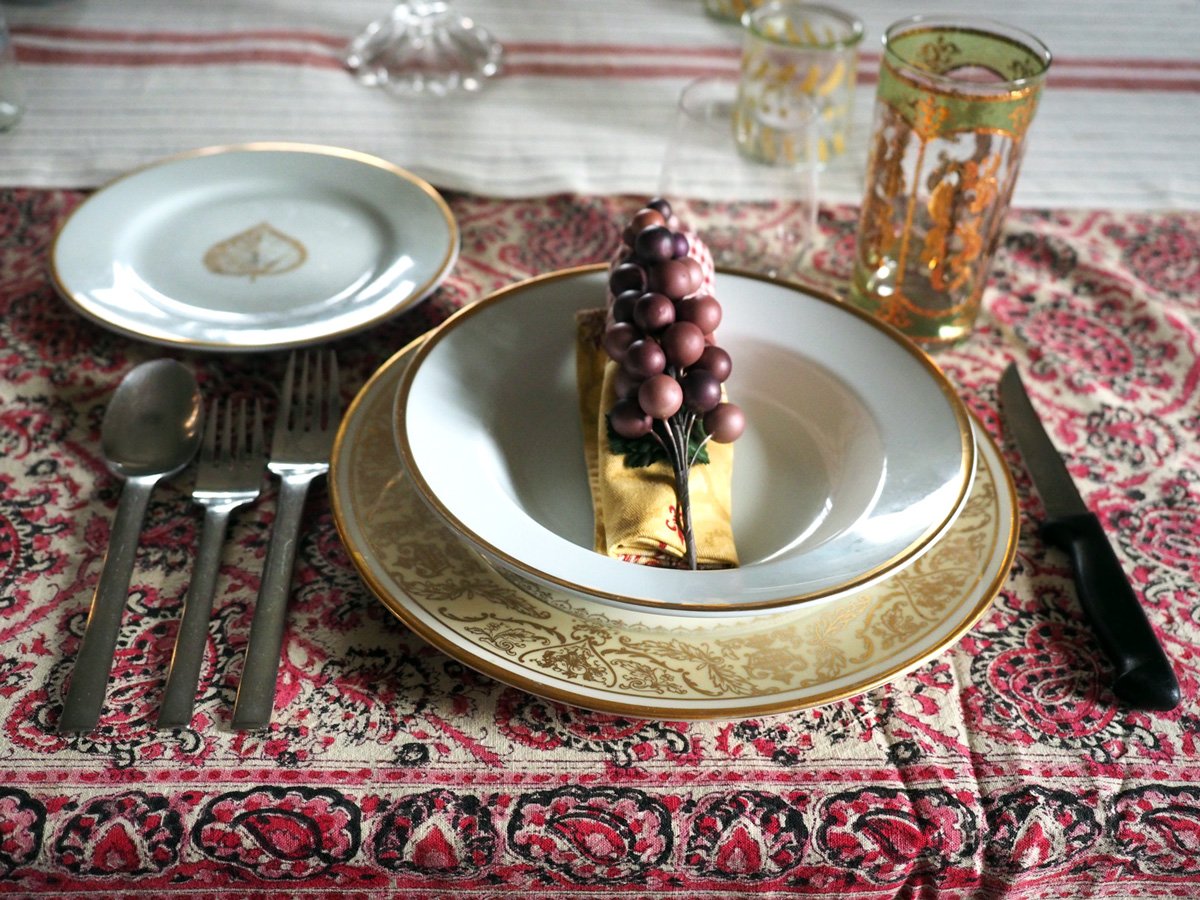
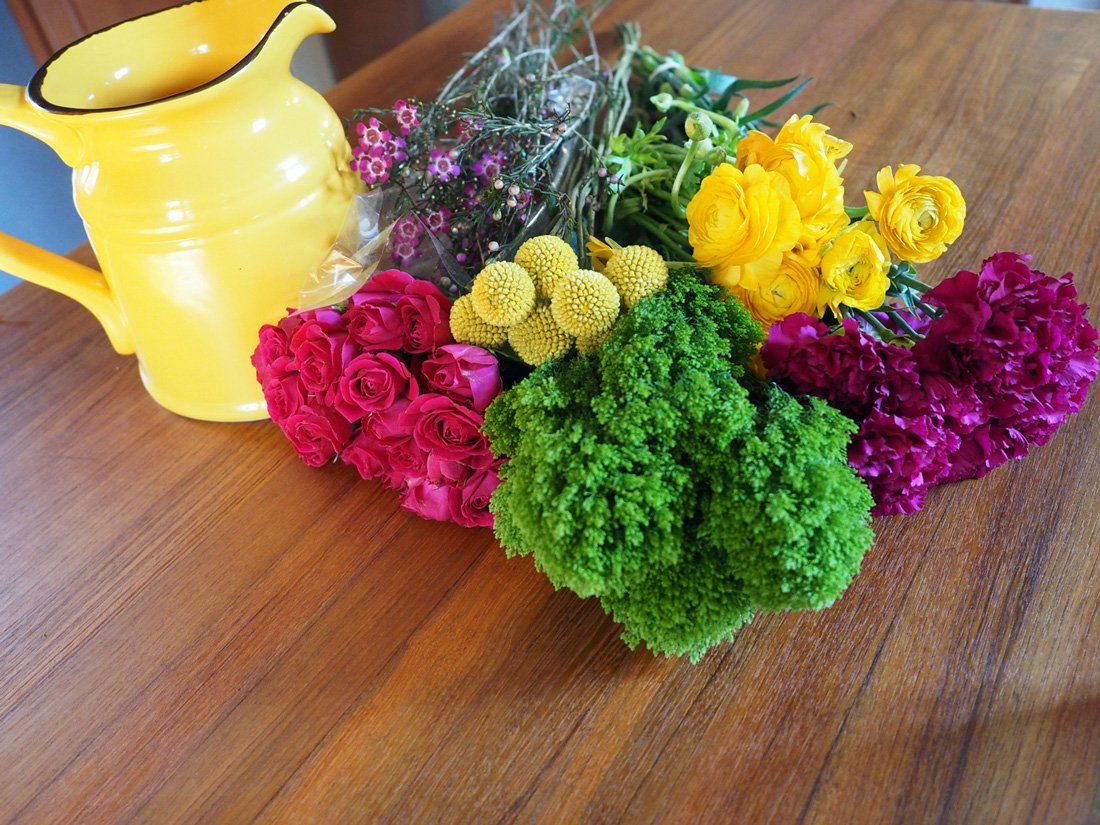
Flowers cut from my garden, casual placemats and purple napkins to brighten things up.

Once again I find myself hosting during the week, and with each visit I am loving this idea of “work week’ entertaining. As these last few blog posts have proven, I’ve been ‘week day entertaining’ of late. My schedule affords me the luxury of being flexible and available, so these moments aren’t stressful at all. On the contrary, they are a joy to break up the work week. (Which is an ironic and funny statement since the majority of work week is cooking. What I mean is that the break comes in the form of being social. And THAT is a great thing.) I do understand that even with the work from home scenario your schedule might not allow for this much flexibility. But if it does, here is a menu that might suit your needs. And if not, then serve it as a weekend lunch option, or a light dinner. Also, this meal doesn’t need to be summer only, which is why I don’t feel so badly posting it so late.

Here’s how it went down. Even for a simple lunch, it’s always nice to have a starter to offer when your guest(s) arrive.

Appetizer - The Ubiquitous Cheese/Charcuterie Platter
(There is a reason this platter is so popular. It just works. You don’t have to go crazy with a huge platter. A few nibbles is all that is needed to whet the appetite. I put out a few things that I had on hand: Mortadella, Humboldt Goat Cheese, Cucumber slices, Picos (Spanish Mini Breadsticks), G. F. crackers, olives, sliced fresh apricots)

Choose a platter size that is appropriate for the amount of people. That way you can fill it to fill abundant, even if it’s a small offering.
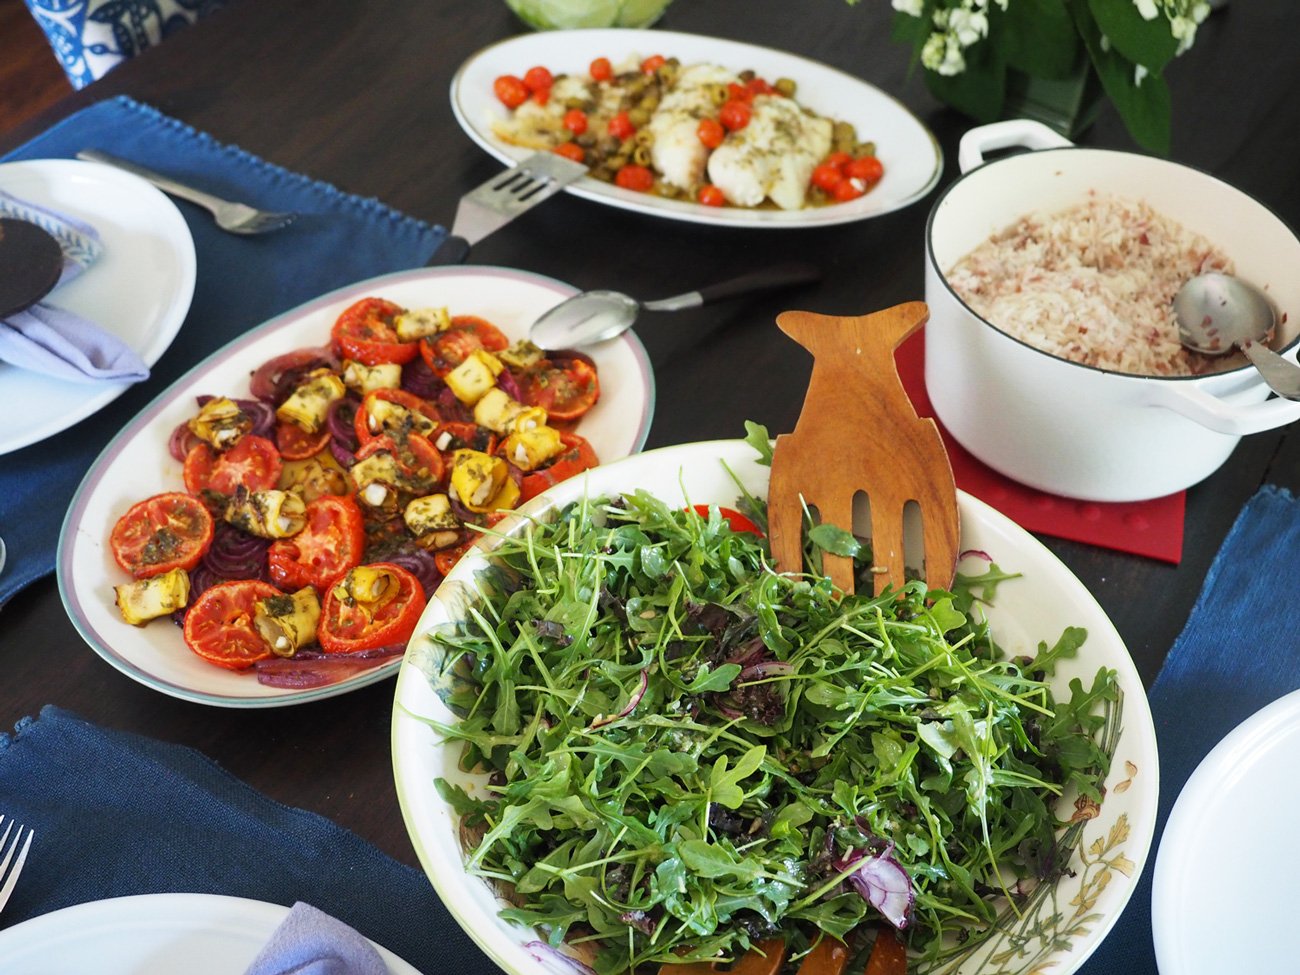
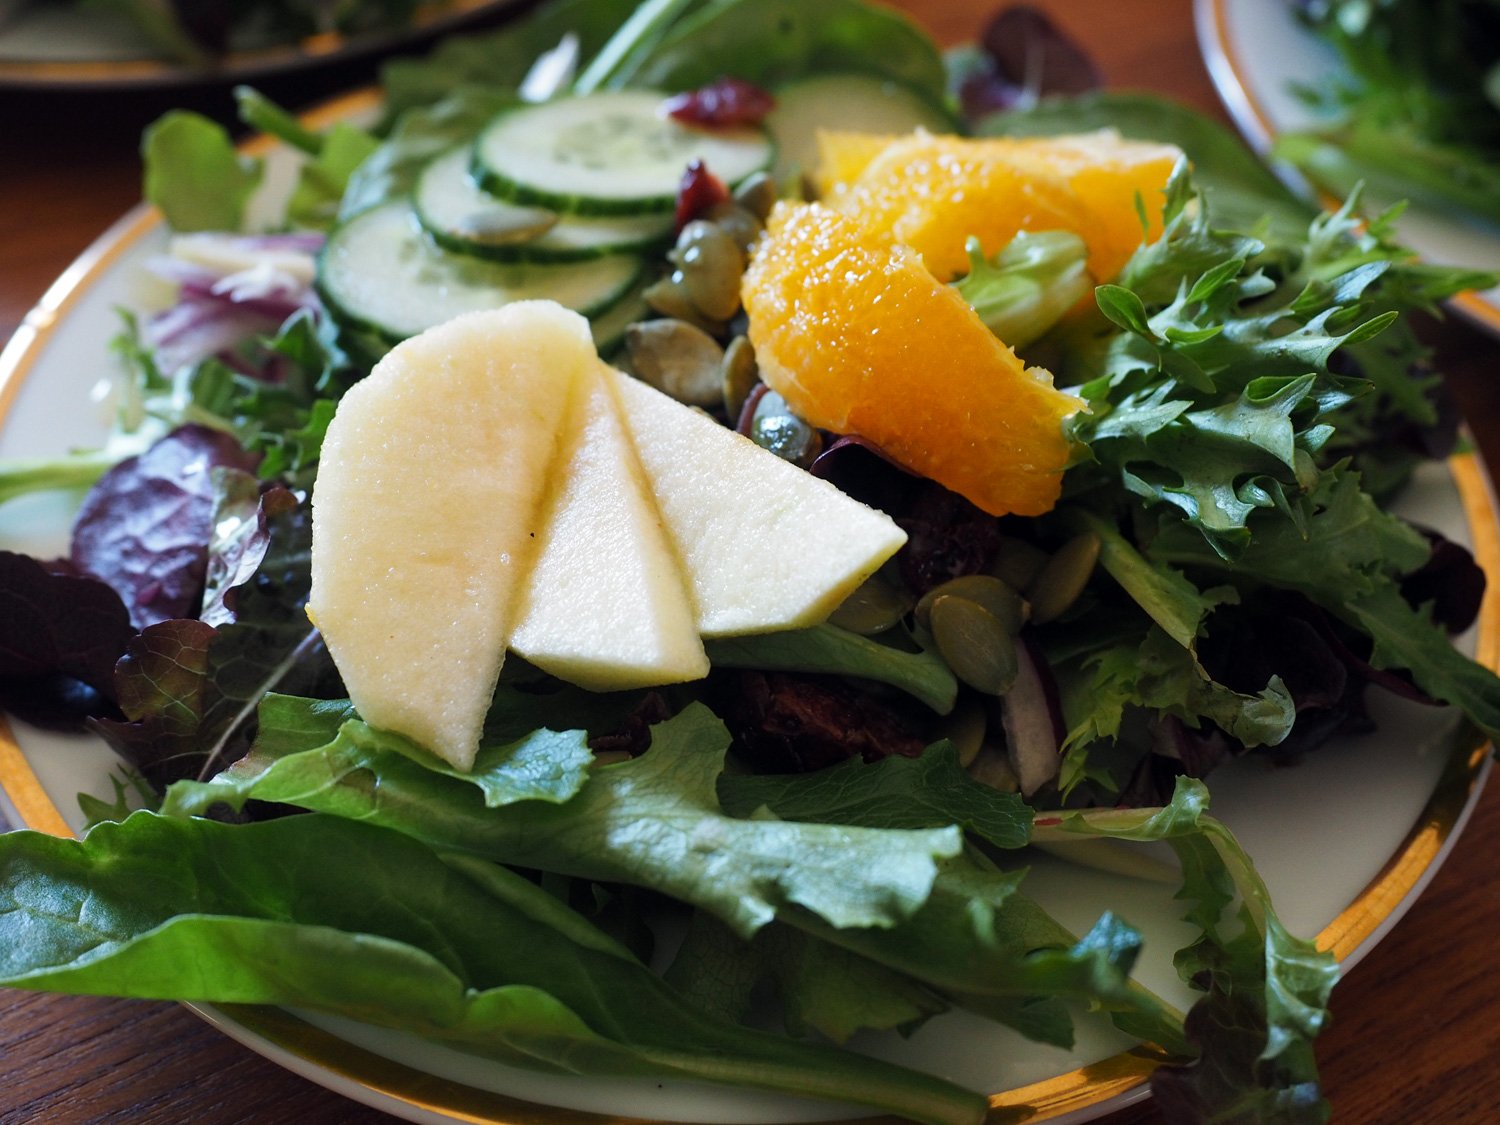
I used both baby Arugula & baby Kale for this salad. It’s fresh and crisp and the arugula adds a peppery bite.

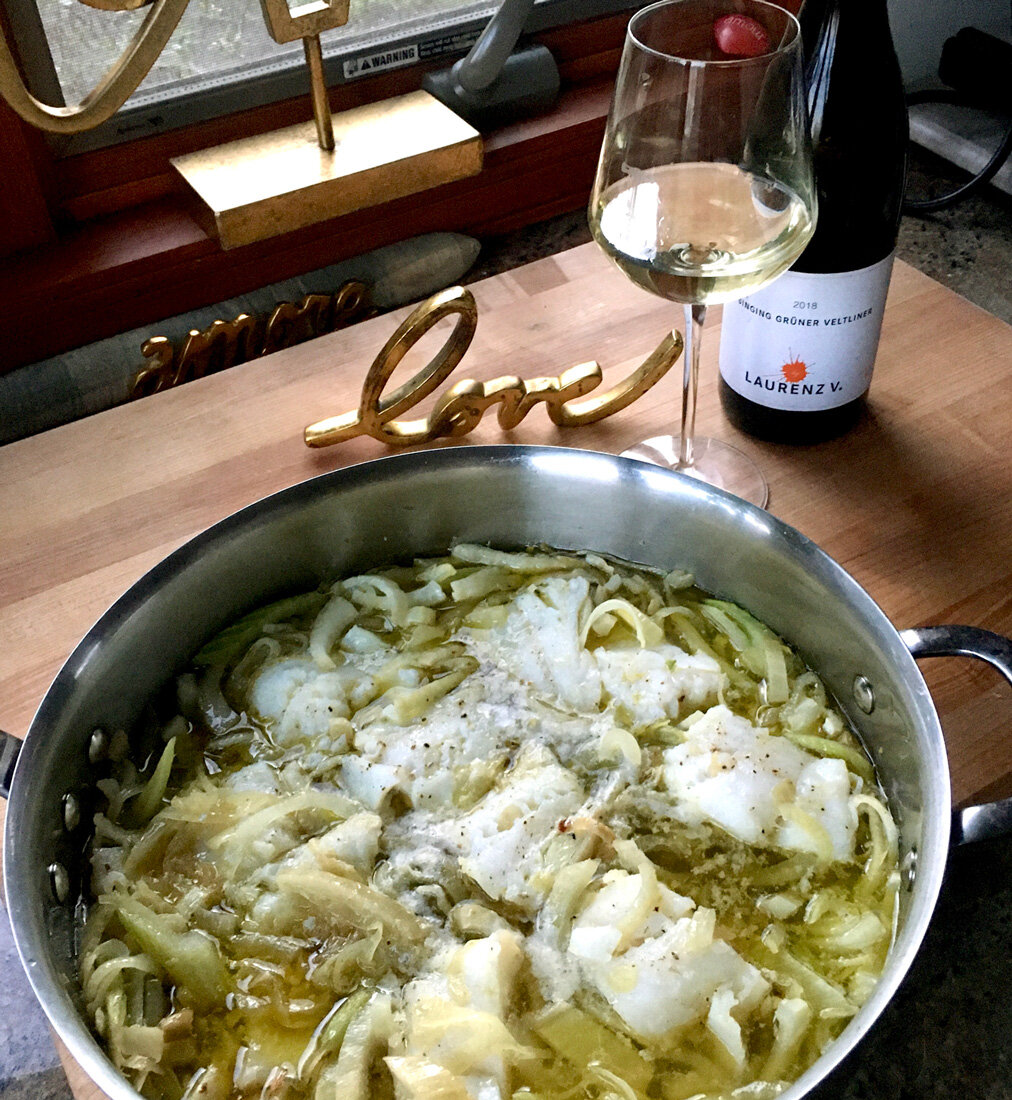
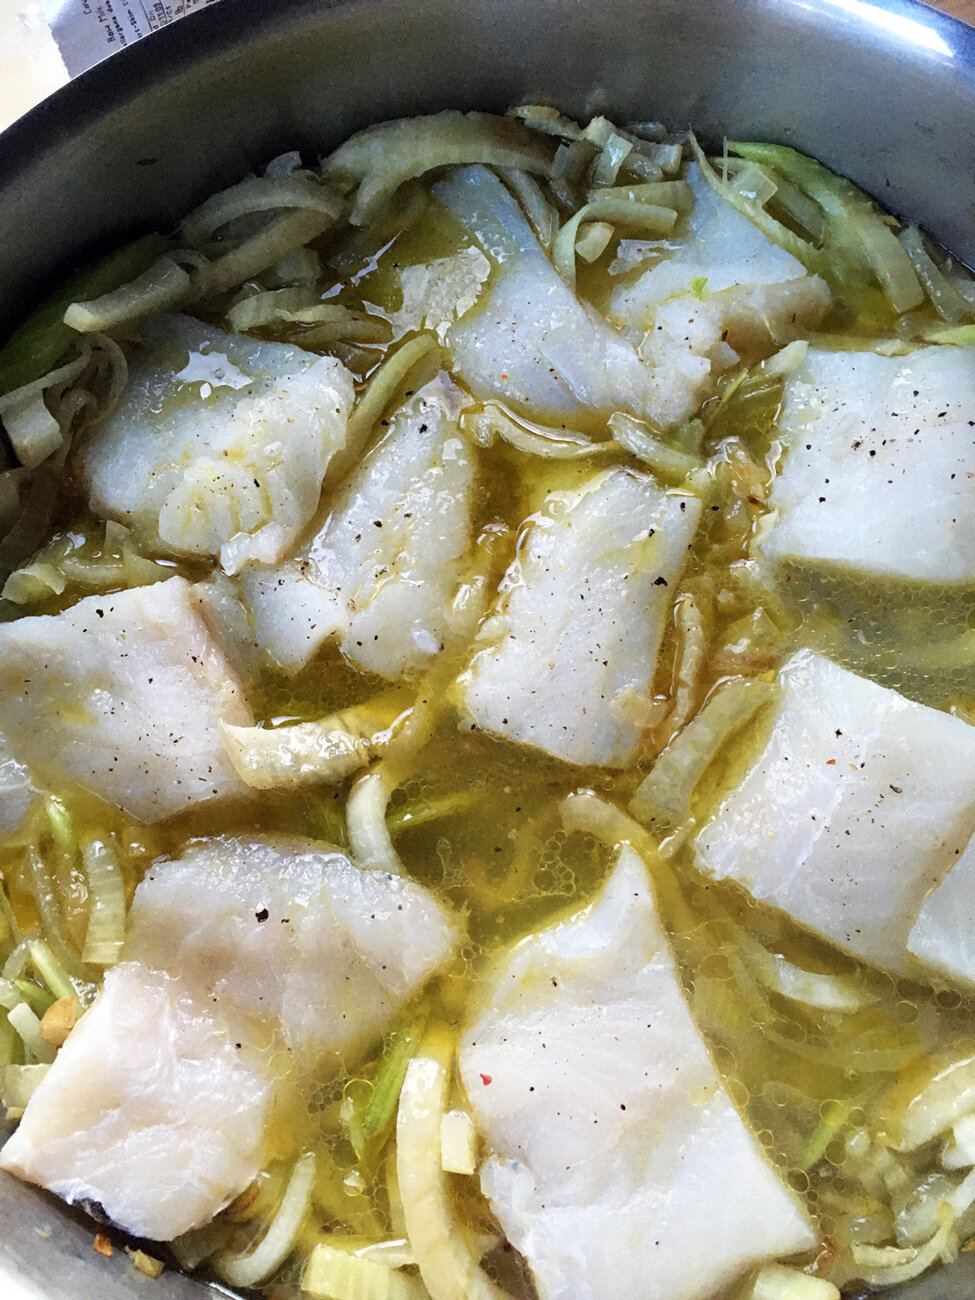
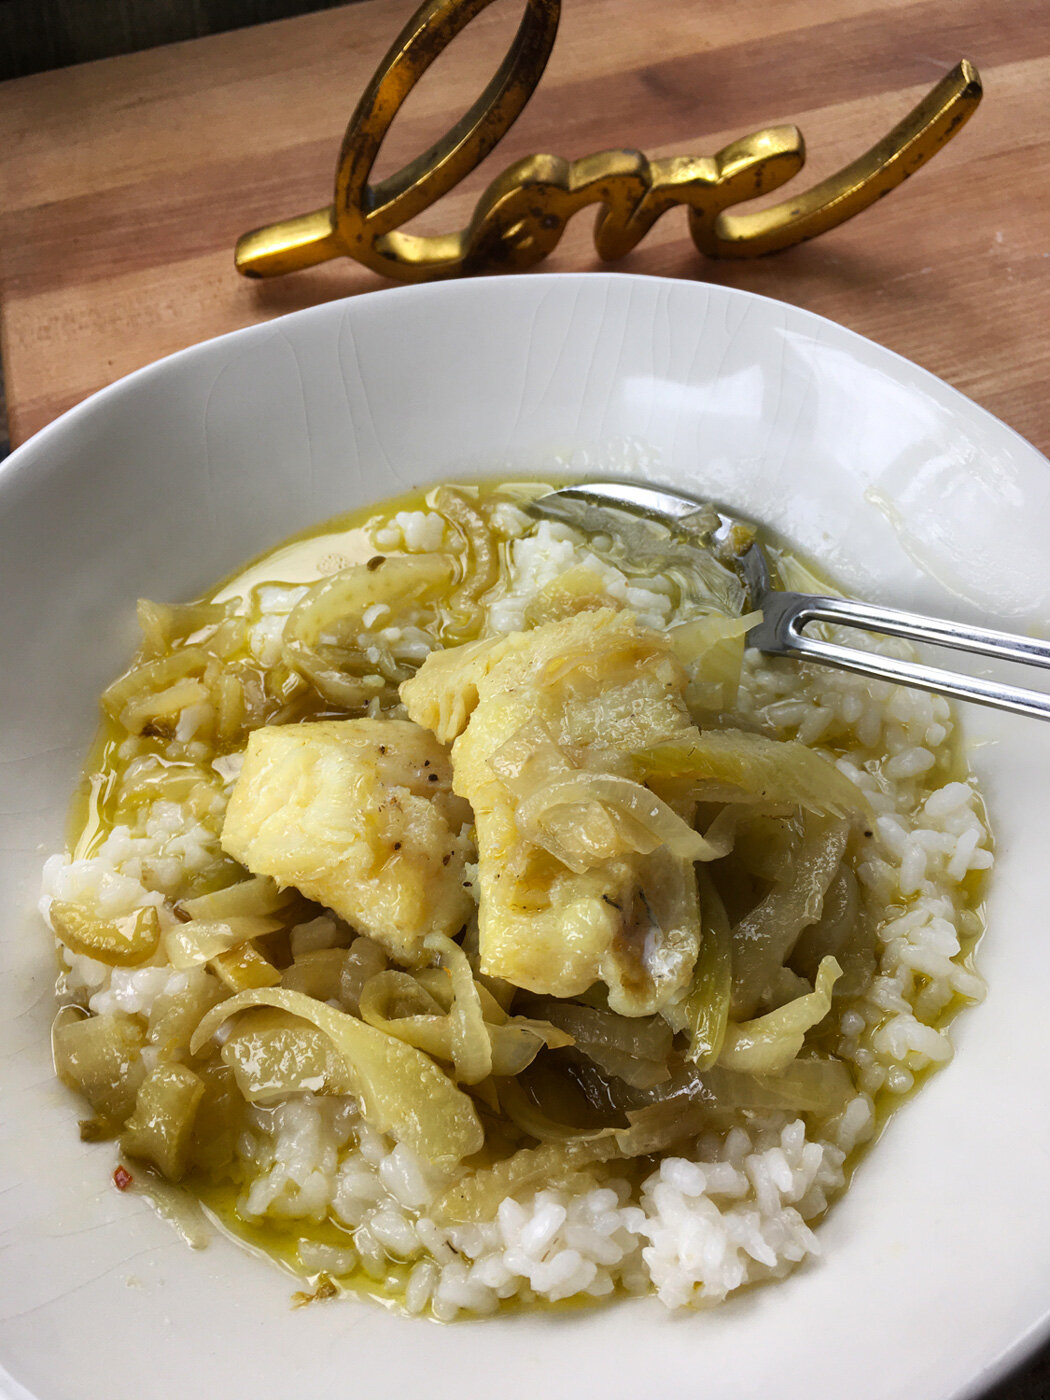
Oven Roasted Herb Oil Cod with garden picked grape tomatoes & green olives

  • Place the cod, grape tomatoes and green olives on a baking sheet.

  • Season with oil, salt and pepper (you can add chopped parsley & thyme)

  • Roast at 350 degrees for 10-12 minutes depending on the thickness of the cod.

This is easy to prep prior, covered and placed in fridge until ready to roast.

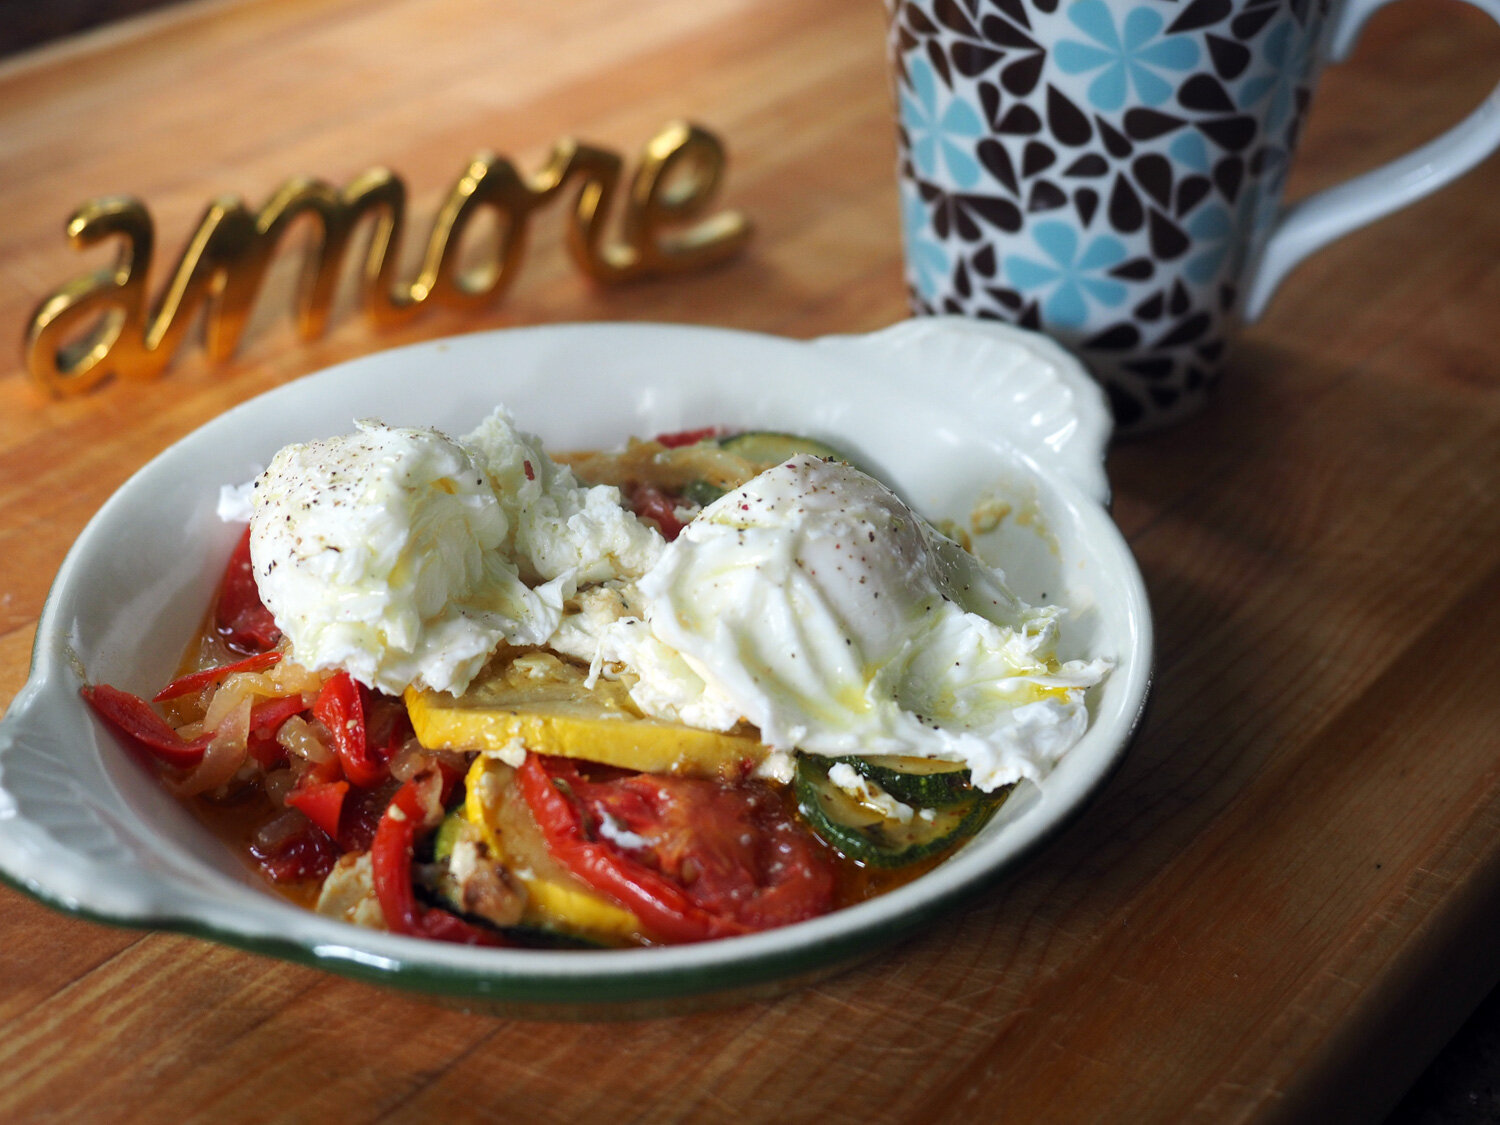
Plate it up and pour all those delicious juices over top.

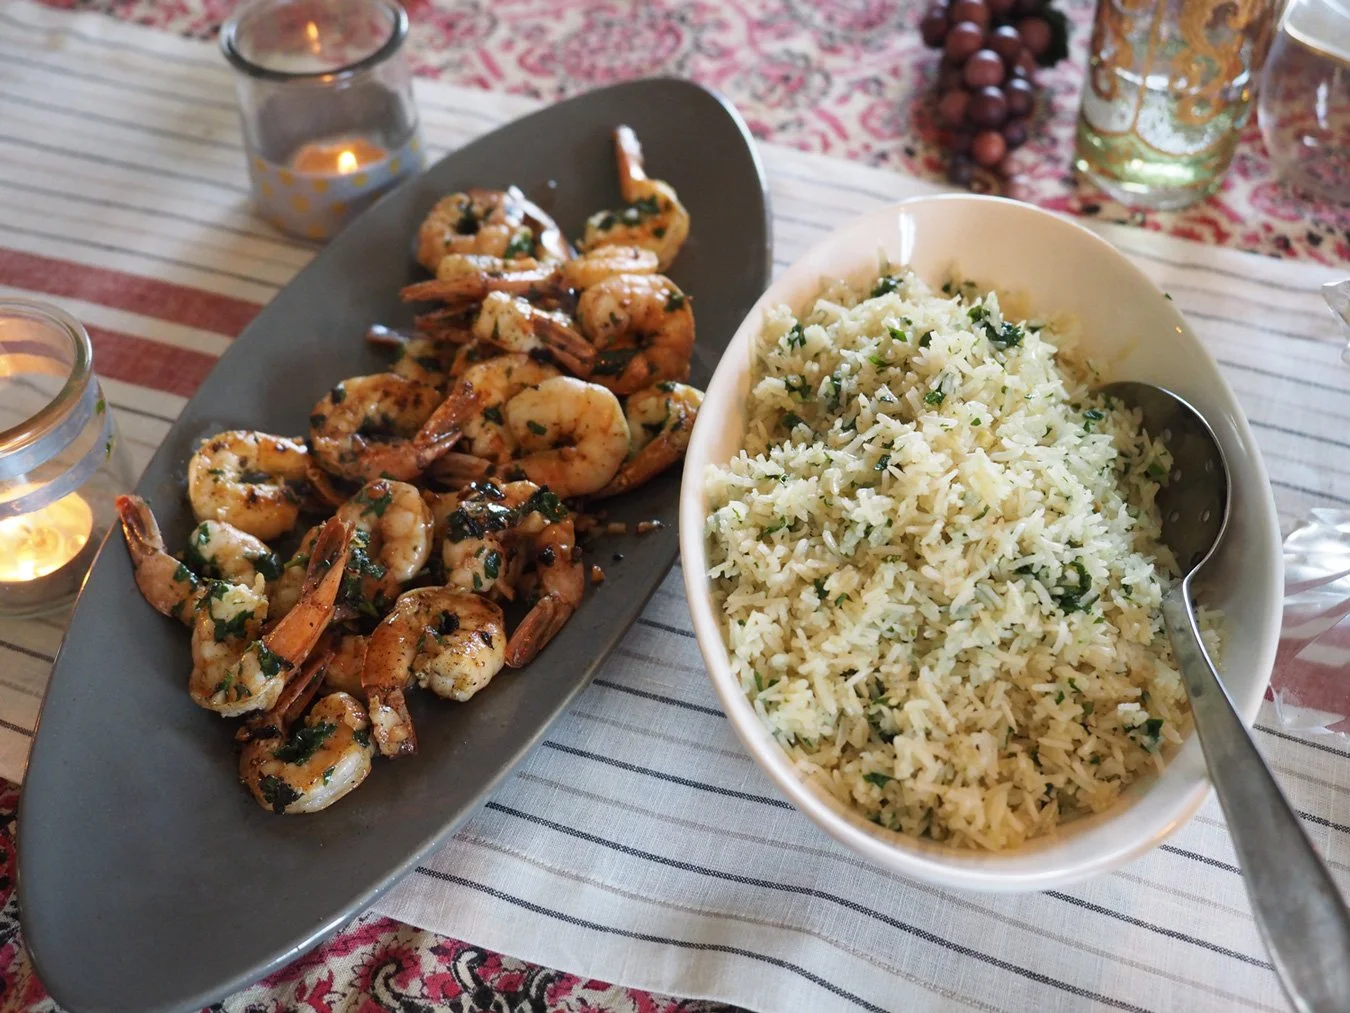
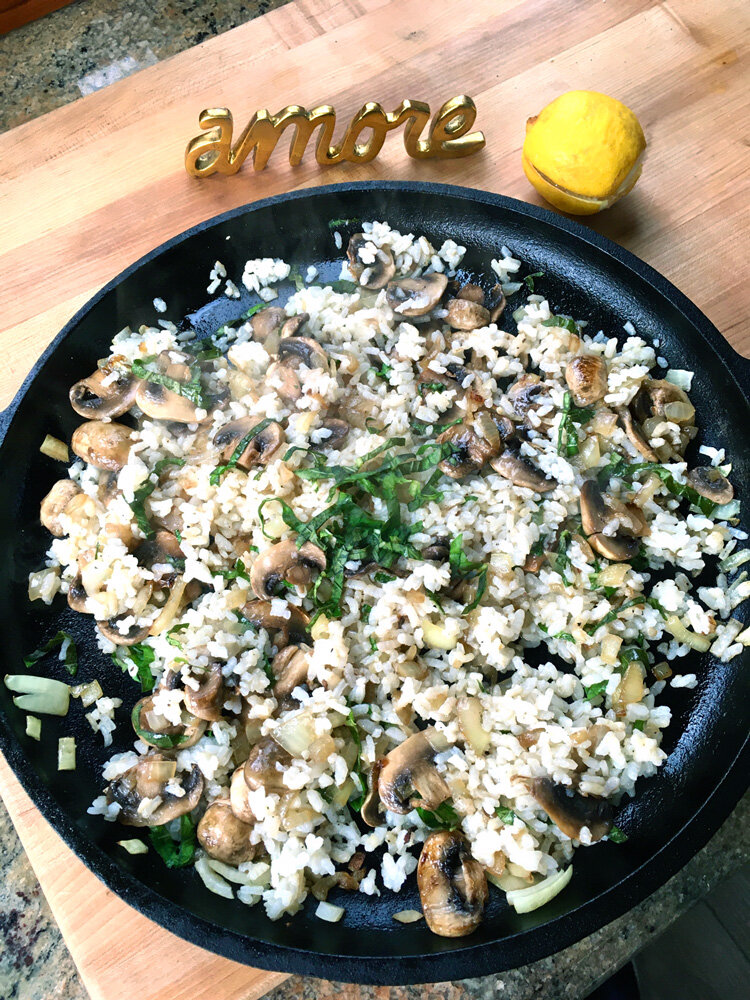
Basmati Rice with Sautéed Red Onion

  • Bring 1 cup of rice to 1.5 c water to a boil.

  • Lower to simmer, cover and let cook for 13 minutes. Remove from heat and let steam with cover on for another 5-10 minutes.

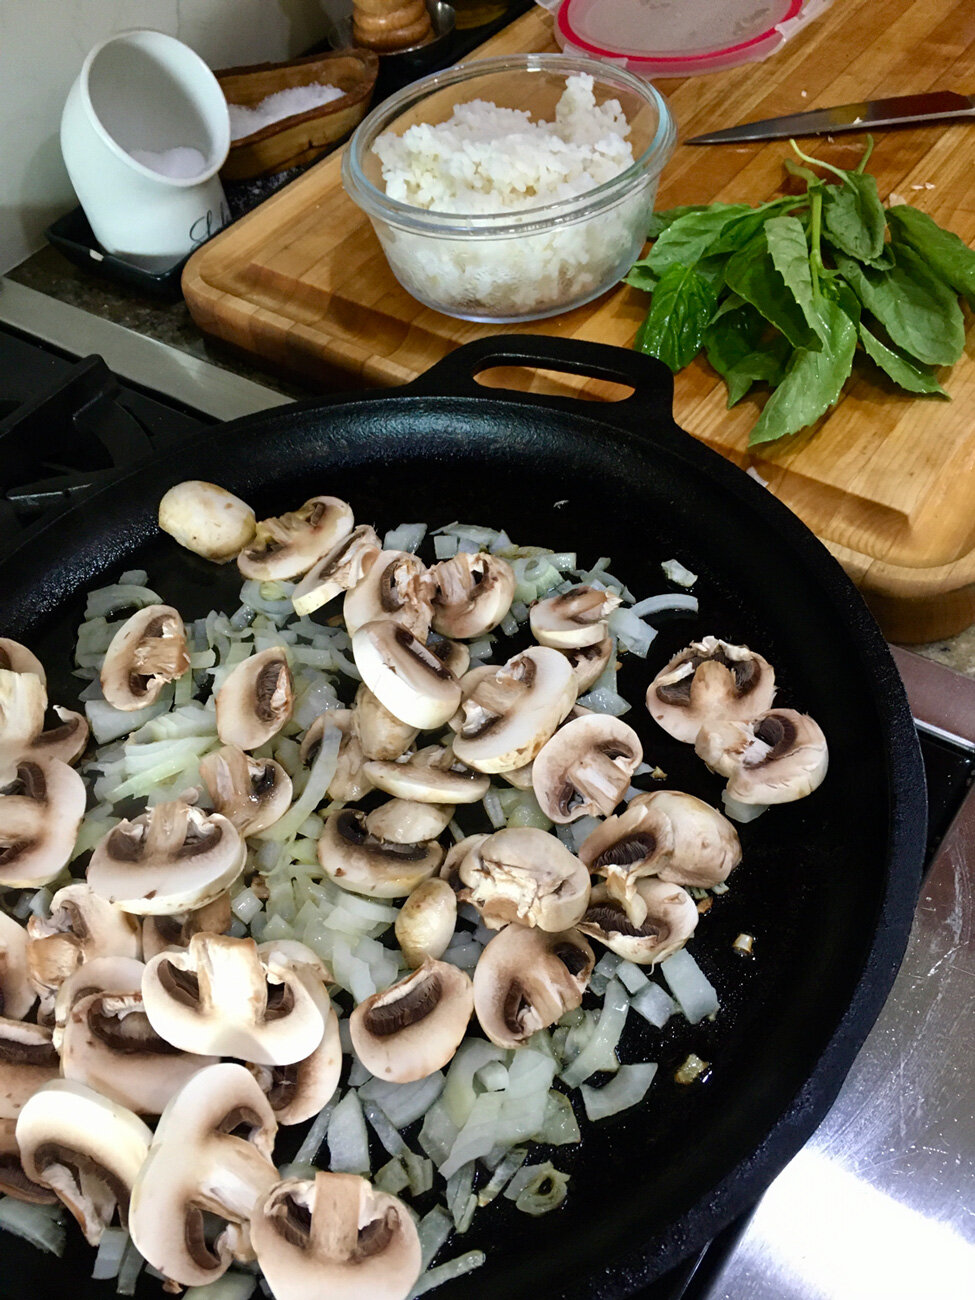
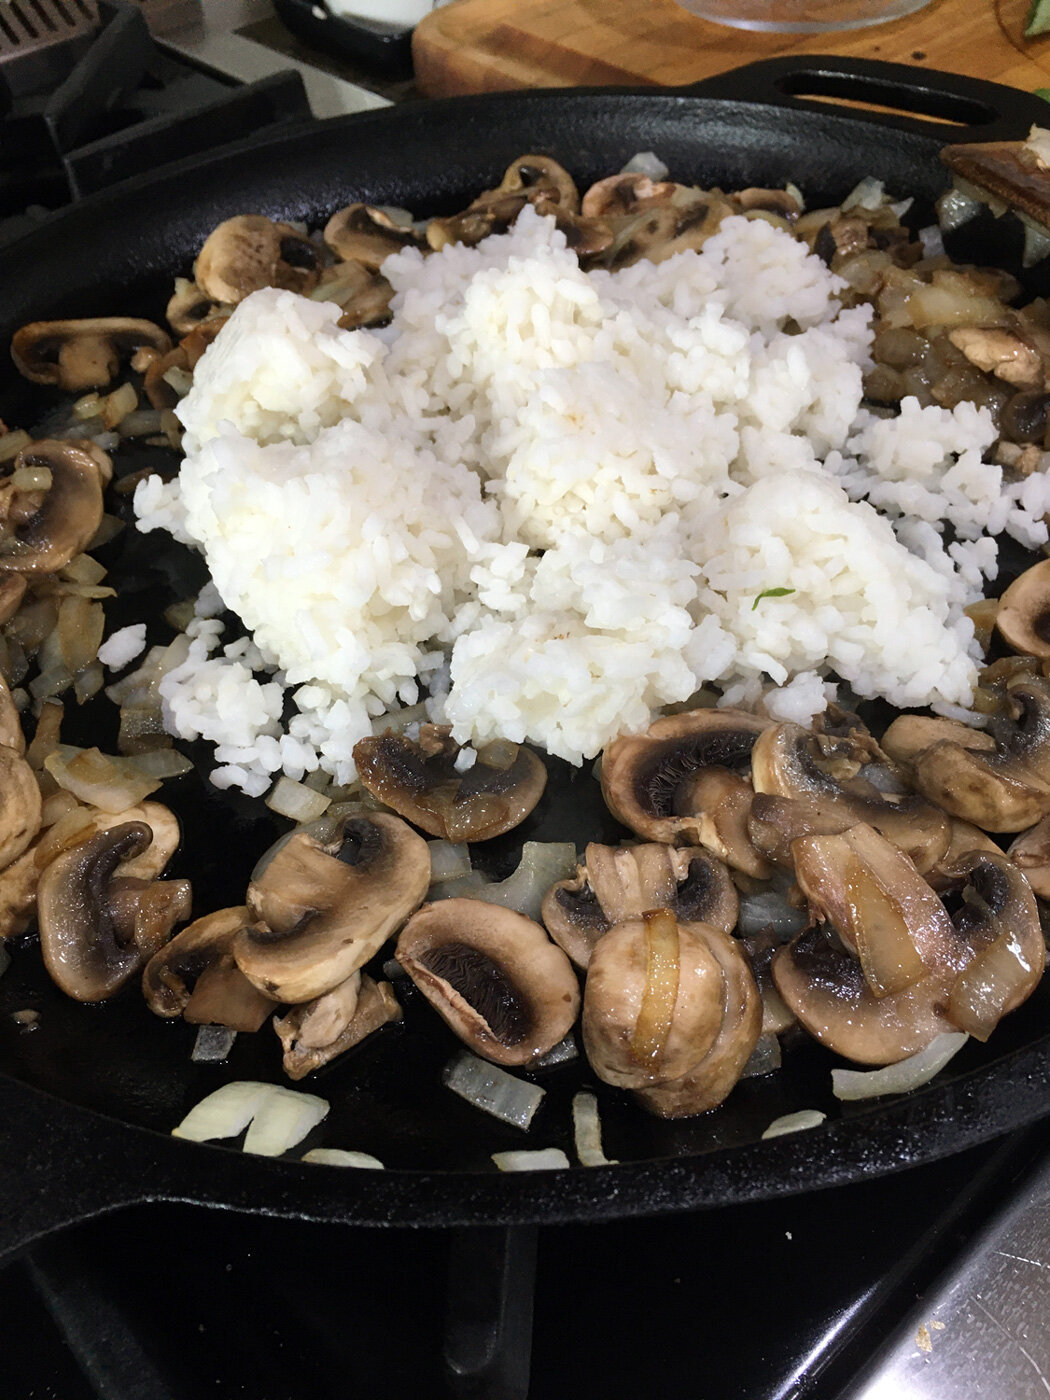
  • Meanwhile, in a cast iron pan sauté diced onions in olive oil, salt, pepper until caramelized. Then add the rice to onions and ‘fry’ it up.

This is such a simple way to enhance rice that makes it more than just a carb side dish.

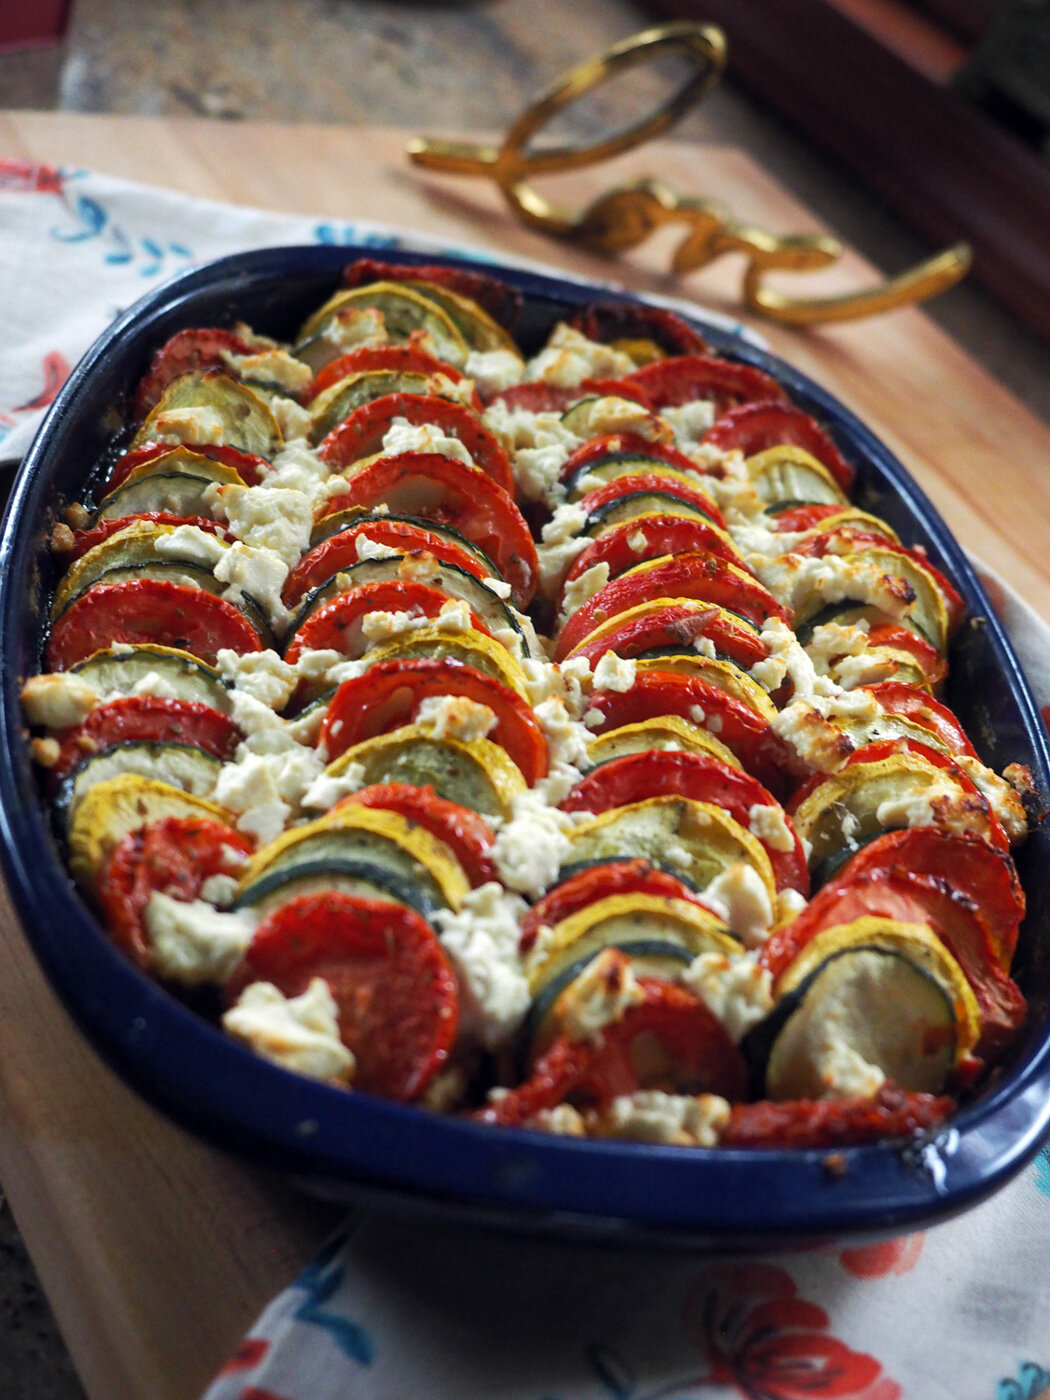
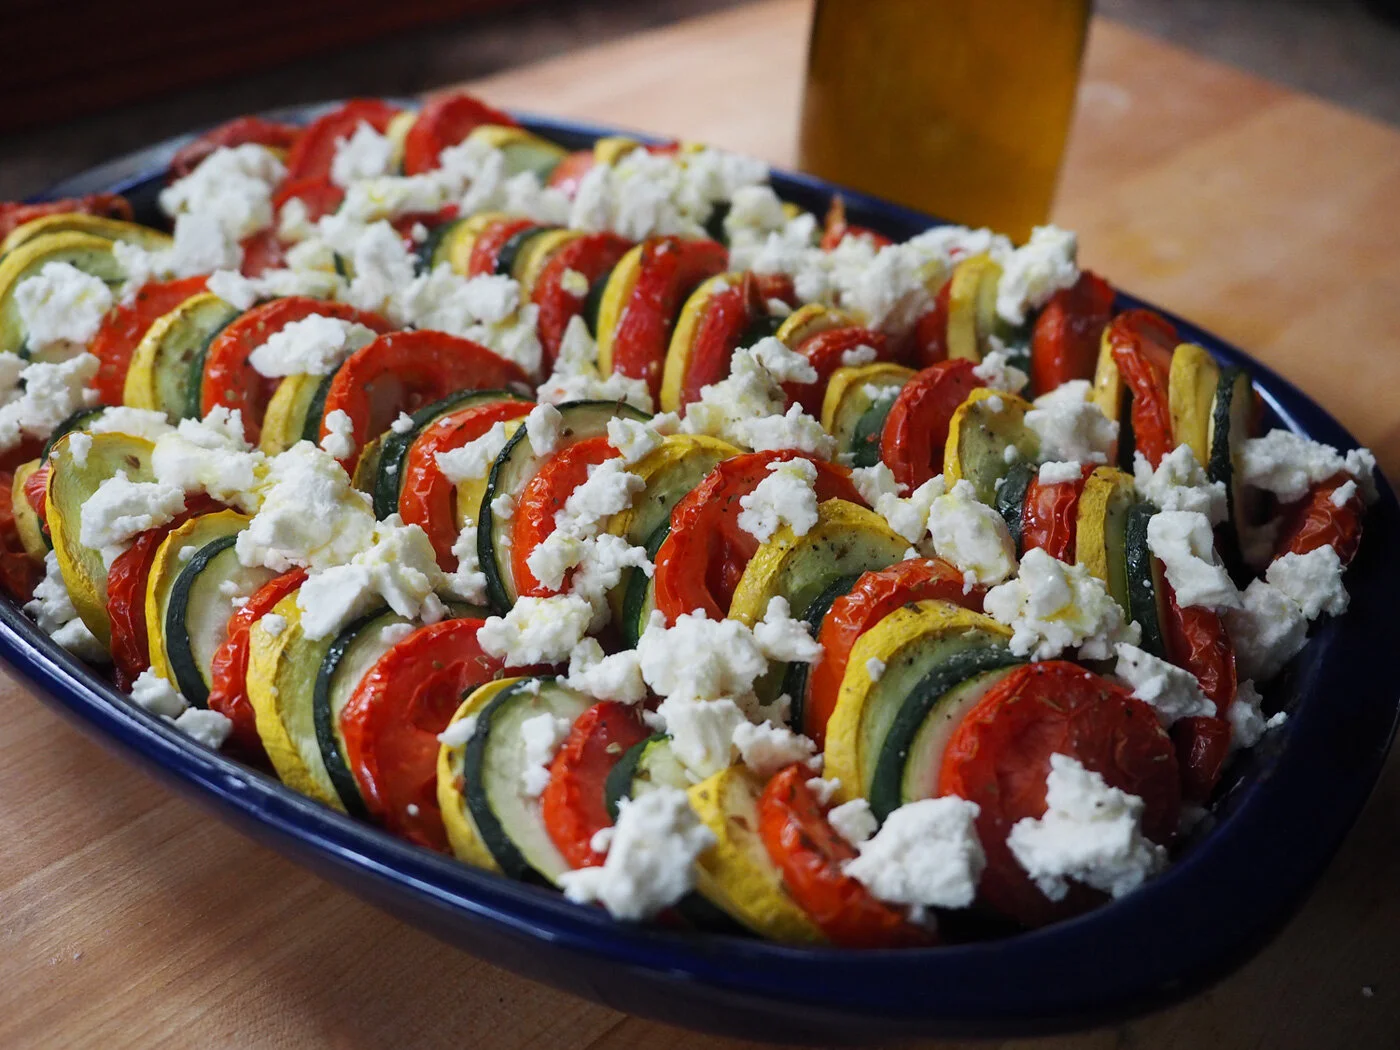
As far as prep, I could have done all this the morning of but I had an early morning meeting away from my home. So, I prepped the Yellow Squash dish the day before. Partly because this was a brand new creation which required a think through process along with time to set up for proper photos. The added benefit was that it proved to me that this new recipe could be made ahead of time and then finished before serving. Another disclosure; I already had the homemade Caesar dressing from a couple of days before from our dinner. But if you don’t have time to make fresh, then find the best, most natural dressing you can. I make most everything from scratch, especially dressings, but that doesn’t mean you have to. If this is an area where you can relieve the workload, then do so. However, if you have the time, there is nothing like fresh, homemade.

We finished by sitting outside enjoying homemade ice cream sandwiches. Dianne and I had the most lovely visit. Juancarlos was able to join us for lunch which was nice. We certainly missed, Lenny, Dianne’s husband, and hoping we can lure him for next time. I feel so grateful to have friends, and ones that have lasted decades. Spending time with people you care about enriches the soul. I believe we all are quite aware of just how true that is after spending almost 3 years in isolation.

If you can’t chisel out a weekday calendar slice, then do try to carve out a weekend moment to share it with old, and new friends alike.
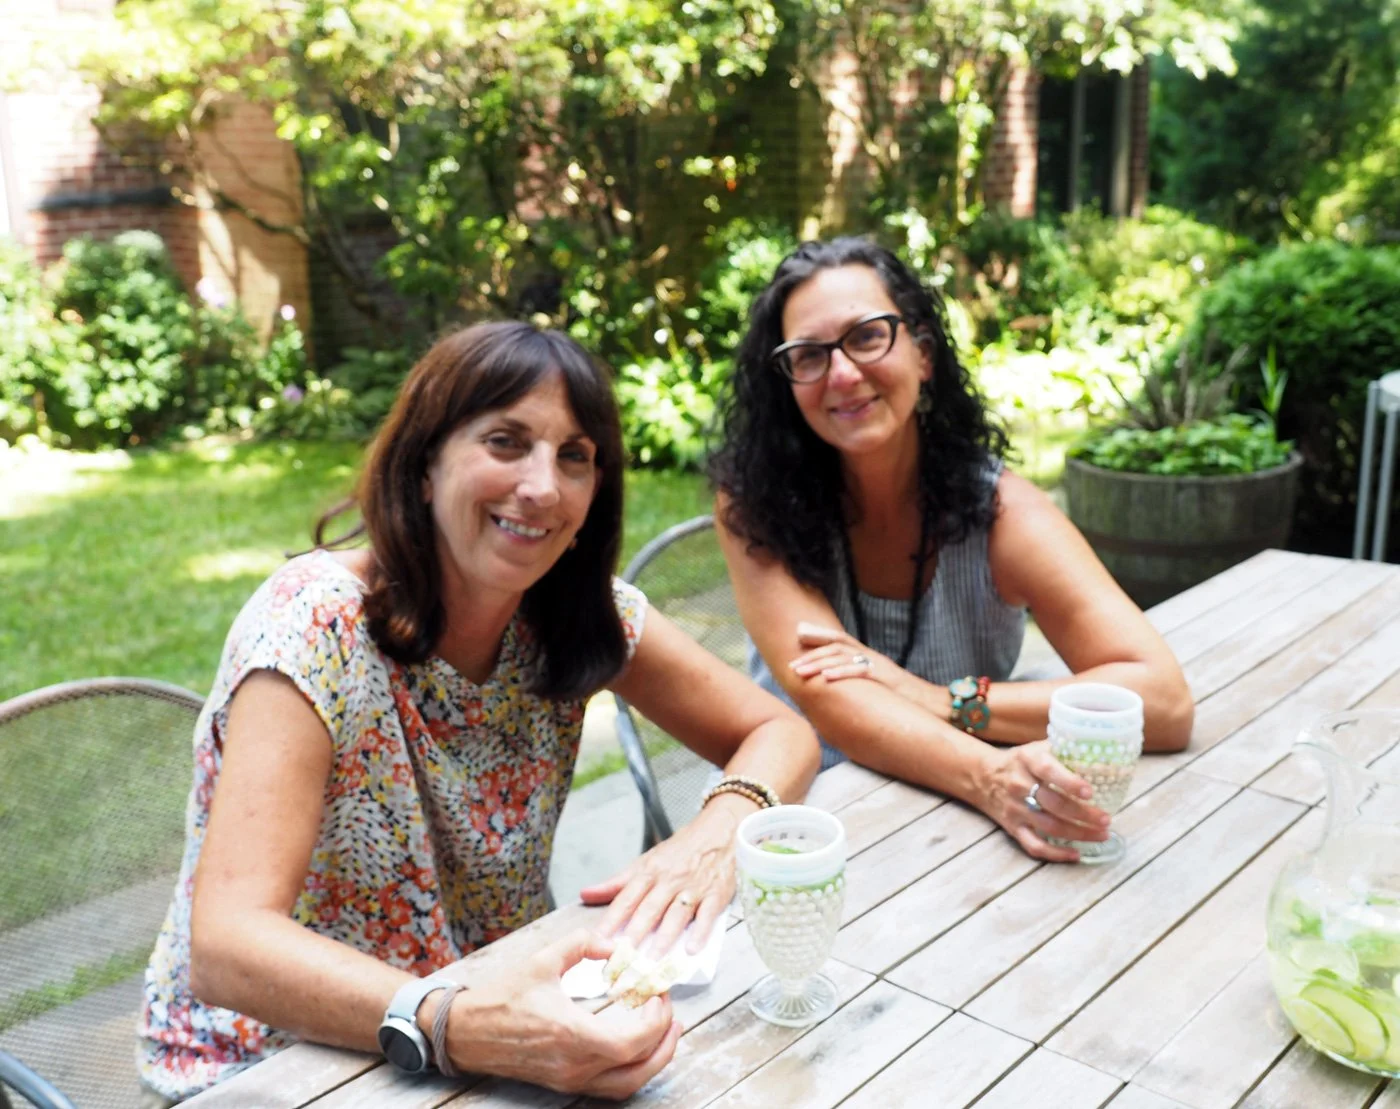
Here we are.

Dianne, always so thoughtful and gracious brought me a hostess gift that was right up my alley. A lovely candle and napkins with beautiful friendship sayings. Besides her presence, these were the most perfect gifts.


Spring & Easter Table Setting

I have long pined over creating a table setting that featured multiple layers of floral patterns on top of each other; from tablecloth to napkins to dishes. However, as I embarked on making my mental vision a reality, I encountered a major issue. My dream was way more fantasy. Believe it or not, after rummaging through my vast linen collection I realized that I didn’t quite have the variety of floral patterns I had envisioned in my noggin. And because I’m the type of person who just can’t give up on an idea, I did the next best thing. I found other patterns with the intended color scheme and worked from there.

This is just the napkin selection and a few tablecloths.

With the floral theme still running through my brain, I selected the closest linen I had to Spring florals. A pinkish toned tablecloth with leaf-like swirls resembling flowers. I remember when I purchased it from an upstate vintage shop and thought it was unlike anything I had. You may think I’m tripping on some hallucinogenic imagining that these swirls look like flowers, but I was desperate.

As I continued my search for napkins among my collection I was dumbfounded not to find a single one with any real floral print or even pink tones. But then again, would I really have bought such a thing? It was at that point when I realized that the table setting would be something different from my original vision.

An intense pattern of swirls that could be flowers, no?

I pulled out a napkin set that had similar but not exact colors. Roosters and checkerboards were as close as I could find.

I used a simple fold and roll method

Given the intense pattern of the tablecloth I felt it might be overwhelming on its own. A table runner would help provide some visual relief. Yet another pattern, not floral, but tones that would complement.

A striped table runner is another pattern. It’s simplicity allows for visual interest without taking away from the tablecloth.

The search for florals continued to be a bust. No floral plates like my little head hoped for. So, instead I pulled out a more ornate plate with gold adornments, followed by soup and salad plates with gold trim.

Dishes with gold accents.

At this point, my only option was to keep building on the new theme, and upped the ante with green and gold trimmed glassware and votives. Now I at least had a pattern on pattern theme working. Florals became swirls. The key to layering different patterns is to find a common thread of complementary colors.

Fancy glasses and votives with some gold trim help to elevate the table.

With my choices laid out it was time to set the table.

All the table setting pieces ready to be placed.

The runner definitely breaks up all that pattern and the stripes down the center act as a landing strip for the candles.

Fold, roll and wrap the napkins with a ‘floral’ themed enhancement.

Typically, I stack all the dishes, but opted to keep the salad plate on the side to hint at the original floral theme allowing the leaf design to be seen. Plus I knew I would be individually plating the salad to ensure my guests ate that course. Having the plate out makes it easy to grab and pile on the salad.

Finished place setting with utensils for each course.

Pre-plating the salad makes serving a breeze. Dressing is served in bowl for guests to add to their liking.

A pretty inviting way to welcome your guests to the table.

Side note; I find that if you plate it and serve it separately before the main meal, everyone eats it. If you place a large bowl of salad with all the rest of the meal, people often times say, “I’ll serve myself later.” And later becomes, “I’m too full.” So get your greens in early.

Ok, with the table set, it was time to move onto the actual florals. Since this was a last minute table setting, and I don’t travel to the city like I used to with my usual floral stop at Dahlia - Grand Central, Trader Joe’s would have to do. They typically have a decent selection at reasonable prices. I have to admit that I got excited about the colors I saw in the store but once I got home I realized I completely missed the mark on the pink tones. However, the purchase was made and I had to push on. I’m starting to feel like the theme went from layered florals to “ just make it happen and make it pretty.” I honestly thought the colors were more fuchsia than red hued but oh well. Pops of yellow and green made it all feel fresh and Spring like. The large yellow jug added more seasonal brightness and helped to tie it back to the napkins.

Definitely a burst of floral color

The key to a well composed arrangement is color blocking and keeping to just a few colors that complement one another.

The colors were a bit off but it still adds a happy feel.

In the end the reds and yellows echo the colors in the napkins.

Happy colors.

As for the meal, this was a Palm Sunday lunch. I told my sister, Alyssa, that it would be simple since all this was a last minute idea. But alas, I made much more than a simple meal for just six of us. It ended up being quite filling, and delicious. So, if you want something a tad different for Easter, this menu could work for an simpler meal than the usual extravagant lamb dinner. Here goes:

Appetizer

  • Roasted Grape Tomatoes in Garlic Oil

  • Whipped Feta
    This is an easy way to elevate a humble chunk of feta. Simply place the desired amount in a mini food processor and buzz it until smooth. One important note: rinse the feta block with cold water first to remove some of the saltiness. For some reason, once blended it brings out even more of the salt flavor.

  • Garlic Bread

Oven roasted grape tomatoes, whipped feta, garlic bread

First Course

  • Cauliflower Soup

  • Mixed Greens with Apple/Orange/Cucumber & Date Dressing: I used my Bibb, Arugula Butternut Squash Salad recipe swapping out the lettuces with mixed greens and the butternut squash with apple, orange and cucumber. All the rest of the ingredients and dressing remained the same.

Individually plated salad of Mixed greens with apple slices, orange segments, sliced cucumber, peptias and dried cranberries.

Main Course

  • Pork Loin basted in Rosemary Garlic Butter
    Sear the pork loin (seasoned with salt & pepper) in a cast iron skillet on both sides. Remove from the pan and add butter, sprigs of rosemary and several whole garlic cloves slightly smashed. Once butter is melted, return the pork to the pan and spoon the butter over the pork to finish cooking and flavor the meat.

Rosemary Garlic Butter basted Pork Loin.

  • Seared Shrimp with garlic & parsley
    Marinate the shrimp with crushed garlic, parsley, salt, pepper, crushed red pepper flakes. Sear in a cast iron grill pan. Remove shrimp and add white wine to deglaze the pan and pour over shrimp.

  • Basmati Rice with herb garlic oil
    Make a “chimichurri” sauce of finely chopped parsley, cilantro, scallions, crushed garlic, lemon zest and squeeze of lemon juice, salt, pepper, and olive oil.
    Cook Basmati rice 1 : 1.5 ratio to water. Bring water and rice to a boil, lower heat, cover and cook for 13 minutes. Keep the lid on, remove from heat and let steam for another 5-8 minutes
    Add as much of the herb garlic oil as desired. You can make the rice and oil ahead. Then right before serving warm the rice and add the sauce. I used a cast iron wok to ‘fry up’ the rice and then added the sauce to finish.

Sautéd shrimp and Herb Oil Basmati Rice

  • Oven Roasted Red Onions
    Onions are an overlooked vegetable. When oven roasted they become caramelized, sweet and delicious. Cut them in half, trimming the stem end but still leaving enough of the core to hold the onion pieces together when you cut them into quarters. Place on sheet pan, drizzle with olive oil, salt and pepper. Roast at 400 degrees until browned and caramelized.

  • Broccoli Rabe
    Wash, trim and boil the broccoli rabe until tender. Sauté in oil, garlic slices and season with salt & pepper.

Oven roasted red onions, the humble vegetable turned the star. Broccoli Rabe with garlic oil.

Dessert was a large platter of fruit and a few Saint Joseph Italian pastries. Apologies there are no photos of that course. Even though everyone said they were stuffed, they grabbed the fruit and pastries before I could get a picture. Just image a colorful array of seasonal fruit, along with luscious filled pastry.

I hope this inspires you to pile pattern on top of pattern and let your imagination work with whatever you have on hand. I started with an idea, veered off the flower garden and landed on an array of swirls, roosters, stripes and sparkle that still made me smile. A lesson in forging forward in whatever direction the universe provides and making the best of what life has to offer.

Pro Tips & Time Saving Ideas Part 2

IMG_2574.JPG

The last Pro Tip post seemed to be popular among readers, so in effort to be a people pleaser, I present you Pro Tips and Time Savings Ideas Part 2.

Like most ideas I have, they stem from wanting to be more efficient. Whether it’s cooking, baking, or organizing, my brain is always figuring out how I can achieve the goal quicker, more effectively and with the best results.

Perfect example is the history of me making my ‘Acorn’ Shortbread cookies. I put acorn in quotation marks because originally the cookie was shaped like an acorn with the bottom portion dipped in chocolate. If you’ve ever worked with shortbread you know how dry and crumbly it is. To hand shape each cookie into an acorn used to take me hours. Until I figured out that the cookie tastes the same no matter what form it takes. Naturally, it still needs to look appetizing, but since we’re not squirrels, most any other shape would suffice, and without all the extra hand shaping work. The first couple of years I was still hand shaping but not so intricately. Then I realized that I could ratchet up my efficiency level up a few notches. I packed all the dough into a baking sheet and rolled it out evenly. Then I cut squares or rectangle shapes, and using a spatula, lifted them onto another baking sheet. Voilà, the process now takes minutes instead of hours. And instead of dipping each cookie, I use a piping bag and drizzle the chocolate across dozens of cookies at the same time. In my opinion, I like the look so much better.

I thought I would share that anecdote to illustrate how thinking things through can lead to working smarter rather than harder. I’m all about that x10! I hope these next set of tips do the same for you.

Pro Tips #1 - Roasting or grilling onion slices evenly: Onion Lollipops

I love onions. I make them in tons of ways including using them as a side vegetable. So, when I had a private chef gig out in the Hamptons last summer, I included onions as part of the menu. I wanted the onion slices to look composed and kept together, and of course, evenly cooked. By using this trick, you achieve just that.

First, peel the onion. Then place skewers into the onion spacing them the thickness you want for each slice. Then using a sharp knife, simply slice between the skewers. You wind up with onion lollipop sticks that can be roasted in the oven or grilled on a cast iron skillet. Drizzle with olive oil, salt and pepper then cook as you wish. Of course, you remove the skewers before serving. Unless, of course, you devise an interesting way to serve them keeping their lollipop look. Up to you. The beauty of this method… Let me count.

  • The onions cook evenly

  • It is easy to turn because all the rings are corralled together

  • They can be used in a sandwich or on a burger without onion flying all over the place

  • They look beautiful

Should I go on.

Pro Tip #2 - Rice is Nice but More is Better.

When you make rice, why not make 2 or 3 times what you need. If you are going to do the work once, why not take advantage of the efforts and make it easier at a later date. Cook the rice as you normally would. Set aside the portion you don’t need immediately by spreading it out on a sheet tray to cool for no more than an hour. Once cooled, place the extra portions in labeled plastic freezer bags. The best part about this is that when you need it in the future it doesn’t take 20 minutes to make. Remove the rice from the plastic bag and place it in a covered pan over a low flame and gently let it steam. If you have a microwave, which I do not, then you can warm in a microwave safe container. If using for fried rice, just throw in in the wok or pan directly. No need to steam since you want the rice to be cold. That’s the best way to make fried rice.

Various Uses:

  • Use for Stir Fry dishes like chicken and broccoli or shrimp and mushrooms

  • Add to soups

  • Use for Fried Rice

  • Rice cakes

* Storing and reheating rice needs special attention. Please refer to this link for important information to ensure that you safely store and reuse rice.

Pro Tip #3 - Buy in Season & Enjoy All Year Long.
Oven Roasting Tomatoes & Freezing

Some of you may recall the summer I bought 100 lbs. of tomatoes at the end of the season. Granted that is an inordinate amount, but I continue to reap the benefits of roasting these ruby red jewels. And that, my friends, is exactly what I’m talking about. Make the effort once and continue to feel the love.

For more on the various ways to oven roast or dry roast tomatoes, check out the links below.

The Great Tomato Caper

Tomatoes Galore

I hope that these few more tips and tricks will aid you in the kitchen, and make cooking easier and bring loads of benefits. For more ideas, check out:
Pro Tips & Time Saving Ideas Part 1

 
DP-stirredwlove-ID1.jpg

5 Basic Ingredients - 4 Different Dishes

mushroom.soup.setup.jpg

Being home in shelter in place means so many things to so many people. It conjures up different experiences for each of us. Some people are using the time to get home projects accomplished. Get their yards ready. Some are decluttering. Some are mastering their skill set like solving puzzles. Others are finding hidden talents like painting, dancing or singing. Maybe you are learning a new language. Whatever this time brings, my wish is that we embrace it.

For me, I’ve gone back to my comfort zone which is cooking and baking, using all the food I have, and using it wisely. This has been, and still is, one of my strong suits. It’s how I honed my cooking skills and harkens back to my ‘something from nothing’ style and overall approach to cooking. Which is; check out what you have and figure out what to make, regardless of the ingredients or the quantities.

For those you who aren’t aware of how I began this style, it started when I was in my late teens, just wanting to experiment at home. (You can also click on my About page for more of my back story.) My grandmother, who was both an awesome cook and amazing baker, and one of my strongest influencers, would look on with doubting eyes as I mixed up and cooked up concoctions for the family to try. I often heard her famous line, “What a “mushgononza”. Which is basically the slang version of the Italian word mezcolanza meaning mixture or mash up of several things. I guarantee you that she meant it more as a mixed up mess. However much she may have doubted me during the cooking process, she inevitably would turn to me and say, ‘Not bad, not bad at all.’ Phew, praise from the master.

My Grandma Perri making her famous peaches & cream cake.

My Grandma Perri making her famous peaches & cream cake.

However, I would say that this style of cooking truly took form when I used to visit my sister after she first got married. Jill rarely, ok, never had fresh herbs but usually had a pantry full of canned stuff, and a freezer of frozen items. I would look through her stash and try to figure out what can I make from what was seemingly a hodge podge of items. For more on this, you can click the highlighted link for the Zucchini Orzo Pie story.

From that point, I just kept that style in my own kitchen. Not caring too much about recipes, or amounts. Simply buying what looked fresh, and then once at home figuring out how they all would dance together. Which is why I sometimes encourage you to not fuss about recipes so much but try your hand at using however many carrots you have, or to substitute what you. Sure, I give you amounts and recipes. That’s because I want you to cook, and get a feel for how much looks right. Some of you, I know, are pros and already do this, and just use the recipes as guides. My recipes are a jumping off point, and are here for whatever level of cooking you feel comfortable.

And so in that style of use what you have,
I give you 4 super simple dishes using a combination of 3-5 basic ingredients and then adding a protein and a starch, thus turning them into different dishes. Using slightly different cooking methods, you also create different flavors and textures. From sautéing to stir frying, braising or simple soup making. This is like those old Chinese menu ideas; two from column A, one from column B, etc. Feel free to mix and match. That is the beauty of basics, you can create so many variations.

Celery and fennel.

Celery and fennel.

The Basics:

  • Onions

  • Celery

  • Fennel

  • Carrot

  • Basil

 The Proteins:

  • Shrimp

  • Cod

  • Mushrooms

The Starches:

  • Polenta

  • Barley

  • Rice

Mushroom Barley Soup

4 Basics + 1 Protein + 1 Starch
(Onions, Celery, Carrots, Basil) + (Mushrooms) + (Barley
)

Instructions:

  1. Cook the barley in a separate pot.

  2. In a medium stock pot, sauté onions, celery and carrot in olive oil until softened and season with salt and pepper.

  3. Add the mushrooms, over a medium heat cook until softened.

  4. Then add chicken or vegetable broth or water to cover and let simmer.

  5. Add the barley once cooked. I added basil which I had on hand and it gave it a nice floral note that I enjoyed.

Serve with a salad or crusty bread and lunch is served. And check out the video below. I’m getting all fancy now and inserting moving visuals. Enjoy a steaming hot bowl of comforting soup.


Simple Shrimp Sauté

3 Basics + 1 Protein + 1 Starch
(Onions, Celery, Basil) + (Shrimp) + (Polenta
)

Instructions

  1. Cook polenta according to the package. (You can add cream and butter at the end to make it luxurious and extra creamy, but keeping it in the basic mode, use just water.)

  2. Sauté the sliced celery and onions until softened, then season with salt and pepper. Keep the celery leave tops and use them along with the basil to finish.

  3. Add the shrimp and cook until just pink, then add the freshly chopped basil and celery leaves.

  4. Top the polenta with the shrimp mixture. Yum and Yum

Another video for your viewing pleasure.


One Pot Poached Cod

3 Basics + 1 Protein + 1 Starch
(Onions, Fennel, Celery) + (Cod) + (Rice)

Instructions

  1. Wash, dry and cut the cod into chunks (approx. 2” squares) and set aside.

  2. Sauté the sliced onions, celery and fennel in olive oil, and slowly cook until softened.

  3. Add water and then nestle the cod pieces into the pan. Cover and let poach until the cod is white and cooked through. Depending on how thick the pieces are this should only take 8-12 minutes. A beautifully flakey cod with braised vegetables is soothing and delicious.


Leftover Rice & Mushroom Stir Fry

2 Basics + 1 Protein + 1 Starch
(Onions, Basil) + (Mushrooms) + (Leftover Cooked Rice
)

Instructions

  1. Chop the onions into a small dice. Sauté using olive oil until softened, add salt and pepper.

  2. Slice the mushrooms and add to the onions and let them cook together until the mushrooms get browned.

  3. Add the cooked leftover rice until completely heated through. Add seasonings to taste. (Salt, pepper or even red pepper flakes). Finish with chopped

And there you have it, 5 basic staple ingredients combined with other fairly basic proteins and starches. And just like that you have 4 different meals that are complete, hearty, delicious, and I dare say… EASY.

Send me your mix and match creations. I would love to hear how you are making the most of your basic items.


Squash, Tomato, Peppers & Onion Bake

ratatoulle.final2.jpg

What do you do when you are mandated to follow a food regimen that limits the ingredients you can consume? First, take a sedative. A big sedative. Next, check the food list and start getting creative.

As I mentioned a couple of months back, I started seeing a new naturopath. Among one of my main goals is to try to cure my 3 year sinus issue. Yes, 3 whole years. As we all know, the shin bone’s connected to the thigh bone, the thigh bone’s connected to the hip bone. The hip bone’s connected the backbone. And so on and so on. You get the point. Everything in our bodies is connected and related to one another. Which is why gut health is key. So among one of the paths to curing my sinuses is getting my gut better. To recap, I’ve been following the GAPS* regimen which cuts out all carbs, grains and starchy vegetables. I had been following this diet for weeks, so when I say sedative, there wassn’t enough sedation to calm my aching pasta brain. But I was a trooper, and wanted to get better so I stuck with it and came up with yummy things to eat.

* Links for more info on GAPS at the end of the post.

I decided to visit my happy place, AKA the farmer’s market, where I picked up as many of the things I could eat. Zucchini, Yellow Squash, Onions, Peppers, Tomatoes, Herbs. These immediately reminded me of those baked dishes with swirls of zucchini. So, I thought I would give it a spin.

The vegetable line up. Zucchini, yellow squash, red and yellow peppers and onions.

The vegetable line up. Zucchini, yellow squash, red and yellow peppers and onions.

Now you know I couldn’t just leave it at that. On this ‘diet’, I can actually have goat and sheep cheeses. Thank goodness, or a crime might have been committed without this one saving grace! With curds in hand, this veggie swirl was going to be topped with cheese glorious cheese.

Ingredients

2 medium zucchini, sliced
2 yellow squash, sliced
2 medium onions, sliced
2 red peppers, sliced
2 yellow peppers, sliced
4-5 plum tomatoes, sliced
3 T dry oregano
Salt, pepper, olive oil
3/4 - 1 cup feta cheese & goat

(The first time I made this dish I used a combo of both. Next time I only had feta,
so used 3/4 c)

I like using plum tomatoes for this dish.

I like using plum tomatoes for this dish.

You’ve all heard to talk about the mise en place. And I’m a true believer, but there is a delicate balance between having everything ready, and multi-tasking. Using your time wisely to prep some items while others cook is the perfect harmony of mise en place and smart prep.

Use your time wisely. While one thing is cooking, prep the next.

Use your time wisely. While one thing is cooking, prep the next.

Instructions

1. Thinly slice onions and peppers. Sauté peppers first in a pan with olive oil. Once they start to soften add the onions, salt, pepper and 1 teaspoon of oregano. Let cook slowly over medium low heat until they are completely softened and nicely caramelized. Approximately 45 minutes.

Cook the peppers down first a bit. They take a bit longer than the onions.

Cook the peppers down first a bit. They take a bit longer than the onions.

2. Meanwhile, cut the zucchini, yellow squash, tomatoes in even slices. You can assemble on the board as you go. Or assemble in the baking dish. Whichever you prefer.

Try to make the slices the same width so everything cooks evenly.

Try to make the slices the same width so everything cooks evenly.

Assemble on the board and then just transfer to the baking dish.

Assemble on the board and then just transfer to the baking dish.

3. Once the peppers and onions have cooked down, place them on the bottom of a baking dish (11” x 8”).

Caramelized to sweet goodness. This creates a bottom layer that add both another texture and flavor to the dish.

Caramelized to sweet goodness. This creates a bottom layer that add both another texture and flavor to the dish.

4. Then begin to assemble your vegetables on top. I like alternating one of each in rows. Or if you only have a round baking dish, you can swirl the design around. Drizzle with olive oil, sprinkle with salt, pepper and 1 tsp of oregano. Bake at 400 for 35 minutes.

Beautiful colors, beautifully arranged and ready for baking.

Beautiful colors, beautifully arranged and ready for baking.

Only have a round baking dish. No problem, just create a swirl.

Only have a round baking dish. No problem, just create a swirl.

5. After 35 minutes, pull of out the oven and crumble the cheese over top. Drizzle a bit more oil and the final oregano. Bake for another 25-30 minutes until its golden brown, the veggies are softened and the liquid is bubbly.

Once the vegetables are partially baked, then you can add the cheese.

Once the vegetables are partially baked, then you can add the cheese.

That’s some crumbled yum right there. Back in the oven to get yummier!

That’s some crumbled yum right there. Back in the oven to get yummier!

The first time I made this I inhaled it... I mean, enjoyed it as the main meal. It was a pretty big dish so naturally there were leftovers which I ate for lunch the next day with a piece of sautéed fish. Which is how I ate it the second time, too. Naturally, this dish begs for something starchy to accompany it. Believe me when I say the irony of that thought slays me. Only I would cook up something that pairs perfectly with shit I couldn’t eat at the moment. This combo of flavors would be great with pasta or rice, but my growling stomach thinks that thick slices of roasted or grilled potatoes would the ideal companion. Plate it up alongside a lovely piece of protein like chicken, fish or meat and a complete meal is a done deal.

I like this dish for several reasons. And not because one day soon I’ll be eating it with pasta. But because this recipe is equally suitable for an informal dinner party as it is for a weeknight meal with leftovers for the week. It’s delish piping hot, but I’ve enjoyed it at room temperature as well. I even relished it topped with poached eggs. Which is why I’m posting this right before New Year’s Eve. I think this is a fantastic recipe to make for a New Year’s Day Brunch or even on the buffet table on the eve. And those are just a few good reasons to give this a try. I’m sure there are more. So what are you waiting for?

Ratatoulle.eggs.fina.jpg

For those interested in learning more about the GAPS diet and anti-inflammatory methods below are a few links. As a foot note, I stayed on this regime for 6 weeks, and I although it was difficult, and I truly craved some warm, soft starch in my tummy, I stuck with it and did find that it helped my gut. It is meant to help heal, and not necessarily meant for a lifetime regime, unless of course you have a more serious gut issue.

GAPS Diet
GAPS Protocol
GAPS Overview
GAPS Outline
What is GAPS Diet