Blush Roses - A Display of Order & Whimsy

I haven’t been traveling into the city lately. Much to my sadness, since the urban jungle definitely energizes me. Things to do. People to see. You know, the pulse. The visual impact. The pace. The unusual. The swirl of life.
So, no city, no train, no Grand Central, no flower buying from Dahlia.
Woe is me.

But wait, no need to fret, if my schedule isn’t cooperating just check on others' availability. “Hello, hubby? What are your plans for today?”

Such was my fortune this past week, when JuanCarlos’ meetings took him into the city. Yeah, hurray for me! I didn’t give him any specifics. No flower type. No color preference. I just shouted out from the car as I dropped him off “Get me flowers!…” Please.

And so he obliged. He has good taste, so I knew his choices would be solid. He is a designer after all, so he had that in his favor. With no flower type in mind, he gazed at his options and as usual sunflowers first caught his eye. He adores their big yellow faces. Yet he knew I would want more than just sunflowers to work with. It was the soft color of the roses that lured him in. Soon after he grabbed some green by the way of Kale cabbage stalks and a pop of purply blue from Salvia.

Lucky me. When I saw his choices, I blushed with glee. They gave me a sense of calm and excitement simultaneously. I was lured in, too.

Kale Cabbage stems, Salvia, Roses, patiently waiting their purpose.

Kale Cabbage stems, Salvia, Roses, patiently waiting their purpose.

Now looking at these, even JC admitted, that the natural approach would be to leave their stems long and just nicely arrange them in a large, tall vase. But I saw something different. I saw a sense of order with a dash of whimsy. I realize that maybe I get more dreamy about things than most. They are just flowers, right?

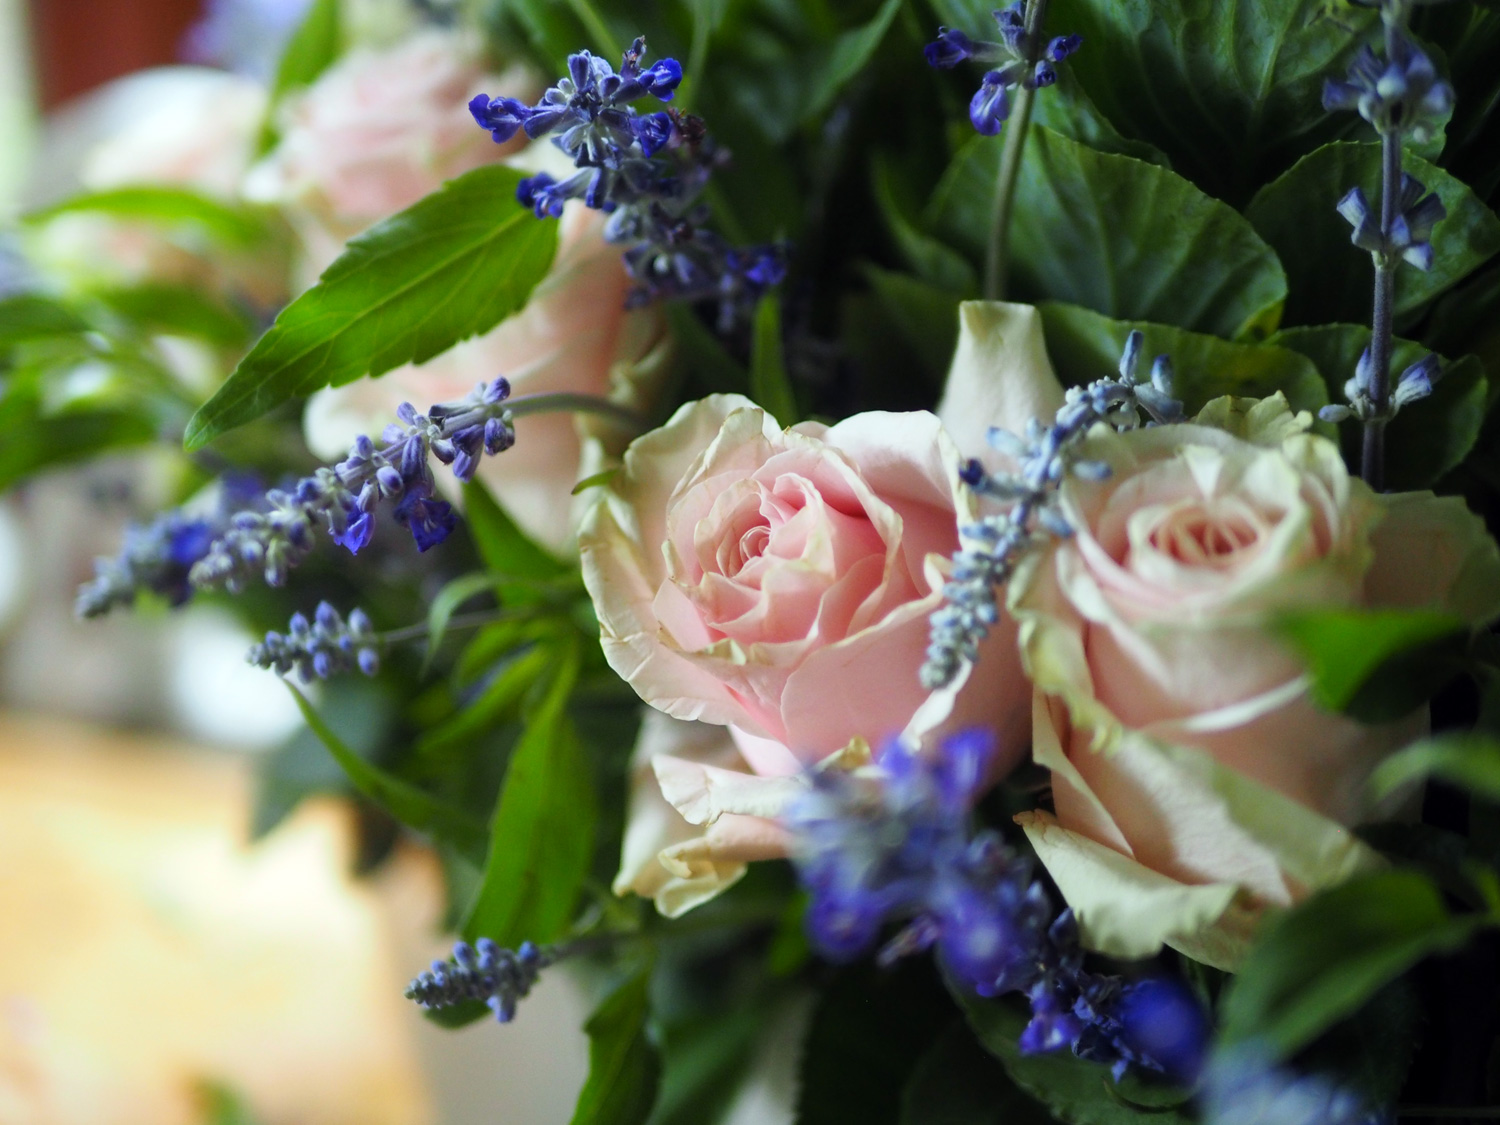
To me they are so much more. They are nature. They are beauty. They are colors and shapes and fragrances that touch my senses. I love catching their grace as I walk by them. I get such joy when I see them stand proudly showing off their natural allure and arranged in ways that showcase their special attributes. So for me, it’s not just flowers. And that especially goes for roses. I dreamed of something a bit different for these pale whispers. We have all seen roses in one big bunch a million times. Of course, they look gorgeous like that. They’re roses. Duh, gorgeous.

cu.roses.jpg

I immediately went for my metal rectangular low vessel and knew it would be a good fit.

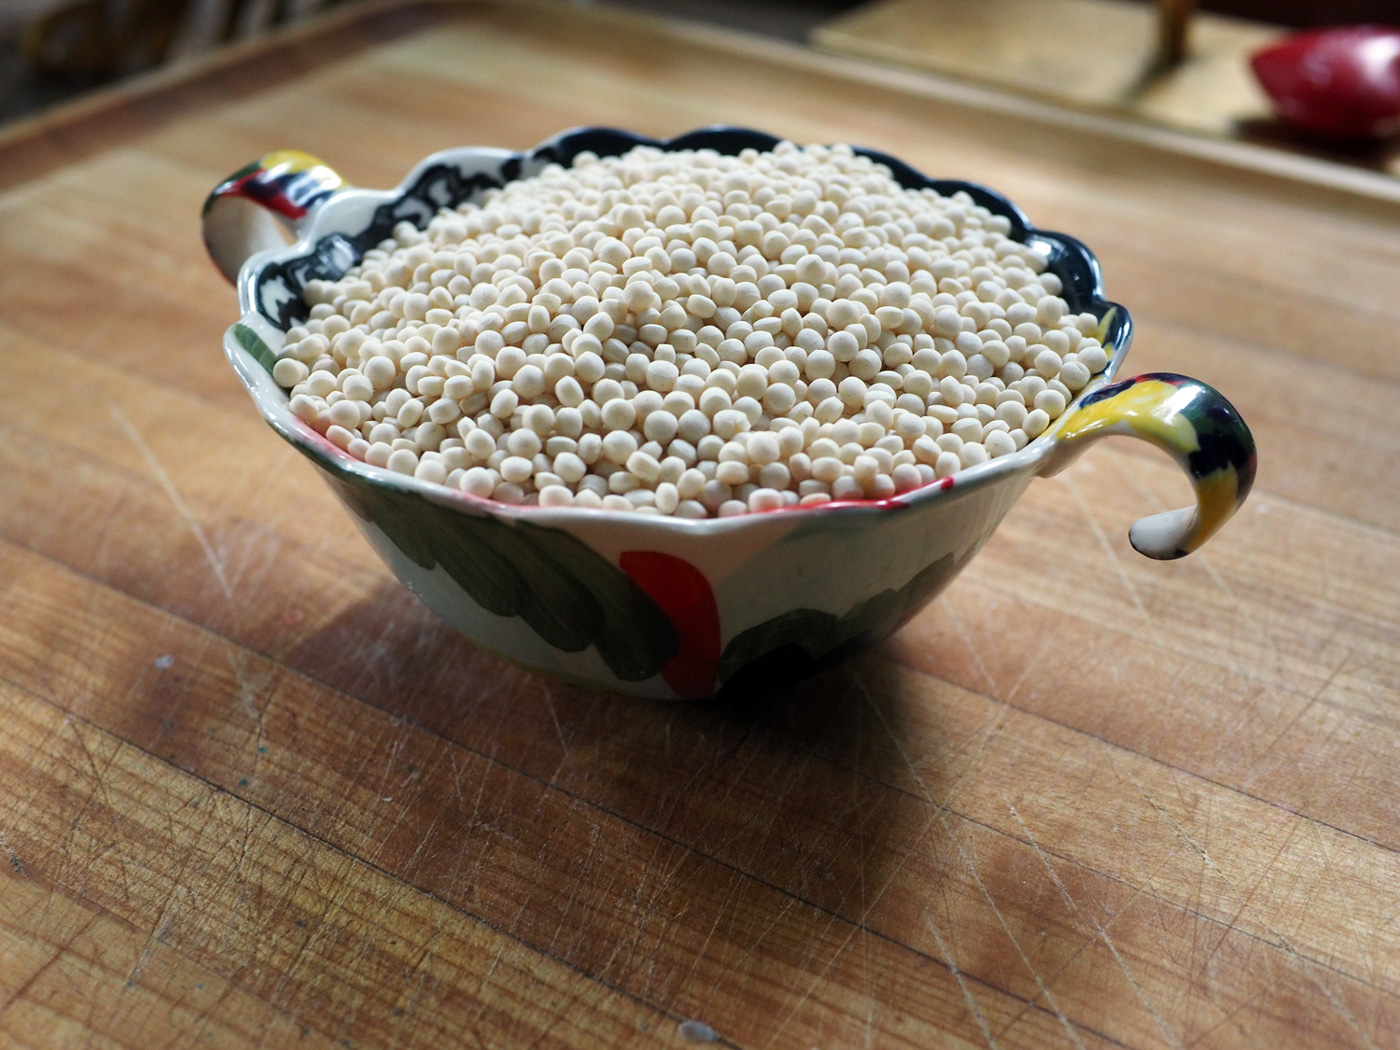
Using frogs, those spiky plates that help flowers stay exactly where you want them, I placed the cabbage stems in an orderly row that be the center point of the arrangement.

I have three different types, and used all three for this arrangement due to the long length of the vessel.

I have three different types, and used all three for this arrangement due to the long length of the vessel.

Like little baby cabbage heads.

Like little baby cabbage heads.

The ‘stay where I put you’ stand.

The ‘stay where I put you’ stand.

Standing tall and sturdy.

Standing tall and sturdy.

Once I placed the cabbage stalks into the vessel, I found the right height for the roses so their tops hit just above the bottom of the cabbage leaves. Then using that as a guide, I cut all the rest of the roses to the same length. Next, I began lining up the roses around them like a moat around a castle. Thus, building on that theme of ‘order’ I had in mind.

Using my first rose to guide me for all the rest.

Using my first rose to guide me for all the rest.

Different heights create more dimension.

Different heights create more dimension.

Onto the whimsy. By placing the Salvia in and around the entire arrangement, peeking out they created a weeping, breezy feeling, softening the hard lines of all the ‘order’. Plus, added a contrasting color punch.

roses.cu3.jpg


Little note; when I cut the Salvia to size, the bottom part of the stems still had greens. I used those to fill in the spaces and create volume.

Nothing wasted.

Everything gained.

stems.jpg
purple.flowers.cu.jpg
roses.cu2.jpg
roses.overhead.jpg

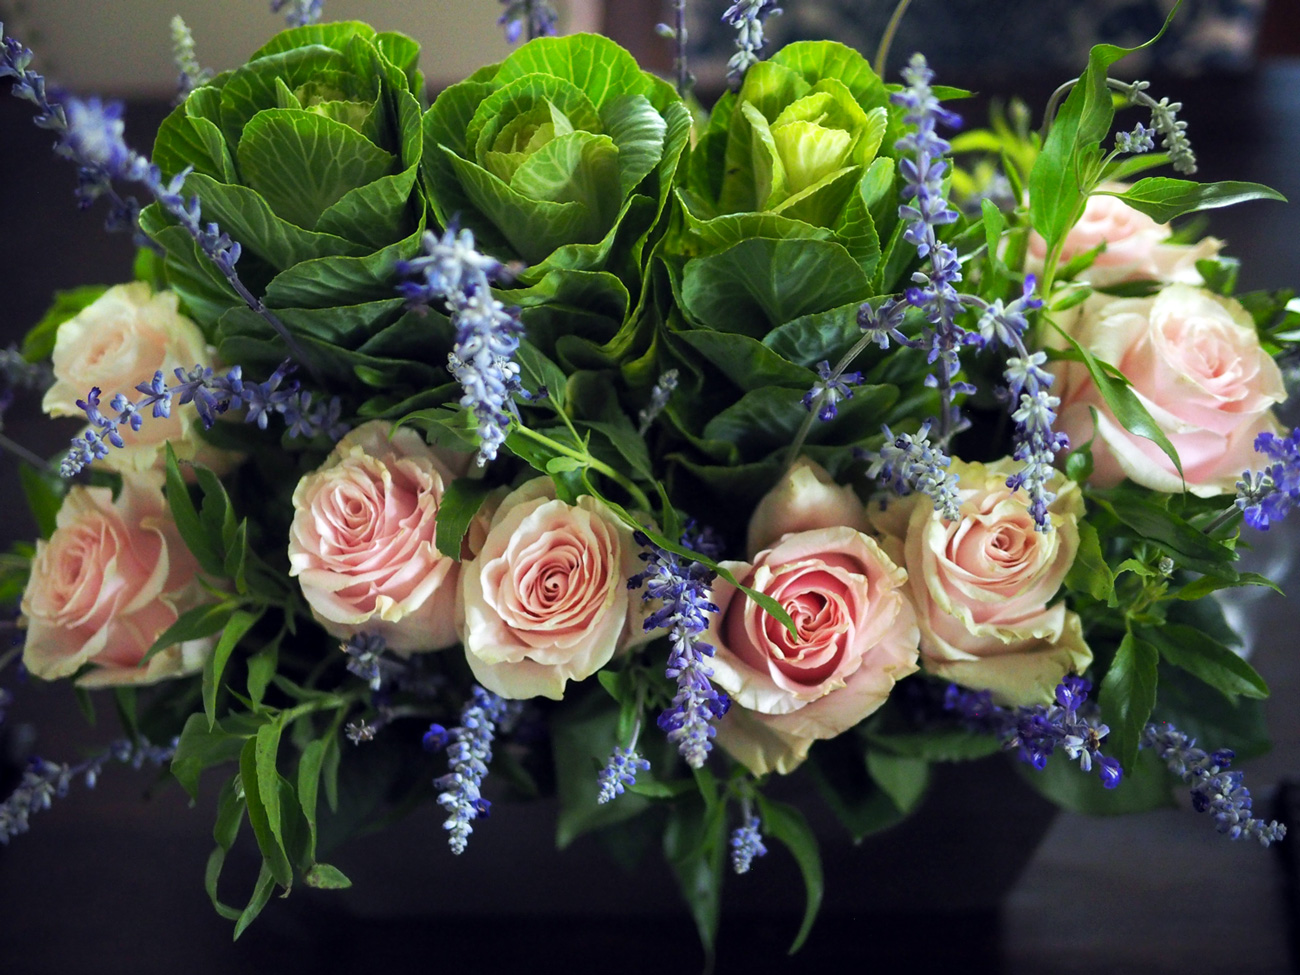
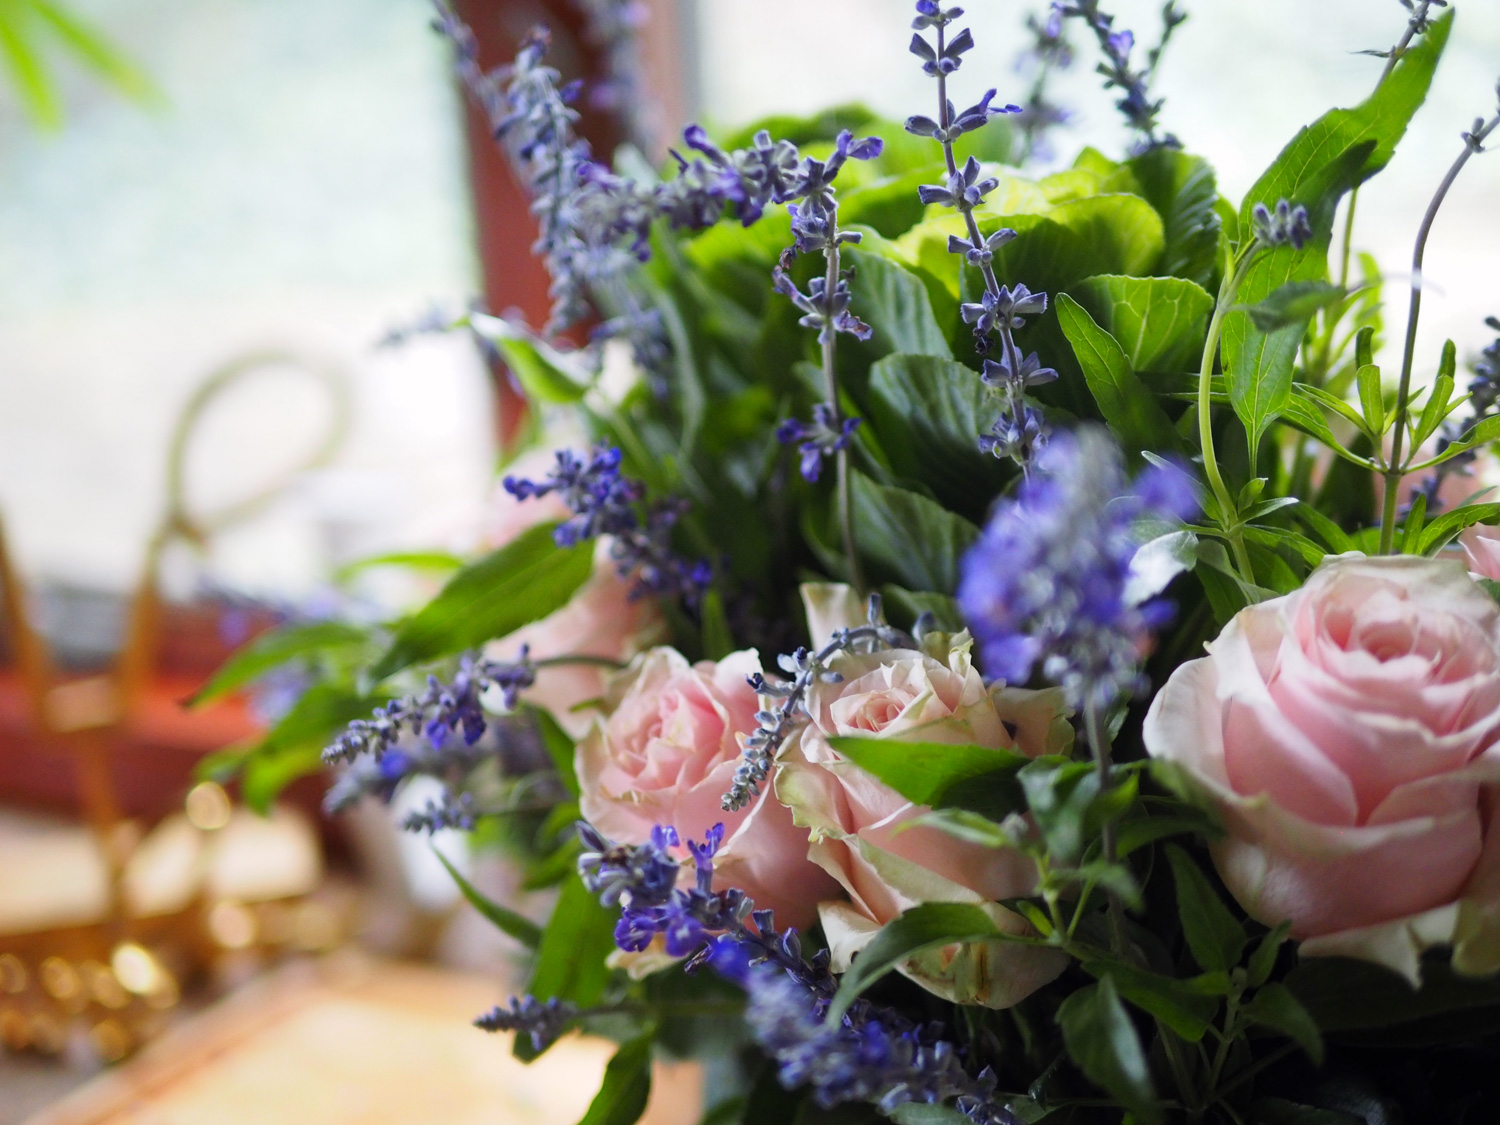
I love this sweet arrangement. Ordered whimsy. I know I am showing a ton of different shots but I can’t seem to get enough of all the pretty angles.

Although I placed it on our dining room, I created the arrangement in the kitchen. All the while I kept getting glimpses of the giant golden LOVE sign my dear friend, Dominique, gave me.

roses.final4.jpg
See the faint lines of love in the background?

See the faint lines of love in the background?

Clearly, love shows up often in my home.

Clearly, love shows up often in my home.

I couldn’t help but think of her as I made this pretty in pink beauty and giving thanks to her friendship, her thoughtfulness and feeling blessed to have her in my life. She definitely represents order and whimsy. She gets stuff done and has fun doing it. Top that with a cosmic giggle as I rejoice on sharing this post precisely now, since tomorrow, September 15th, is her birthday. Here’s to blushing with joy on all the goodness you bring to the world, and to my life… with golden LOVE. Happy Birthday, Dominique!

Love.sign2.jpg
 
DP-stirredwlove-ID1.jpg

Chicken Salad with Fruits & Nuts

chicken.salad.jpg

Have you ever had a chicken salad that just felt too heavy.  So much mayo that it almost leaves a slick cream streak down your throat?  Creamy is nice but heavy is not.   Especially during the summer months, salad featuring proteins should lift you up, not weigh you down. 

My recent cooking adventures afforded me the opportunity to cater for my Mom's 'Ladies Lunch'. I had proposed a couple of different menu options but they didn't want me to go too crazy, fancy.  Understandably so, they needed food that would have a broad appeal for everyone's palate, which makes total sense given a group of 30. Chicken Salad was suggested.

I must admit that making chicken salad didn't thrill me.  It was my job to give the 'clients' what they wanted but also introduce them to chicken salad with pizzaz. I like to create flavors that pop, and really wanted to make something different for these special ladies.  Instead of creating a new dish, the creating came in the form of how to take bland, regular, mayo slathered chicken salad and make it lighter and more exciting.  Once I realized that they were open to a more zippidity-do chicken salad, I starting thinking: summer, lighter, texture and crunch. That's when I got more excited.  Texture would come by way of adding crunchy, crisp fruits and toasted nuts. And I dare say that the fruits also help to lighten the load. Check off the texture category requirement.  Now how to lighten up the dressing that is typically globs of mayo?  Yogurt is light. It's tangy. It's zingy and is still creamy.  Gosh, if only I could be more like yogurt...
So, that was it.  I would cut the mayo in half using Greek yogurt and add a couple of other zesty ingredients to lighten it up.     

I got the thumbs up from the team leaders, my Mom and Elena. Onto the plan. I went back and forth about whether to use dark and white meat, whether to roast or poach.  In the end, I choose to use organic chicken breasts and to poach them using aromatics to subtly impart flavor.

Ingredients 

(This batch was made for 30 people. And it made about 10 c.  Scale down for your needs.)
For the Poaching
9.5 lbs Chicken Breasts *                                       
4 bay leaves
4-6 lemon slices
2 t peppercorns
1 carrot, chopped in chunks
1 celery stalk, cut in pieces
parsley sprigs

For the Salad
2 c red seedless grapes, thick slices
2-3 red apple, peeled & cubed
5-6 scallions, thinly sliced
1 c walnuts, roasted & rough chopped
* You can also use leftover chicken and add the dressing.  

Dressing
1.5 c Mayonnaise
1.5 Greek Yogurt
2-3 T Lemon zest
1/3 c lemon juice
2 T mustard
salt, pepper
 

Instructions

1. Clean and rinse the chicken well.  In a large sauté pan, add the chicken in one layer in the pan.  Add the aromatics and enough water to almost cover.  Bring to a boil, then cover and let simmer for 8-10 minutes depending on the thickness of the chicken.  Use a thermometer to ensure that the interior is 165 degrees.

2. While the chicken is cooking, make the dressing by whisking together all the ingredients.

Creamy, tangy and light.

Creamy, tangy and light.

3. Once the chicken is done, remove from the pot and let it cool.  Meanwhile, roast the walnuts for 5-7 minutes and rough chop them.  Cut the grapes, apples, and scallions. (Squeeze some lemon juice over the apples or submerge in lemon water to keep them from turning brown.)

Chicken
Red grapes
Apples

4. Either cut the chicken into chunks or shred.  Your choice. Mix all the ingredients together with the dressing.  Some people like their salad moist, others dry. Dress as desired.

Chicken Salad lighter

You can serve this on rolls, or French baguette.  I decided for summertime, and for a healthier option, to serve them with small romaine lettuce leaves to act as boats.   All the ladies enjoyed this light and tangy chicken salad. 

A huge bowl full of light and crunchy, savory and zesty chicken salad.

A huge bowl full of light and crunchy, savory and zesty chicken salad.

The ladies taking a little bit of all the offerings.

The ladies taking a little bit of all the offerings.

Since I made a ton of chicken salad and had so many other offerings, I had some leftovers.  I brought home some chicken salad, and the Israeli Couscous  and Asian Slaw with Tahini/Peanut Dressing and made a bountiful  lunch plate for JC.  At first he said, "That's way too much food."  Not too much later, I found the plate, empty, not even a grain of couscous left.  Apparently, it wasn't too much. He loved it enough to have the rest the next day.  

And since I had some of the chicken salad dressing leftover and I love to share, I gave some to my neighbors who are a foodies. They just happen to have some roasted chicken.  What serendipity.  They mixed up my dressing with their chicken and loved how the lemon zest and juice really brightened it all up.  Why did the neighbor cross the road?  Ask the chicken.

My plate full of love that I made for JC's lunch. Boston lettuce pockets filled with zingy chicken salad, couscous and peanut slaw.

My plate full of love that I made for JC's lunch. Boston lettuce pockets filled with zingy chicken salad, couscous and peanut slaw.

Why did the chicken cross the road?  To mingle with a few fruits and nuts and slather herself in a light yogurt lemon dressing, of course.


Lime Zest Cookies with Raspberry Filling

lime.zest.final3.jpg

For years I have been making these Lime Zest cookies. It actually all started years ago when my dear friend Donna asked me to make cookies for her wedding as part of the guest gift bag. What an honor. When you think of weddings, you think of white. Well, at least I do. So I naturally wanted the cookies to have a white motif, and from all the ones that I had chosen I needed one more cookie that would deliver on that theme. I found this Lime Meltaway recipe from Martha Stewart which dusts the cookies with confectioner's sugar, thus making them white. 

Although the original recipe is not mine, I made it my own but adding a twist. The first few times I baked them I followed the recipe as is, including for the wedding. But when I needed to make a cookie for an event, this single wafer didn't seem like it would be enough. What is better than one cookie?  As my darling nephew John stated as a small tot when given one cookie, and asked 'What do you say?' (his mom hoping for Thank you) he shouted out: Two Tookies!  Exactly; two are much better than one. And even better when sandwiched together with the perfect tart compliment to lime of raspberry jam. From that moment on I have been making these cookies with my jammy, tart and sweet stamp. From that moment on, these cookies became a hit.   

Ingredients

1.5 sticks butter, room temp
1 c confectioner’s sugar (1/3 for dough & 2/3 for dusting)
Zest of 2 limes
2 T lime juice, freshly squeezed
1 T vanilla
1 3/4 c + 2 T flour
2 T cornstarch
1/4 t salt
 1 (18oz.) jar of red raspberry preserves  (seeds removed)

Instructions

1.    Using a mixer with a whisk attachment, mix butter and 1/3 c sugar until pale and fluffy.
2.   Add lime zest, juice and vanilla until combined.
3.   Whisk together flour, cornstarch, salt in a bowl and add to the butter mixture on low speed until all combined.
4.   Divide the dough into 2-3 smaller mounds and roll into 1 1/4" thick logs. Wrap in tin foil and freezer until hardened. Approx. 1/2 hour.
5.   Using a sieve, push the jam through to remove all the seeds. Then place jam in a pastry bag or plastic bag with the tip cut off and set aside until ready to fill the cookies. (Cut tip off right before filling.)
6.   Remove the logs from the freezer and cut 1/8" thick rounds placing them on a parchment lined baking sheet.
7.    In a 350 degree oven, bake for 9-12 minutes until they are barely golden.  You may need to rotate the baking sheet half way through. These are thin, delicate cookies and you want them to be tender not overdone.
8.   Remove from baking sheet and let cool on a rack.  I cut up paper bags and spread them on my dining room table. The clean up is easier after the sugar dusting. 
9.   I line the cookies in rows of pairs turning one cookie over to reveal the baked side. Then using the piping bag, dollop about 1/2 T of jam onto the turned over cookie.  Repeat on half the cookies, then top them with their pairs. I usually push all the cookies close together at this point to ready them for the sugar dusting.
10.  Using a same strainer, sprinkle the remaining 2/3 c of confectioner's sugar over all the cookies. Let the sugar set before storing them away. 

You won't need this many limes unless you are baking for an army. I make 6x the recipe during the holidays to give to my family and friends. Photo credit: asithappens.format.com

You won't need this many limes unless you are baking for an army. I make 6x the recipe during the holidays to give to my family and friends. Photo credit: asithappens.format.com

Creaming the butter with the confectioner's sugar makes it light and fluffy. Remember, this photo shows me making many batches.

Creaming the butter with the confectioner's sugar makes it light and fluffy. Remember, this photo shows me making many batches.

When you add the lime juice and zest the butter seems to break, but do not worry. It all comes together with the dry ingredients. Photo credit: asithappens.format.com

When you add the lime juice and zest the butter seems to break, but do not worry. It all comes together with the dry ingredients. Photo credit: asithappens.format.com

A moment of zen. Photo credit: asithappens.format.com

A moment of zen. Photo credit: asithappens.format.com

There are several key pointers that I want to share about making these cookies.

  • Roll the dough into logs ensuring that there are no air pockets in the middle. (The first time I made and cut these I noticed that the lime juice creates air pockets and each cookie had a tiny hole in the middle. To avoid that, just roll and push the dough together and roll again into the log.

  • Roll the logs evenly and equal size.

  • Freeze the dough log so you get a clean cut without squashing the log. Use a sharp knife.

  • Remove the cookies carefully from the baking sheet. They are very delicate when they first come out.

  • Try to match up your cookies so each sandwich consists of two equally sizes cookies. (I know this may sound like the words of a crazy, controlling person but if you don't want jam oozing out because one cookie is bigger than the other, then hear me out. I have a method that ensures the cookies are good matches. When I place them on the sheet to be baked I place them in exact order that I cut them so each slice is next to the one before it. Then when I remove them, I do the same. This way similarly sized cookies will be together making it easier to match up when you sandwich. I know this sounds nuts and might not be an issue for you, but when you are selling your cookies or presenting them at an event perfection is expected. Heck, when you are serving them to guests they should look pretty, too.)

Freezing the dough makes cutting so much easier. I eye ball the width trying to ensure each cookie is the same size, about 1/8".  Photo credit: asithappens.format.com

Freezing the dough makes cutting so much easier. I eye ball the width trying to ensure each cookie is the same size, about 1/8".
Photo credit: asithappens.format.com

Use parchment paper and give them a little space between. They don't grow that much. I usually get 5 across on a half sheet pan.  Photo credit: asithappens.format.com

Use parchment paper and give them a little space between. They don't grow that much. I usually get 5 across on a half sheet pan.
Photo credit: asithappens.format.com

These are delicate cookies when they come out of the oven. When removing them from the pan, be gentle when placing them to cool. Photo credit: asithappens.format.com

These are delicate cookies when they come out of the oven. When removing them from the pan, be gentle when placing them to cool. Photo credit: asithappens.format.com

I always try to find the most efficient way to accomplish a task. Putting the jam in a piping bag or a plastic bag makes it easier to dollop onto each cookie.  Photo credit: asithappens.format.com

I always try to find the most efficient way to accomplish a task. Putting the jam in a piping bag or a plastic bag makes it easier to dollop onto each cookie.
Photo credit: asithappens.format.com

After they are lined up, turn one row over so you are filling the baked side with jam. Then the outside of the cookie looks nice when sandwiched together.  Photo credit: asithappens.format.com

After they are lined up, turn one row over so you are filling the baked side with jam. Then the outside of the cookie looks nice when sandwiched together.
Photo credit: asithappens.format.com

sandwich.cookies2.jpg
Jam it up and sandwich it up. Photo credit: asithappens.format.com

Jam it up and sandwich it up. Photo credit: asithappens.format.com

Like snow, let the sweetness fall and cover with a good dusting. Photo credit: asithappens.format.com

Like snow, let the sweetness fall and cover with a good dusting. Photo credit: asithappens.format.com

Photo credit: asithappens.format.com
And just like that they begin to disappear. Photo credit: asithappens.format.com

And just like that they begin to disappear. Photo credit: asithappens.format.com

I always get a thrill out of watching the faces of people when they try these cookies for the first time.  They can't quite make out that the zingy flavor is lime, because who would expect that in a cookie.  Then they smile with tartness of the raspberry jam finished with the sweetness from the powdered sugar dusting.  It's a perfect combo.

As you can see these cookies have that snowflake feeling. White and delicate, they were perfect for Donna and Jeff's wedding. Thank you Donna for asking me to be a part of your joyous celebration, and thus finding another cookie tradition that everyone loves.

Me, Donna & JC at her wedding. Doesn't she look happy & beautiful! And not because of the cookies.

Me, Donna & JC at her wedding. Doesn't she look happy & beautiful! And not because of the cookies.


I usually make them as part of my Christmas cookie offering but recently these have been requested for two different catering events.  They were, and are universally loved.  I hope you give them a try whether it be for your own sweet tooth need with tea, or to share with your guests.

My Christmas cookie box.

My Christmas cookie box.

As part of a catering event's mid afternoon dessert offering in the Hamptons.

As part of a catering event's mid afternoon dessert offering in the Hamptons.

At a luncheon for my Mother's Ladies Group

At a luncheon for my Mother's Ladies Group


Smoked Trout Cucumber Bites

final.trout.platter.jpg

Coming up with easy to make, easy to eat appetizers is a fun game I like to play.  Sure, I almost always put out a cheese/charcuterie board because it's chock full of crowd pleasing eats: cheese, dry-cured meats, olives, nuts, fruits & crudité bits.  But I truly enjoy serving a 'pop in your mouth' nibble.  These Smoked Trout Cucumber Bites answer the call. 

I have used smoked trout before in several different ways.  In the fall and winter months when the cucumber is swapped out with a small, warm potato rounds, it makes a perfect combo of a warm and cold bite. Sometimes I use small new potatoes, as shown here.  Sometimes, fingerling potatoes.  But for the warmer weather months, I choose a boat that keeps it cool, like a cucumber, or endive.

trout.potato.jpg

Ingredients

5-6 oz. Smoked Trout, flaked approx. 1.25 c
(pre-packaged like Ducktrap or from a specialty deli)
1 English cucumber, thick slices
1/3 c + 2T sour cream
1/3 c scallions, thinly sliced
chives, finely chopped


trout.pkg.jpg

Instructions

1. Cut the cucumber into thick slices about 3/8" thick and arrange on a platter.

cucumber.rounds.jpg

2. Remove the skin from the smoked trout and break it up with your clean fingers, or flake it with a fork.  I use my fingers because I am able to feel and remove any fine bones.

3. Add the scallions and/or chives, plus enough sour cream to hold the smoked trout together. (The store didn't have any chives that looked good, so I only used scallions on this day.  I do love chives for this dish, though.)

Smoked Trout skin still on, waiting to be flaked.

Smoked Trout skin still on, waiting to be flaked.

Smoked Trout flaked.

Smoked Trout flaked.

Awaiting the savory combo of scallions and sour cream.

Awaiting the savory combo of scallions and sour cream.

4. Again, using your clean hands or a small ice cream scoop, create little mounds on top of each cucumber round. The ice cream scoop is not only faster, but also makes keeps it all uniform and looking pretty.  We eat with our eyes, folks.

trout.scoop.jpg
trout.scoops.jpg

5. Place about 2 T of sour cream into a small plastic bag, taking all the air out and cutting a small hole on one of the corners. Squeeze a little dollop of sour cream on top of each mound.  Sprinkle with more scallions and chives.

sour.cream.bag.jpg
sour.cream.dollop.jpg
rounds.scallions.jpg

I made these two weeks ago for an outdoor party placing them on a tiered plate rack, which came back to the kitchen with two empty plates. And again two nights ago for a late summer dinner party.  They were loved both times. Cool and refreshing; a one or two bite nibble that everyone will love. 

final.cucumber.rounds.jpg
final.cucumber.tierstand.jpg

This could not be simpler to assemble. You've made tuna salad before, right? Well, this is the same concept, only presented in a tantalizing, easy to enjoy way.  Best part is that you can scoop this mixture on top of other 'pop in your mouth' vehicles.  Need some ideas?

  • Fingerling or New Potato rounds

  • Potato Chip, or Tortilla Chip Cups

  • Puff Pastry round

  • Radish Slice

  • Endive or Mini Romaine Leaves

  • Celery Stalk pieces

You get the idea.  I served these as one of the 3 appetizers for a small dinner two nights ago.
Here was the scorecard:

 
  • Consumers: 4

  • Smoked Trout rounds: 18

  • Leftovers: 0

We smoked these babies.

One of the other apps was a cheese/charcuterie plate.

One of the other apps was a cheese/charcuterie plate.

final.trout.overhead.jpg

Israeli Couscous with Sautéd Squash, Roasted Tomatoes & Garlic

couscous.final.jpg

I like comfort food.  Which usually means a mouthful of pasta.  I especially like it when it is small enough that I can simply scoop spoonfuls into my mouth.  Gosh, I hope that doesn't sound gross. But it is quite satisfying.  Which is why I love creating salads that fit that agenda.  As with my Orzo Salad, this Israeli Couscous dish has that same mouthfeel.  Flavor in every bite filled with the comfort of a pasta.  Small enough that it's easy to spoon, swallow and spoon again.  Oh, yeah, don't forget to chew.

I created this dish for a Ladies' Lunch for my Mom and the women's group at her condo.  They were gracious enough to allow me to cater the lunch for them, and I had a blast doing it.  I will post more about the entire meal but for now, let's focus on spooning some of this salad for your next lunch, dinner side dish or BBQ party.  When I came up with idea it was to satisfy what I thought the women would enjoy as well as a dish that would be easy to make given all the other items I was making.  What I didn't even realize at the time was that this Israeli Couscous, aka Pearl Couscous, plays off the same idea as my Garlic Rice with Sautéd Zucchini & Tomatoes.  I found that recipe as I was writing this one so I could share other zucchini ideas. And there it was, along with several others.

Apparently, there are a million ways to serve up zucchini.  So here's a quick reminder of a few I have experimented with and achieved success.  Try them out while the weather is zucchini friendly.
Zucchini Crudo with Shaved Parmigiano & Mint Oil
Zucchini Orzo Pie
Zucchini Carpaccio
Balsamic Bathed Carrots Wrapped with Zucchini
An Asian Twist to Zucchini Ribbons

Now back to the main attraction. This is one of those dishes that you can literally being cooking, cutting, sautéing all at the same time.  A multitasking wonder. So I have written the instructions in a way to be most efficient. 

Ingredients

1.5 cups Israeli Couscous
1 large zucchini, cubed
1-2 small yellow squash, cubed
1 medium shallot, diced
1 pint grape tomatoes, oven roasted
4-5 whole garlic cloves
2-3 T basil, chiffonade
1 c olive Oil
1 t coarse salt
1/2 t pepper
*Note: You can alter the couscous to veg ratio if you like more of one.  Totally up to you.

Slice the squashes lengthwise first. Then strips, then cubes.

Slice the squashes lengthwise first. Then strips, then cubes.


Instructions

1. Roast the grape tomatoes in 1/2 c olive oil with whole cloves of garlic.  Refer to the oil roasted recipe in my post The  Great Tomato Caper.

72AA45BA-C509-48F9-BCD7-D3C5AB9F889F.JPG


2.  While the tomatoes roast, cut the zucchini, yellow squash and shallots and sauté them separately in oil. Season with salt and pepper, adding half the shallots to each batch, once they are partially cooked.  You don't want to add the shallots first as they will burn.

Nice little cubes all the same size so you get a piece in every spoonful.

Nice little cubes all the same size so you get a piece in every spoonful.

Zucchini cubed up

Zucchini cubed up

3. While the squashes are sautéing, cook the Israeli Couscous as you would any type of pasta, in a large pot of salted boiling water.*  Cook until al dente.  Drain and set aside in a serving bowl, drizzle with a little olive oil so it doesn't stick and let cool.

Gorgeous pearls of pasta

Gorgeous pearls of pasta

4.  Once the tomatoes are done, remove the garlic from their skins and mash them with a fork and course salt.  Add 1/4 c olive oil, pepper to taste and whisk together.

Grapes tomatoes oven roasted in luscious oil with roasted garlic.

Grapes tomatoes oven roasted in luscious oil with roasted garlic.

Sweet and tender garlic.

Sweet and tender garlic.

Smash to create a paste.

Smash to create a paste.

5. It is best to mix the roasted garlic oil into the couscous while it is still warm so the flavors absorb, but you can mix it at room temperature, too. Be sure to thoroughly incorporate.
6. Chiffonade the basil (cutting them in strips) and add to the couscous.
7. Then add some of the juices from the roasted tomatoes, the tomatoes and sautéed squashed. Gently mix until combined.  Serve room temperature.

A bowl of goodness that is pure pleasure to eat spoonful after spoonful.

A bowl of goodness that is pure pleasure to eat spoonful after spoonful.

This is one of those dishes that is both hearty but light at the same time.  The couscous is a pasta so it does do the job of satisfyingly fill you up, but the lightness of the veggies make it feel summertime fresh, especially served room temperature or even chilled.  

couscous.final2.jpg

I made this out of love.
Love of pasta.
Love for my Mom.
Love to share with others.


Print Friendly Recipe