Ok, linguine with clam sauce may not be such new recipe but I would venture to say that everyone has their own little twist to making it. Back in the day when I didn't have a lot of extra cash, or time to buy fresh clams, I used to buy canned clams. I bought whole, chopped and minced and used all three types to make a clam sauce. Yeah, yeah, I know what you are thinking, "she used CANNED clams". The girl who touts 'buy what is fresh.' Sometimes, a girl had to do what a girl had to do when fresh wasn't available, when $$$ were not available and when that was what was in the cupboard. (And if memory serves, shhhh, the canned version was quite tasty.) But I've grown up since then and realized that if you can't get fresh just wait till you can. And such a day arose. With the beautiful summer breeze, the unlimited sunshine, and a glorious Sunday with no plans, I embarked on RE-creating the 3 clam recipe but with fresh clams.
Like with any recipe, building up flavor is the key. Here are the key items.

I love using small bowls for mise en place (which in French means "everything in its place", your set up) Ron Miller artfully handcrafted these perfectly sized bowls that work just great. They come in various sizes and depths for all the different items you need for prep. Check out his site, Miller Pottery HVNY
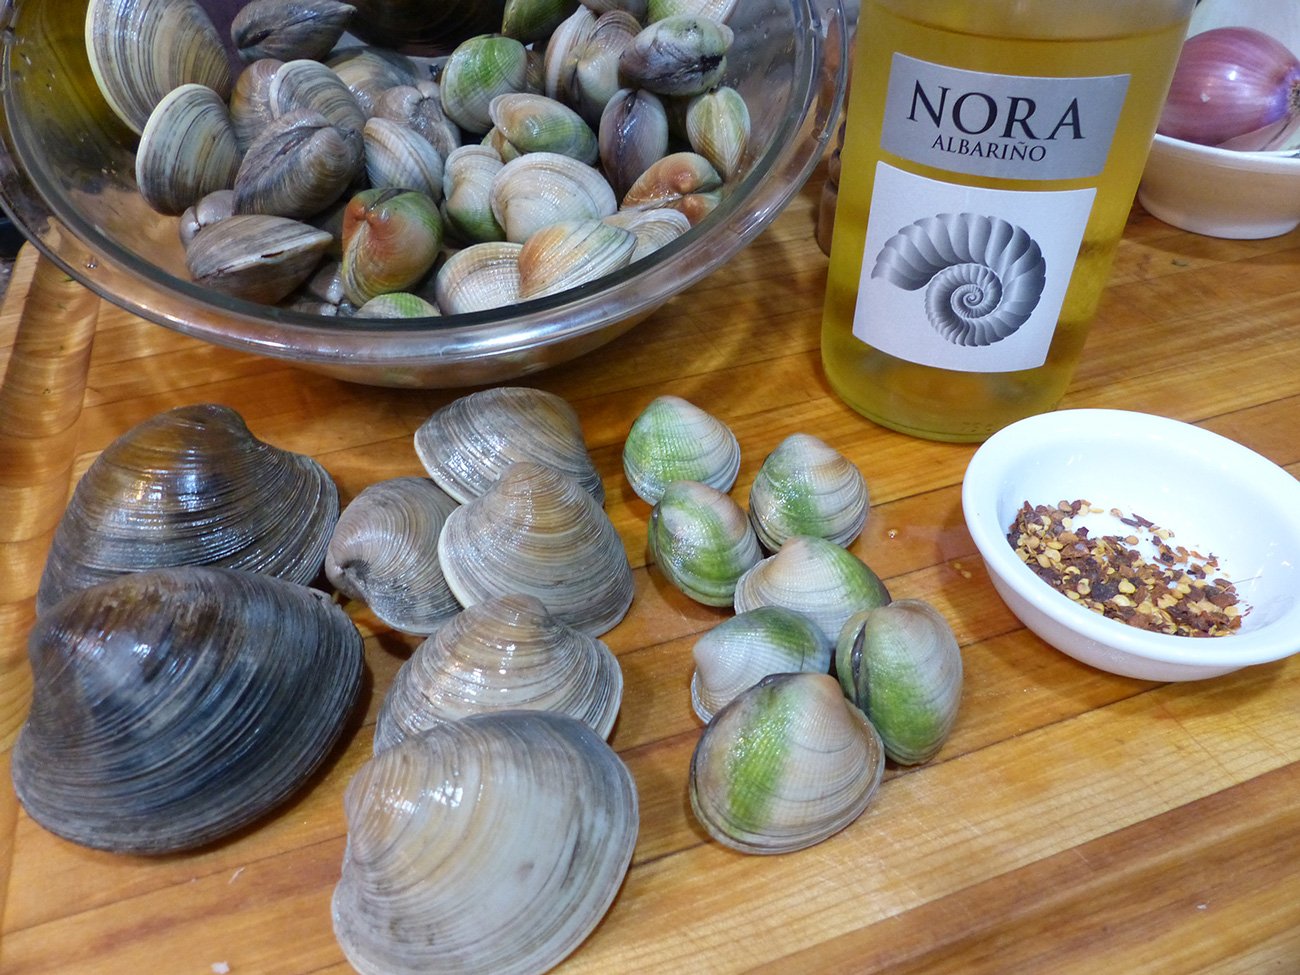
The Stars!
Ingredients
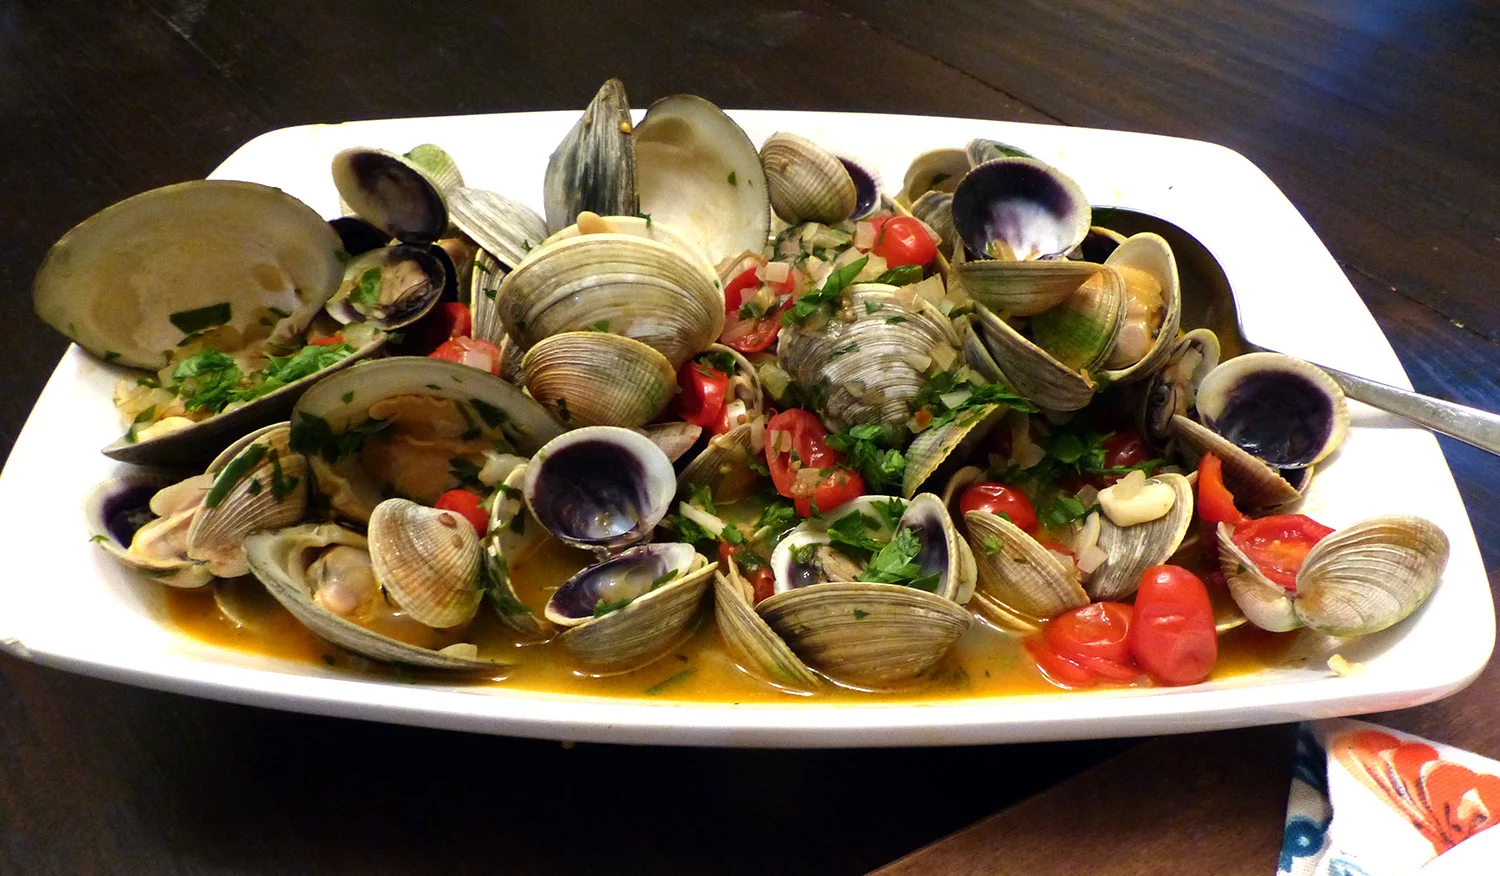
Littlenecked Clams
Shortnecked Clams
BBQ Clams
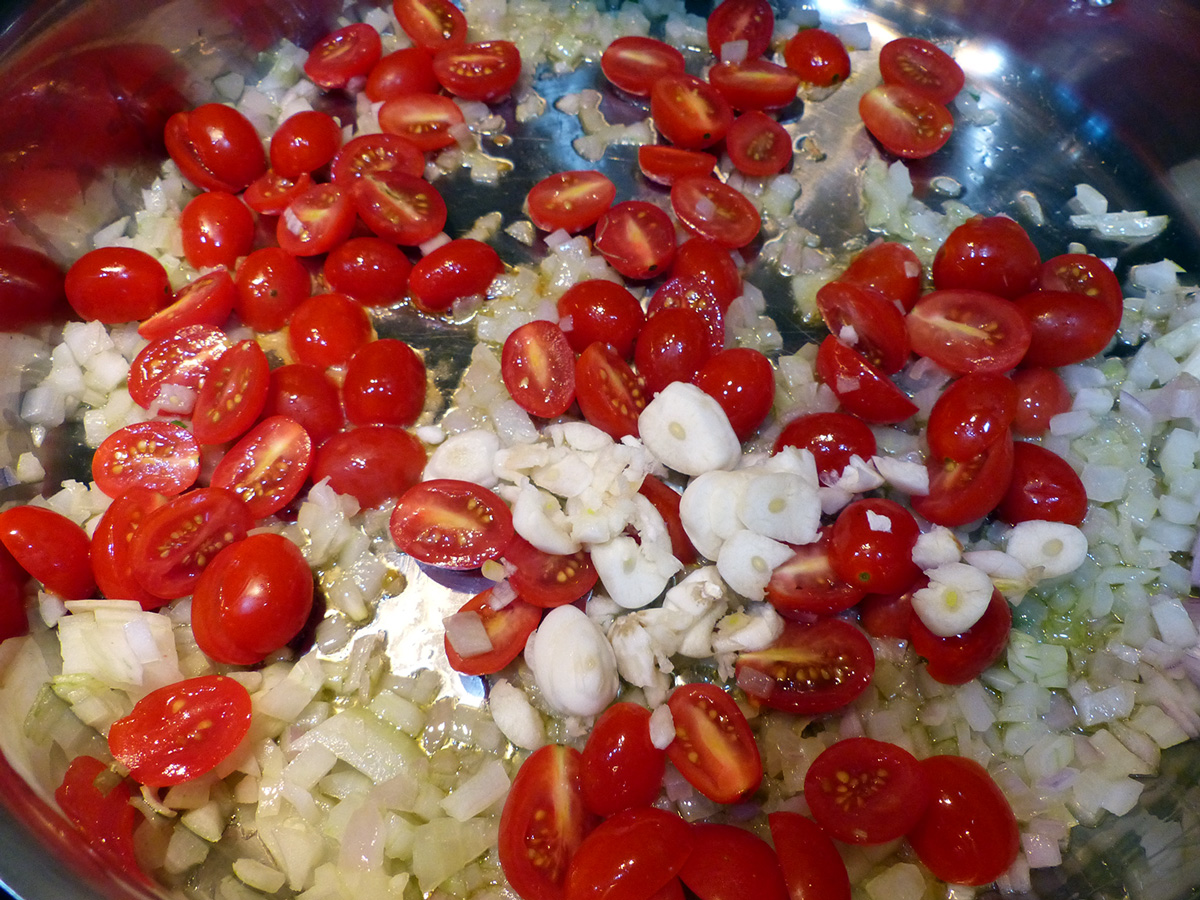
2 shallots, minced
6-8 garlic cloves, sliced
1 1/4 c White wine
3 cups grape tomatoes, halved
Olive oil
red pepper flakes, optional
2/3 c parsley, chopped
1 T fresh Thyme
Instructions
Sauté shallots, garlic until softened and red pepper flakes. Add tomatoes and cook until tomatoes breakdown.

Since there are three sizes of clams, it is best to cook in stages, as the little ones don't need as much time and will get tough if you put them all in together.
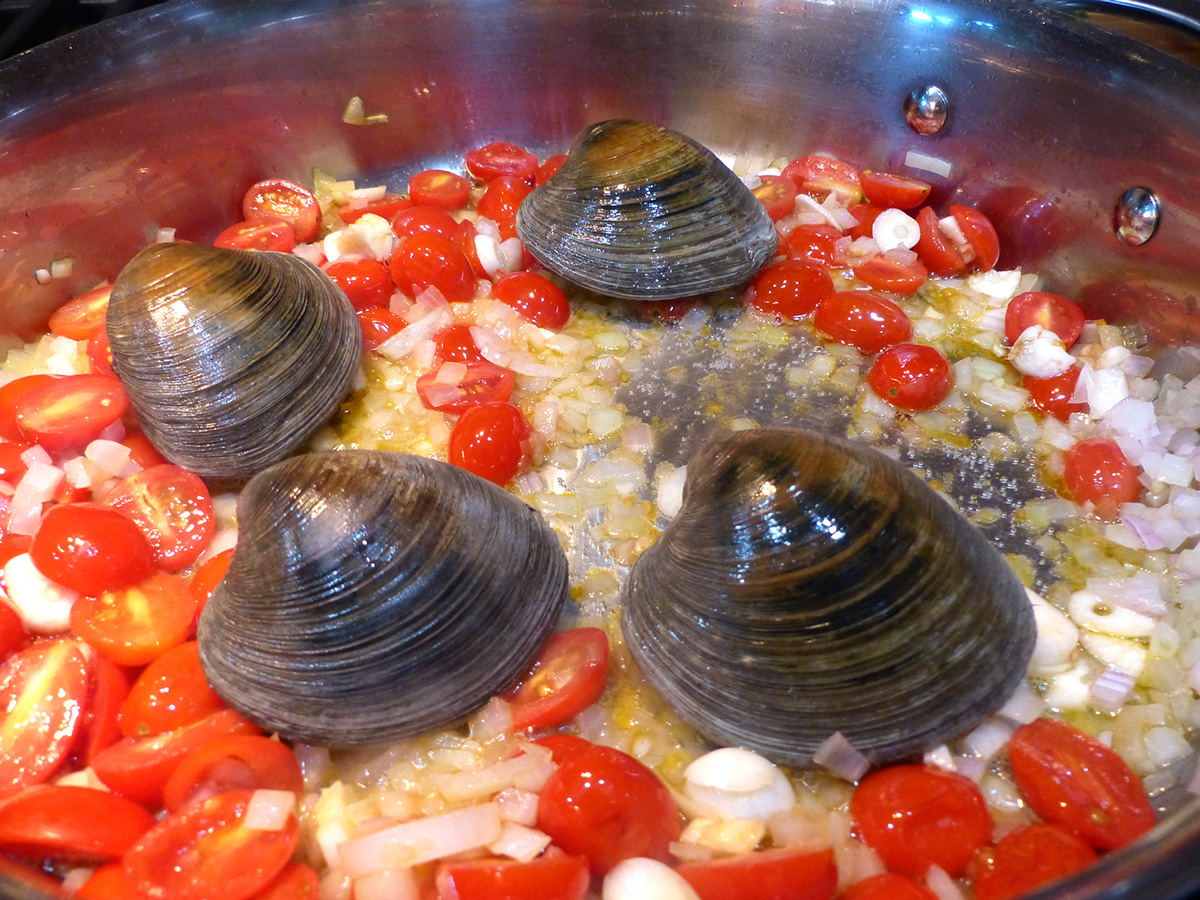
Big one first

Next size goes in next
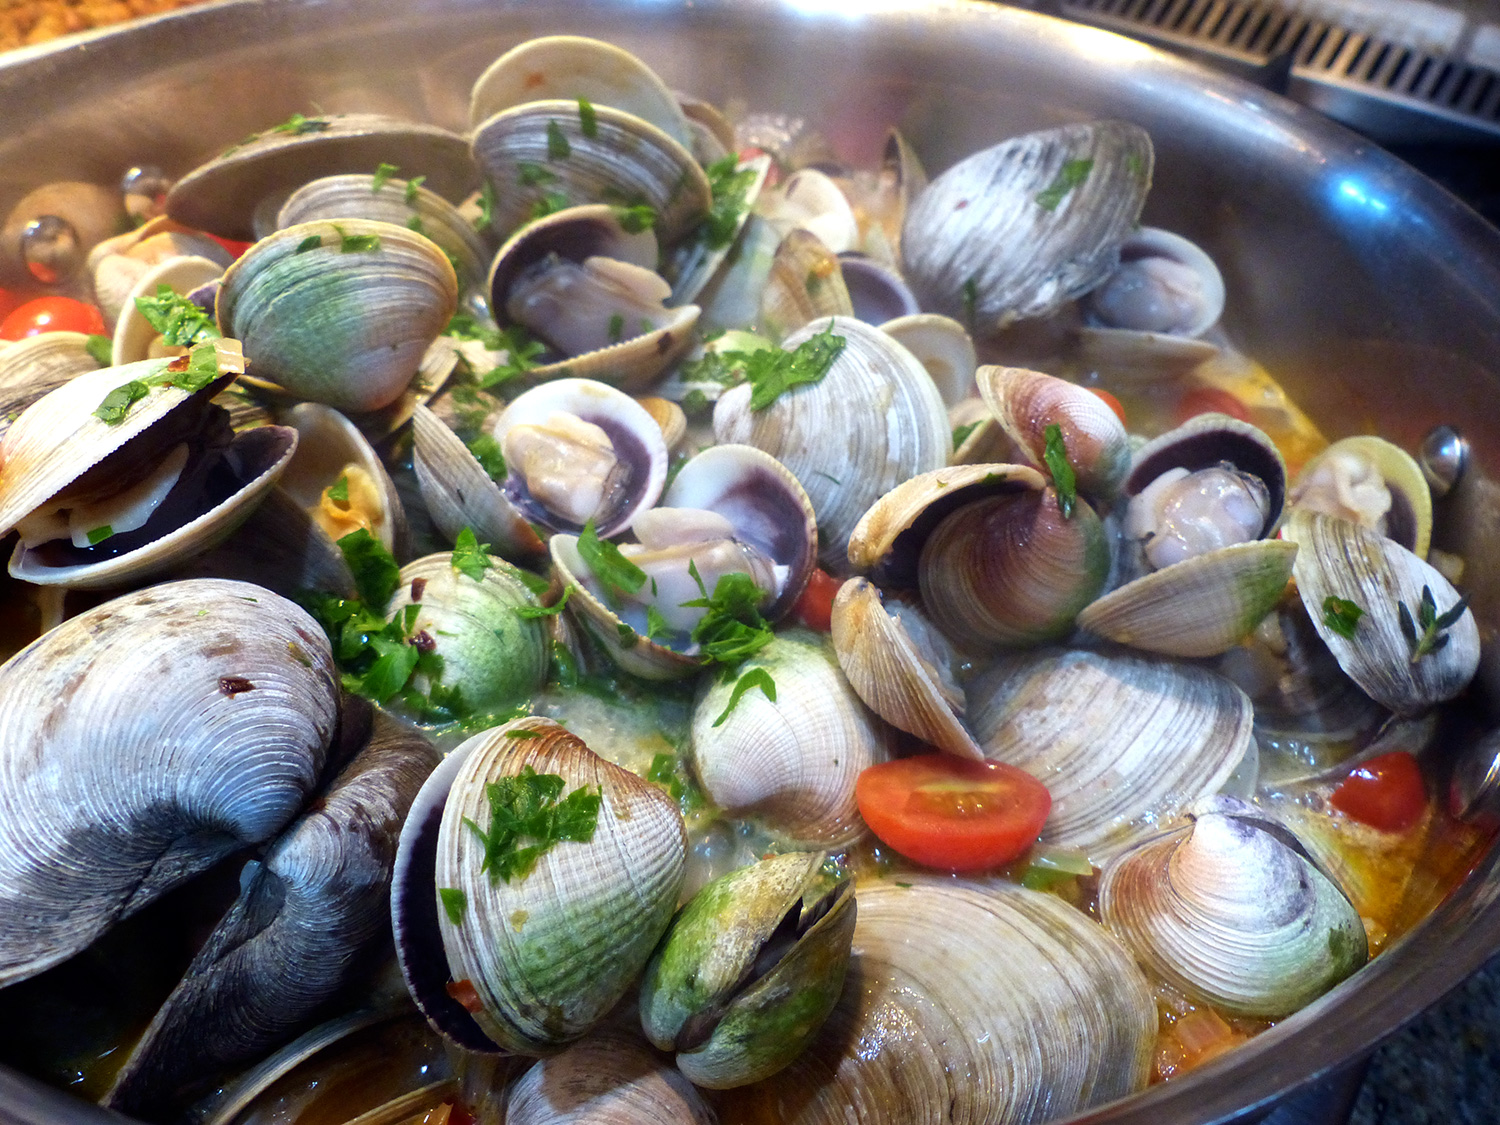
These babies starting to open and release their essence of the sea!
Add the largest clams first and add 1/4 cup wine and cover. After about 5-8 minutes or until the clams just begin to open. Add the 2nd batch of clams with 1/2 cup of wine and cover. After 5 minutes or so add the smallest clams adding the thyme and 1/2 the parsley and the last 1/2 cup of wine. Cover and let cook for another 5-8 minutes until all clams are opened. You shouldn't need to add salt to this dish since the clams emit the nature salt of the sea but taste the sauce to check if seasoning needs adjusting for salt and the red pepper flakes, depending on much heat you like. Right before serving, top with the remaining chopped parsley.

Of course, this dish is perfect with linguine, but can also be served with polenta or crusty bread. Do not forget to enjoy this with a crisp white or rose wine. I would highly recommend a Spanish Albariño or French Rose. JC and I love having this on a Sunday afternoon where the two of us just sit in front of a big bowl and have at it. My dad is a huge seafood fan and we try to make this for him when we can. When he is not around, we torture him by sending photos. I guess that is kinda mean.
It's summer time and this dish is a great starter for a BBQ. Place a big bowl on the table and watch the party take on a new life. Your guests will love just digging. What better way to begin a meal than to share gifts from the sea. Party of 10 or party of 2, clams, clams and more clams!