Creamsicle Table scape

finished-setting.jpg

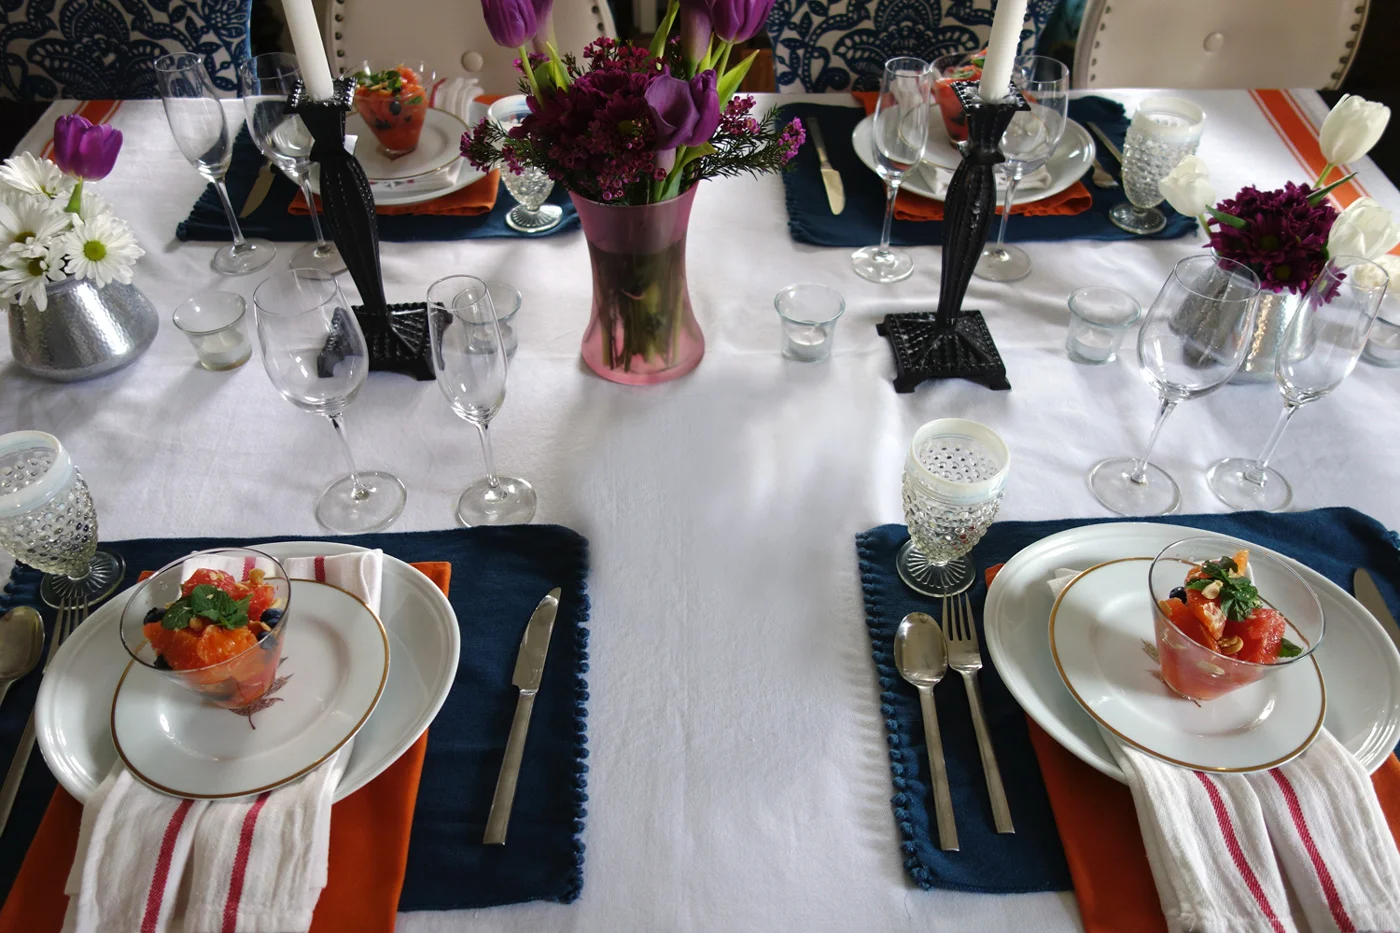
I will not lie, I love setting a table, whether it be for an big event or brunch for 4.  Just such an occasion arose several Sundays back. While rummaging through my archives I found a photo of this table setting and remembered how fresh and clean it looked.  Why rework a good thing?  That's when I started pulling out all the same linens.  It felt like a Creamsicle and seemed appropriate to recreate for this brunch.

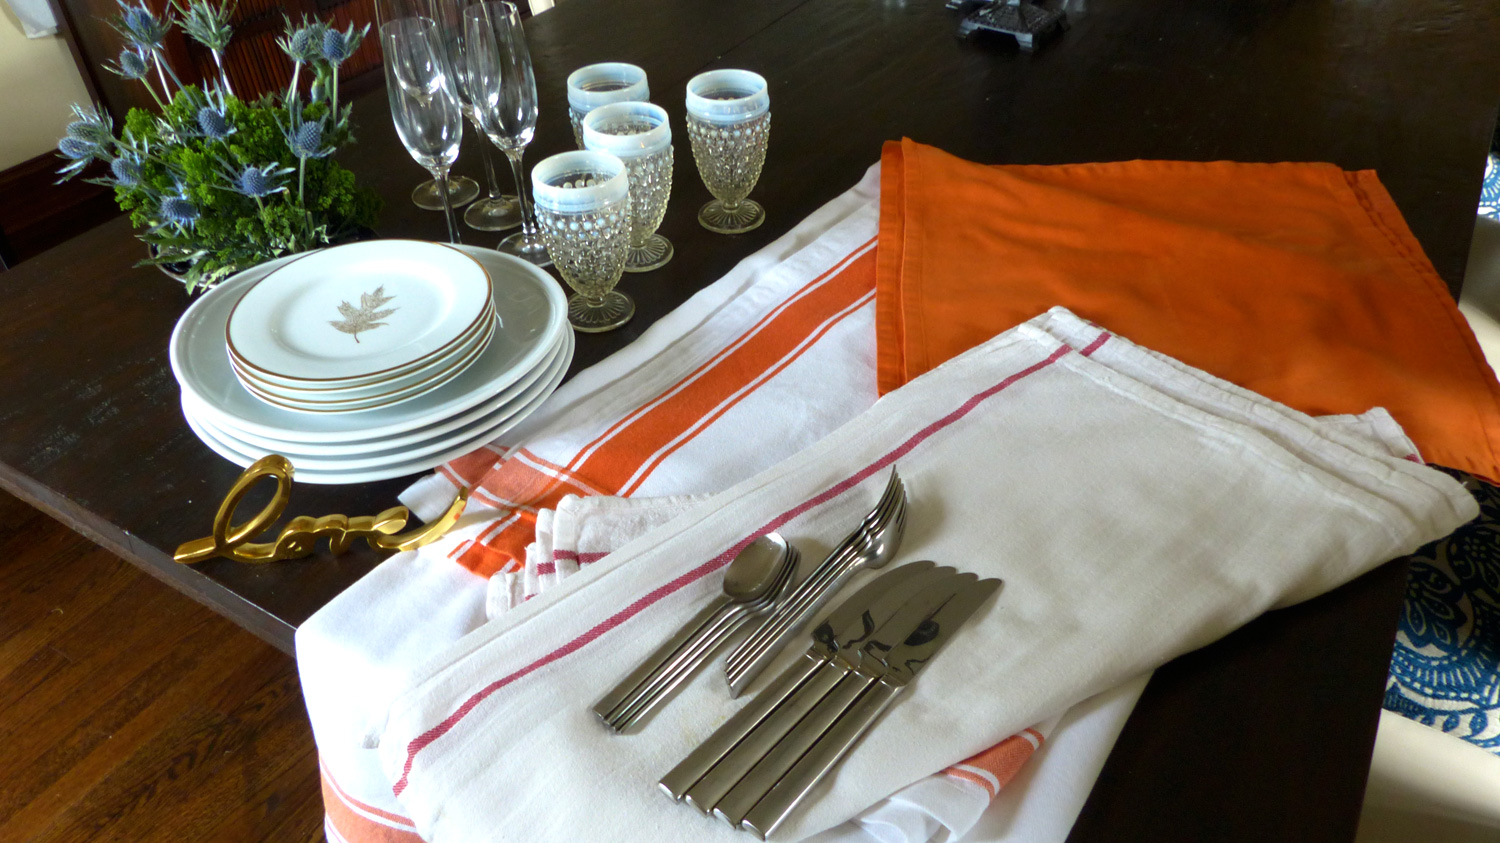
I like to mix and match items.  Styles and colors, high/low priced items that I find at different times from different stores or even garage sale finds.   For this table, I am starting out with a crisp white cotton tablecloth from Williams Sonoma that has bold orange borders. (Please note that I purchased this awhile ago so the link doesn't show that exact tablecloth.  However, if you are interested, here are two links with similar ones from Bed, Bath & Beyond and Ebay

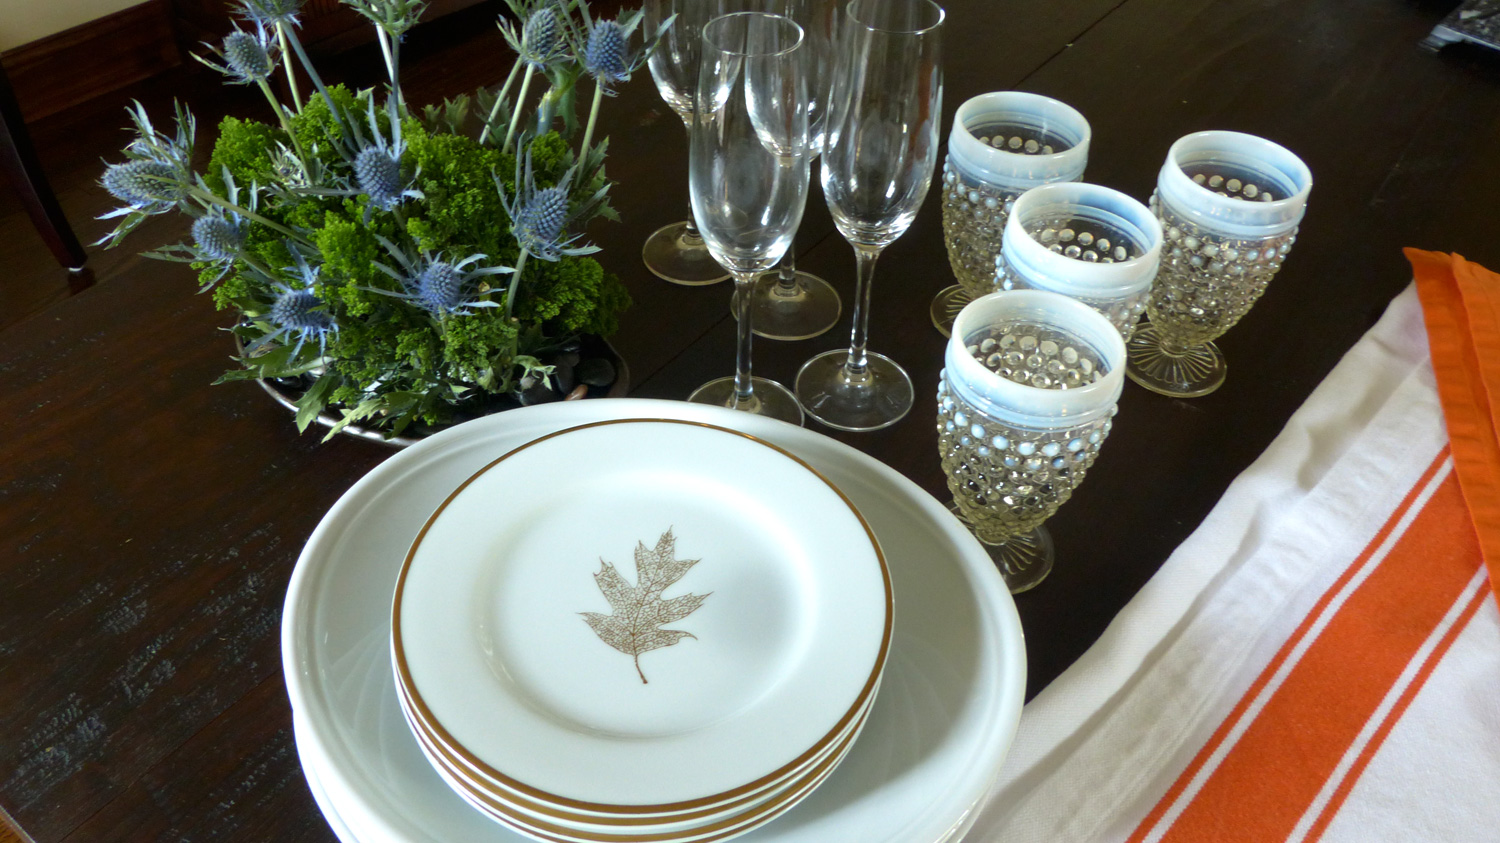
I think the idea of matching everything perfectly has been replaced with coordinating some low cost, even vintage finds with items that are more refined and using what you have to create a a particular vibe. Well, at least that's how we feel in our household.  I used a mix of white china with restaurant grade dinner plates cuddling up alongside Riedel wine glasses that didn't mind mingling with vintage water glasses found at an antique shop.


I also like to layer.  It's similar to what you do in cooking, add ingredients a layer at a time to build up "flavor".  I think this effect does exactly that.  So to complement the orange border in the tablecloth, I use deep orange napkins that I purchased from World Market. In this case, these are not used as a napkin but for color punch. To pull in the blue accents we have in our dining room, and for even more depth and separation, I added deep dark blue placemats as the base layer. Then the folded orange napkin is placed on top which will be the base for the plates.

placemat.jpg

From there, I continue to build my layers by using white with a red stripe dish cloth that I picked up at Ikea. These are super inexpensive and are great as napkins.  

Folded in left side

Folded in left side

Right sided folded in to meet in the middle

Right sided folded in to meet in the middle

In order to get the red stripe showing just the way I want, I fold the long ends back onto itself on each side to meet in the middle.  Then fold in half and place on top of the plate, followed by a salad plate.  


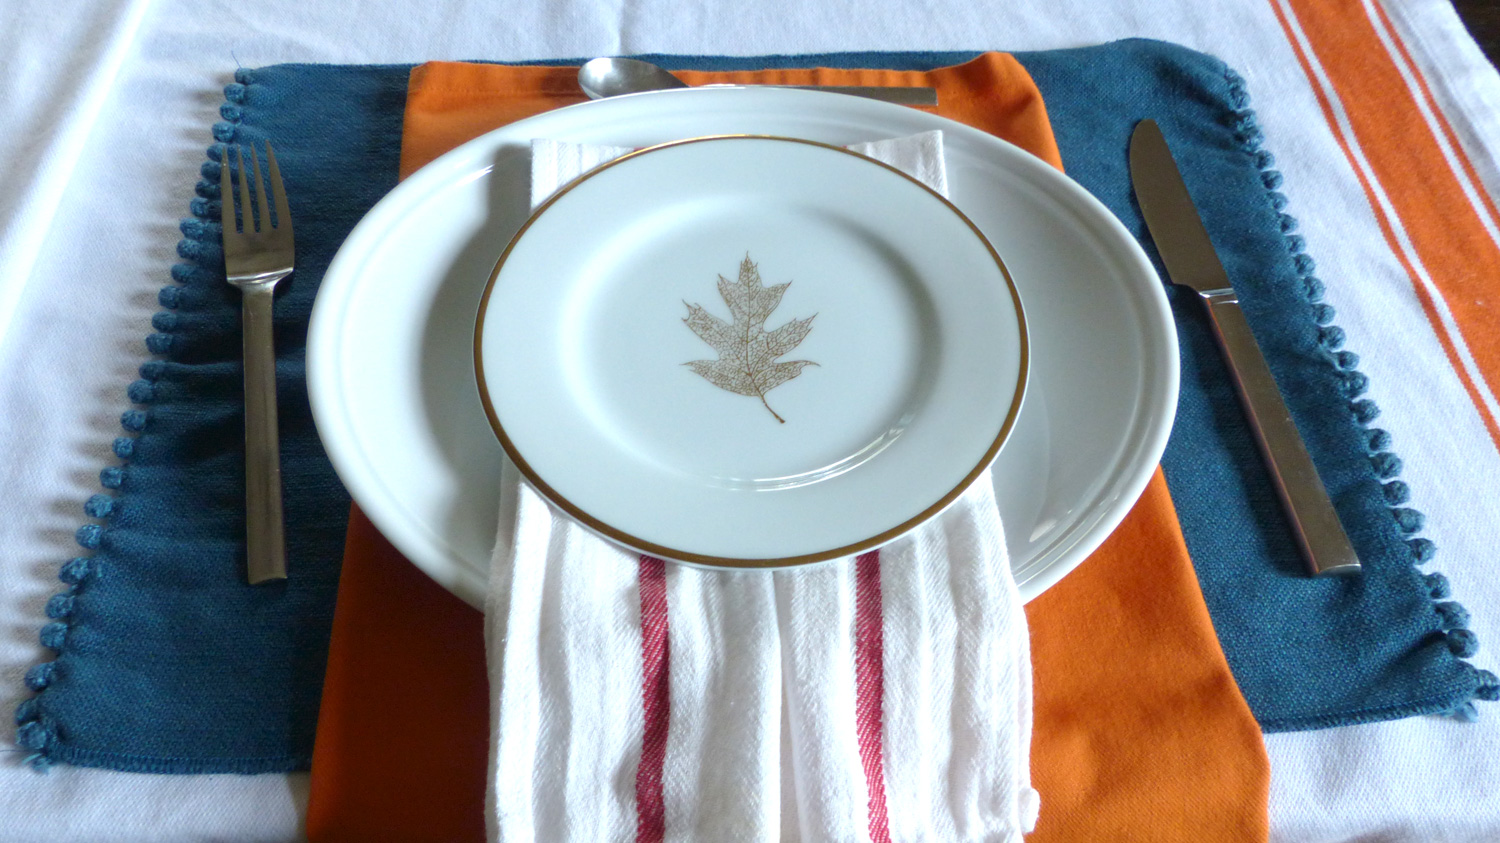
From there just start placing the silverware and glasses around each setting.  Add some candles and of course the Purple Forest arrangement,  or purple tulips and white daisy mums and that's it.  And just the like the ice pop it reminds me of, this Creamsicle tabletop that is as crisp, clean and as refreshing as the menu.

Lox on a What?

As some of you may know, I have a food sensitivity to wheat and try to be as wheat free as possible.  A few months back on a glorious Sunday morning, my hubby went out early to buy warm, soft, billowy bagels for our houseguests.  He also was thinking of me, as he opened the bag and pulled out scallion cream cheese and luscious lox.  I quickly went through the cupboards in search of my favorite Mary’s Gone Crackers  (gluten free!) only to find the cupboards bare.  What's a girl to do?  I peeked into the bagel bag breathing in their yeasty aromas.  I even starting eyeing the one who would be my wheat free wrecking ball. Oh, my temptation was deep but my WILL was stronger.

As I looked around the kitchen I spied an apple.  At first thought, it seemed like it might be too sweet, but upon realization that this would be my only delivery vehicle for my cream cheese-lox combo, I quickly washed and sliced away.

I knew it wouldn’t taste bad, but I had the bagel in the back of my head.

Much to my surprise the balance of flavors played off each other beautifully.  The crispness of the apple was so fresh against the creaminess of the cheese and the salty bite of the lox. An added bonus for me, since I like different textures in my food, was the apple provided a crunchiness that a bagel fails to give.  

Oh my friends, I dare say I might never be tempted by those soft billows again. The weekend is approaching and Sunday is as good a time as any for this combo.  Give it try. I would go as far to say these would make a great brunch plate or even a light appetizer for a fall party.  You might want to cut the apple with cookie cutters or into smaller bite sized pieces. If you choose to serve these in that way, squeeze some lemon juice over the apple slices to keep them from turning brown.  Heck, do that anyway, it will just enhance the overall flavor. 

Lox on a what? Yes, on an apple.


Tomato & Goat Cheese Tart

With just three main ingredients, this pie could not be simpler.   Its sweet and savory notes do their part to round out a buffet table for a brunch, or a slice can cozy up to a side salad for an ideal pairing for lunch.   This dish first came together for me last year when I had leftover heirloom tomatoes after assembling my Salmon Salad... A Deconstructed Platter.   I had a pie crust in the freezer that thankfully wasn't freezer burned. Stroke of luck. Some goat cheese and a few supporting characters to enhance the flavor and a pie is born.  This time I used vine ripe tomatoes and it was just as lip smacking good.  Our guests each had a second slice.

Oh, the beauty of an heirloom. Sweet wonders

Oh, the beauty of an heirloom. Sweet wonders

Ingredients

1 pie crust (store bought or homemade. I used a gluten free version so I could enjoy it)
5-7 large tomatoes, (heirloom if you can but any hearty tomato will work)
2/3 c (approx) goat cheese
Basil leaves
Salt, Pepper, Olive oil

Truly, just 3 main ingredients star in this pie party

Truly, just 3 main ingredients star in this pie party

Instructions

In a 350 degree oven, blind bake the crust until slightly golden brown.  Then arrange first layer of tomatoes in a circular fashion.  Sprinkle with salt and pepper and dot with goat cheese.  Do the same to create a second layer and repeat until pie crust is filled.  Bake until the cheese melts and tomatoes are bubbly.  Add basil ribbons and drizzle with olive oil right before serving.  For an added touch to enhance all the flavors, sprinkle flake salt on top.

Now that tomatoes are in season, bake 'em up, serve 'em up to your heart's  delight; tomato red. 

Strings... of Bean, Pepper & Asparagus Salad

Many, many moons ago I made a string bean and pepper salad to bring to a BBQ. The hostess and guests loved it, but ironically I never made it again. Mostly because back then, I never wrote any of my recipe ideas down and had forgotten all about this one.  My memory was jogged when I was shopping yesterday and saw some of the ingredients.  I decided it was worth digging into the memory banks to revive this salad.  

The main ingredients I remembered

The main ingredients I remembered

I knew I used string beans, red and yellow peppers with a creamy type of dressing. I also remembered that I cut the string beans on a severe angle, and julienned the peppers so that the visual effect was of all the ingredients being long and lean.  After that, quite honestly the rest was a blur.  This time around I found that I had asparagus in the back of the fridge and thought they fell right in line with the long and lean mantra. So, into this recipe they went. Then began the "recreation".   

Ingredients

4 c (approx) string beans, blanched then cut on a long diagonal
1 red pepper, julienned and blanched
1 yellow pepper, julienned and blanched
1 bunch asparagus, cut lengthwise on the diagonal, blanched
1 scallion, thinly sliced on the diagonal
Mint, chiffonade
 

Dressing

1/2 avocado
1/2 lemon, juiced
1/4 t course sea salt
1/8 t crushed black pepper
1/4 t whole grain mustard
3 T olive oil

String beans blanching

String beans blanching

It's the peppers' turn

It's the peppers' turn

Now the asparagus

Now the asparagus

Instructions

Trim and wash the string beans.  In a saucepan, blanch the string beans until tender but still with a bite.  Cut both the red and yellow peppers into thin julienne slices.  Once the string beans are done, remove and cut them in long diagonal pieces. Add the peppers to same saucepan and lightly blanch.  These literally take 30 seconds to one minute. You just want to get the raw bite out of these.  Cut the asparagus stems on a long diagonal cut.  After removing the peppers, blanch in same saucepan.  Add all the vegetables to a serving dish. Add the scallions and chopped mint.  

avocado.jpg


I simply could not recall what I did for the dressing but I had an avocado and knew that would deliver a creamy version.  I used a mortal and pestle to combine all the above ingredients, whisking in the olive oil.  You certainly can use a mini blender in pulse mode or a fork to mash the avocado, then whisk all together.  Pour the dressing over the room temperature vegetables and lightly toss.  


This wasn't quite the original salad, and I'm not even sure how I can say that since I can't remember what the exact original salad was, but I liked it just the same.  I loved how I could taste the hint of mustard with a bright mint finish and that all the veggies still had a fresh bite to them.  I think this is a great spring and summer side dish for a warm evening's dinner or great for a afternoon BBQ.  This could also be hearty base for a sautéd fish.  It looks great. Tastes great. And truly is a quick and easy recipe to whip up in a hurry.  So hurry, get your long and lean strings of veggies on.
 

Salmon Salad... A Deconstructed Platter

As the weather gets warmer the urge to entertain grows.  Well, at least for me.  Although, if you were to ask my husband, he would say my urge to invite guests over is based solely on having free time, weather notwithstanding. He might be right.

Entertaining friends and family is such a treat.  Spending time and sharing food with loved ones, well, that's what living is all about.  However, the trick is to be able to actual spend time when invited guests come.  So entertaining has to be easy.  Look no further, for this recipe delivers a party on a platter. 

Usually, time of day will dictate the menu, as some dishes are clearly for lunch, while others are clearly dinner or breakfast.  Every now and then there are those star recipes that are the ideal crossover dishes.  This platter is one of those dishes.  It was originally devised for a brunch menu that I created last year but look deeper into its serving possibilities.  It's a perfect lunch,  or a summer dinner or simply ideal for a large party, indoors or out.  It's my take on a Niçoise salad but a bit deconstructed and replacing the traditionally used Tuna with Salmon, as I try to avoid Tuna due to high levels of mercury.  

Why I love this dish?  Let me count the ways.  

  • Eighty percent of this can be easily prepped beforehand.  Even the day the before.  
  • It's as simple as cutting up vegetables, roasting the onions and fish and assembling a beautifully abundant platter full of options. 
  • You can use whatever vegetable combinations you have or whatever are your favorites
  • Guests can grab whatever they like to compose their own 'salad' on their plate
  • It's plentiful and fresh...and a gorgeous presentation
  • It's room temperature so it's stress free serving
  • And let's not forget... delicious

INGREDIENTS


2 lbs Wild Salmon, roasted
4 c string beans, sauteéd
2 large heirloom tomatoes, cut in thick slices
1/2 c thinly sliced red onion
1/2 English cucumber, sliced
1/2 c Moroccan oil cured black olives
1 c Greek yogurt
2 small yellow onions, cut in thick slices/oven roasted
1 endive, leaves separated
2 T chopped basil
1/4 c dill, minced
Olive oil, salt, pepper
roe, optional
Lemons

tomatoes.jpg

Instructions

In a roasting pan, place the slices of onions, drizzle with the Magic 3 (olive oil, salt & pepper). Roast at 425 degrees, turning once until they are caramelized.  About 30 minutes.  (These can be done ahead of time and left out at room temp before serving, or even slightly warmed up while the salmon is cooking). While the onions are roasting away, sauté the string beans with the Magic 3 to your liking.  I like these with some bite to them.

In a separate roasting pan, place the salmon skin side down. Drizzle with olive oil, salt and pepper and add the chopped basil on top.  Bake for 15-20 minutes at 375 degrees.  I do not like dry salmon and prefer to serve medium rare.

Salmon ready for roasting

Salmon ready for roasting

While those are cooking away, prep all the other ingredients.  Thinly slice the red onion, cut the cucumber. Chop the dill and mix it into the yogurt.  Cut the lemon wedges.  Separate the endive leaves.  (Note: all the previous cutting can be done the day before and place in containers or baggies and kept in the fridge.) Once you have all those prepped, you can start assembling your platter by placing all the above items any way you like. For me, I feel color blocking makes an attractive platter.  I like grouping same items together and spreading the color around the plate for visual interest.  I also use small bowls to hold certain items like the olives, roe and yogurt. Remember to leave a space for the star; Salmon.  For a little more pizazz, I use fennel fronds as a base for the salmon. 

All it really takes is some assembling to "deconstruct". 

All it really takes is some assembling to "deconstruct". 

I have made this platter several times now and really do love it's presentation, it's flavors and it's adaptability to any guest.   I have added boiled potatoes or roasted beets to it on occasion which truly makes it a complete meal in and of itself.  This dish can be adapted for a gathering of 4 or a large party of 20.  Deconstructed salad... makes the best building blocks of a great meal.  Get your entertainment apron on start deconstructing.