Chick Pea Salad with Warm Potatoes - A Hot/Cold Salad Saga

I am a huge fan of beans.  With the wide variety of legumes and the infinite ways to cook them, the recipes ideas are endless.  They each have a different flavor, texture and purpose.  I love when they play together, and I love when they play with others.  In this episode  of "How the Bean Turns", the chick pea and the potato meet in a warm vs. cold encounter.

As you will often hear me say... "I made this dish many years ago because these were items I had at the time." Since starting this blog I have been rummaging through notebooks to see what cryptic notes of recipes past I may have left.  I came upon a scrap of paper with a simple description of this salad with no quantity specifics.  Which means this was early on when I realized I needed to start writing my ideas down but didn't think the amounts were important. (And I still don't, but I do realize that, like for my sister, Jill, amounts are essential.)

A funny thing about my recipe ideas is that since I made them up on the fly, some of them never got repeated. Mainly because I don't specifically go out and buy those items in order to make it again. Add to that no notes, tons of other ideas and I have a memory like a sieve.  I see food items that interest me and just come up with something else.  However, this blog has given me a wonderful platform to revive recipes that I thankfully wrote down in some fashion or another. I have to give total credit to JuanCarlos, who years ago bought me a notebook and said, "Start writing them down."  Hail King JuanCarlos for his brilliant foresight. 

So here goes another warm & cold salad for all occasions.  Which is ideal for this time of year when the nights have a little chill but the days are warm. 

onions-chopped2.jpg

Ingredients

1 29 oz. can Garbanzo/Chick Peas
3 c potatoes, cut in 1" pieces
1/2 yellow pepper, cut into mince like pieces
2 scallion, sliced
1 garlic clove, minced
1/4 c shallot, minced
1/3 c red onion, diced
2 c grape tomatoes, cut in half (if you can find the red, yellow or orange versions buy different colors.  It adds to the overall festive feel of the salad. No worries if you can't, just use all red.)
4-5 stalks Hearts of Palm, optional

Dressing

2 T fresh lime juice
1/4 c sherry vinegar
2/3 c Olive oil
salt & pepper to taste
1/4 c each Basil, mint, chopped
Whisk together in the order listed above.

Instructions

Boil the potatoes until they are slightly undercooked.   Then remove, drain and set aside.  Using the same pot, sauté the shallots, red onion and the white parts of the scallion until soft.  Then add the potatoes and yellow pepper cooking until all are nicely caramelized.  Add the garlic and 1 c of grape tomatoes and cook until warm.

Meanwhile, in the serving bowl, add the chick peas, the green parts of scallion and the remaining 1 c uncooked grape tomatoes (and Hearts of Palm if you so choose).  Toss with the half of the dressing, then mix in the warm potato mixture and stir in the remainder of the dressing.  Serve immediately.

If you recall from an earlier post entitled Salad: Hot & Cold, I am an advocate of mixing temperatures in salads. Although this one is more warm and room temp, it does give a nod to that thought.  This salad is great for a big party, a Sunday brunch plate, a Saturday afternoon lunch, or now as the weather turns warmer, for a BBQ.  It's a good hearty dish that really plays well with so many main courses.  I made this for a dinner party for a family of friends, three of which were young teenagers.  I got thumbs up from all, which put a smile on their faces and mine. Warm up your smile, with another salad saga of Hot & Cold.  

Post Note: I recently made this again when our nephew, John, came by for dinner.  Here's how it played nicely with all our other offerings.

Simple green salad with carrots/red onion, sautéed Haricot Vert, sautéed Cremini mushrooms, Shrimp & Monkfish in a saffron broth and our star potato/chick pea salad.

Simple green salad with carrots/red onion, sautéed Haricot Vert, sautéed Cremini mushrooms, Shrimp & Monkfish in a saffron broth and our star potato/chick pea salad.

Citrus Salad Bowl - Served One by One

With Easter fast approaching, you might need some ideas for dinner.  I thought now might be a good time to share a little wisdom, and fun trick I learned from hosting last year's Easter dinner.  It was a small gathering with both our immediate families and we decided to keep it really simple with a select few offerings.   When it came to the salad, I got it stuck in my thick skull to serve it individually plated instead of one big bowl.  This idea sprouted from a clear vision I had on how the salad should look. Little did I realize that the individual plating and serving before the main meal would work out even better than I could have imagined.  

Traditionally, I make a big salad and place it out with the main course.  Without fail, everyone says, "Wow, that looks amazing but I'll have salad later.' Then they dive into all the other offerings, getting too full, and thus leaving lots of yummy salad left over.  This brilliant, new plan allowed me to serve the salad before the main course came out. An added bonus was timing, as the hunger meter was beginning to tick, with our guests starting to want more after appetizers.  Perfecto mundo!  cue the individual plates and witness the entire salad course disappear.  Now, I'm no magician, but this was a nifty trick in having no left over salad and plus I got them to eat greens!!!  I wholly recommend plating your salad and forcing your guests to enjoy your nutrient rich offering.

The salad I served was a variation on one that I've made many times.  This time I scaled back on some ingredients and focused on the Boston lettuce with citrus fruits to keep it clean and fresh, like a burst of Spring.  I think this is a light, colorful salad to serve for Easter or brunch during this time of year.  It is one of those salads that can actually be prepped a day in advance, making the day of your event much easier.  Each of the items below can be cut and stored in containers, then just assembled 15 minutes before serving.

Your starting line up of glorious greens and oranges colors of nutritious, deliciousness.

Your starting line up of glorious greens and oranges colors of nutritious, deliciousness.

Ingredients

(makes approx. 10)

Salad                                                                                                     
3 heads of Boston lettuce, leaves carefully separated
3-4 red grapefruits, segmented
4 oranges, segmented
3 avocados, cubed
4 Persian cucumbers or 1 English cucumber, sliced
1 c fennel, shaved
1 c celery, sliced
1/2 red onion, thinly sliced
2-3 Scallion, thinly sliced


Dressing * 

1/4 c chives, chopped
Fennel fronds, chopped
1/3 c Juice of grapefruit & orange
1/2 c Olive oil
Salt, pepper

* This mixture using only the citrus juices is quite mild. If you want more punch, add a splash of balsamic vinegar.

Instructions

Cut the cores from the lettuce so the leaves can be separated and kept whole.  Wash and set aside to let dry.  (If prepped the day before, make sure they are dry, then store them with a slightly damp paper towel and place them in a container or plastic bag in the fridge.)

Segment the citrus fruits, collecting all their juices and reserving for the dressing. Shave, slice and dice up the remaining ingredients and combine them in a bowl.

Chopped and ready to go. The most important part of an assembly line, having everything prepped.

Chopped and ready to go. The most important part of an assembly line, having everything prepped.

To prepare the individual plates, place 2-3 full lettuce leaves in a bowl like shape on the plates.  Then add several pieces of grapefruit and orange to each plate.  

Lettuce bowl

Lettuce bowl

Assembly line awaiting their topping and a rain of citrus juices

Assembly line awaiting their topping and a rain of citrus juices

In a separate bowl, combine the citrus juices, oil, salt, pepper and some of the fennel fronds. Whisk together. Since this will be individually plated and not all tossed in a bowl, I recommend combining all elements minus the lettuce and the citrus and lightly dress these items, reserving some of the dressing to drizzle and finish off each plate.

Top with the sliced mixture and drizzle the remaining dressing over each salad topping with some of the fronds.  Serve immediately. 

Drizzle some dressing over top as the final touch.

Drizzle some dressing over top as the final touch.

Have I mentioned just how pleased I was serving the salad this way?  Instead of praying our guests leave room for salad at the end, it was a slam dunk that they ate up every last bite.  Truly savoring this super fresh, vitamin packed salad first.  And because it is light, they had room for the rest of the meal, too. A ploy I may just employ a bit more often. I hope you do, too.

Side note:

This salad tastes equally delish if served in one large bowl.  You can decorate this any way you like. You can toss all the ingredients together for a green and orange rainbow of color.  Or you can present it similar to the individual plates, placing all the lettuce on the bottom and focusing all the other ingredients in the middle. Any way you toss it, you and your guests will get a fresh bite of salad that will brighten more than your senses.

Print Ready Recipe


Pizza Rustica - An Italian Easter Tradition

"Tradition!  Tradition! "  As Zero Mostel so famously belted out in Fiddler on the Roof, it is what grounds us to our own history.  I love family traditions. They fill me with memories and smiles, good times and laughter of being together as a family.   And for me, a big part of that was being in the kitchen with any one of the 3 incredible women who inspired my love of cooking and baking.  My Italian grandmothers and mother: Powerhouses in the Kitchen. As a little girl I would watch them and help whenever and wherever I could.  I studied, learned and committed most of what they did to memory. Thankfully, some recipes, like this one, Pizza Rustica were written down, so I can keep the tradition going.  Today's recipe is brought to you by these two amazing woman, my grandmothers.  

Trofimena Carmela Annunziataaka - Mildred Majewski, mom's momPhoto Credit: Paul Majewski

Trofimena Carmela Annunziata
aka - Mildred Majewski, mom's mom
Photo Credit: Paul Majewski

Carmela Marie Giovannaaka - Mildred Perri, dad's mom

Carmela Marie Giovanna
aka - Mildred Perri, dad's mom

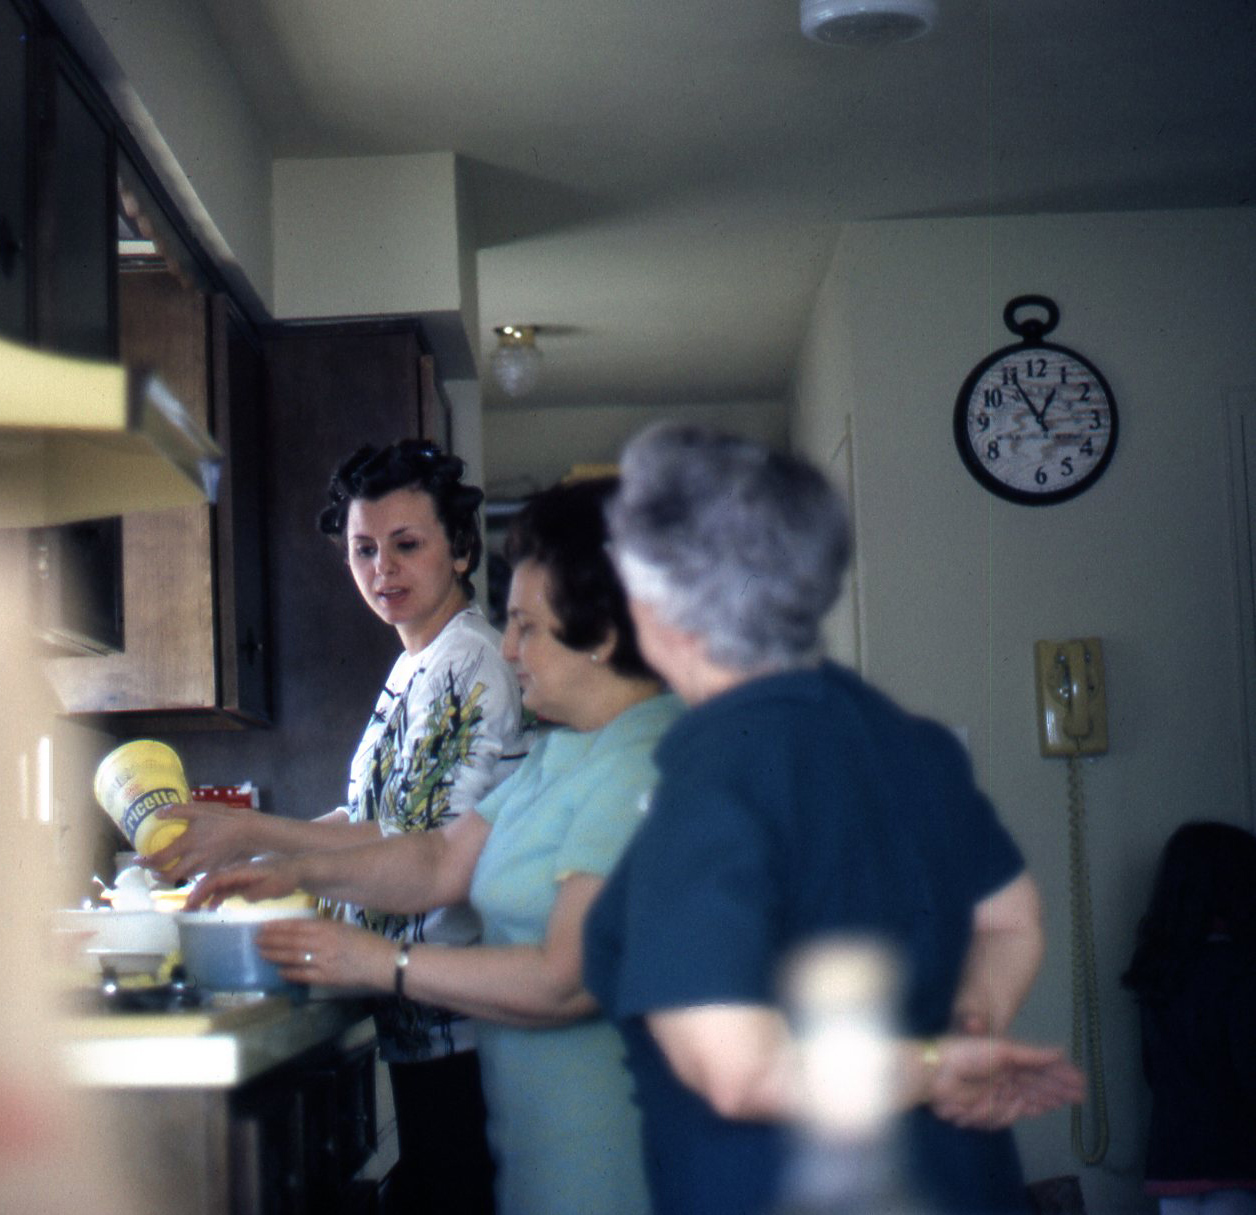
The 3 Powerhouses of the Kitchen - Literally making Pizza Rustica.  That's my gorgeous Mom. I can't believe I found this photo!!!  A treasure.

The 3 Powerhouses of the Kitchen - Literally making Pizza Rustica.  That's my gorgeous Mom. I can't believe I found this photo!!!  A treasure.

For the past few years, I have been making Pizza Rustica for Easter.  What is that, you ask? Well, pizza, in Italian, simply means pie.  Rustica means rustic. Duh! So this is a rustic pie packed with cheeses and meats served typically at Easter to break Lent.  For those who might not know, Lent is that period of time prior to Easter when Catholics are supposed to abstain from eating meat (which I do daily anyway, so no sacrifice for me, hehe). Thus, this 'more torte than' pie celebrates the return to eating meat. It was a definite tradition in our home growing up and one I'm trying to keep afloat. 

It is rich. It is dense. It is a delicious and decadent pie. One that my parents, in particular my dad, absolutely love.  Nothing brings me more joy than making traditional recipes for them and seeing their happiness.  I relive the moments of my childhood. This recipe is not difficult to make, just a little time consuming.  You may see versions where the filling combines all the ingredients together. That is the easy way out.  But my grandmas patiently and lovingly created layers. So that’s what I do.  Plus, I think it looks beautiful that way.  (Funny thing is my mom and I were in heated debate about this methodology.  She swears her mom used the layering method, of which I have no doubt.  But claims my dad's mom mixed it all together.  I remember them both layering it, so that's that. Take the time to layer it and do it the pretty way.) 

I like to think of this as a three part recipe.  1- Make the dough.  2- Make the filling. 3- Then layer the meats and cheeses.    Here we go.

Ingredients

Dough
2 lb. Flour (approx. 6 cups)
2 tsp. Baking powder
1 c. milk
1 c. oil
5 eggs
dash of salt & pepper

Combine all the above ingredients in a big bowl. I add the eggs last. Once all the dough comes together, knead on a board until dough is smooth.  Divide dough into two sections (2/3 and 1/3).  Roll out the 2/3 portion and place the dough into a 9" x 3.25" liter spring pan. (Because the pie is so dense and heavy, I suggest using a spring pan so you can remove it.  If you don't have one or don't mind serving it from the baking pan, then just us the largest pan you have. My grandmothers like making this in a deep pan, but you can make it in a long rectangle. You will just have less layers.)

Combining into a ball.

Combining into a ball.

Kneading until smooth

Kneading until smooth

Roll it out to size.  If the dough breaks, just patch it.

Roll it out to size.  If the dough breaks, just patch it.

Now onto the filling.

Filling
½ - ¾  lb. Prosciutto, sliced thin
½  lb. Genoa salami (sliced thin)
½  lb. Soppressata (sliced thin)
1 whole Basket cheese (farm fresh cow's milk cheese made & left in the basket)
3 lbs. Ricotta cheese (whole milk)
6 eggs
fresh parsley, chopped (optional, another debate. sometimes it was added, sometimes not)
Salt

Cheesy deliciousness

Cheesy deliciousness

In a separate bowl, combine the ricotta cheese, basket cheese and parsley with the eggs and season with salt.  

You have to crack some eggs in this recipe

You have to crack some eggs in this recipe

Get all the meats items ready for assembly.  Begin the layering by first adding a layer of the cheese mixture, spreading evenly to cover the bottom. You want about 1/2" of the cheese mixture. Then add a layer of the prosciutto, followed by another layer of the cheese mixture. Next layer the salami, repeat the cheese layer. Then a layer of soppressata, and repeat the process until you fill up the pan.

First layer of goodness going down.

First layer of goodness going down.

Layering up and up, overlap the meat so there is a good amount.

Layering up and up, overlap the meat so there is a good amount.

I use an offset spatula to spread the mixture around.  It makes it a lot easier.

I use an offset spatula to spread the mixture around.  It makes it a lot easier.

Roll out the remainder of the dough a little larger than the top of the pan.  Place over the top of the pan. Trim the excess but leave enough to seal. Then using two fingers, pinch to crimp and seal the top.

Since the dough is quite pliable, it's much easier if you roll it onto the rolling pin and they roll it onto the top.

Since the dough is quite pliable, it's much easier if you roll it onto the rolling pin and they roll it onto the top.

Trim the excess

Trim the excess

Using two index fingers, pinch the dough together to create a seal AND a pretty border.

Using two index fingers, pinch the dough together to create a seal AND a pretty border.

Bake at 350 degrees for 1 hour or until golden brown.  Let rest and cool before lifting it up through the springform pan.

This monster of a "pie" feeds an army, so we usually serve it as an appetizer with very few, or light apps to accompany it.  Like olives, or fennel with olive oil and course salt.

Our line up of apps one year.  Roasted red peppers, burrata with fresh tomatoes/basil, fennel with coarse salt/pepper/oil and the of course, the towering Pizza Rustica.

Our line up of apps one year.  Roasted red peppers, burrata with fresh tomatoes/basil, fennel with coarse salt/pepper/oil and the of course, the towering Pizza Rustica.

Layers of rich deliciousness.

Layers of rich deliciousness.

Serve up a slice. Yes, an Italian Easter Family Tradition... but delicious anytime.

Recipe Print Friendly Version

Food photos in this post credited to: www.asithappens.me

Shaved Brussel Sprout Salad

Raw everything is all the rage these days, and shaved brussel sprout salad is so in vogue.  I get a huge belly shake of laughter seeing how vegetables are taking center stage, becoming mega stars in a social media video blitzkrieg.  It is about time that vegetables got their due.  For too long now, bacon and butter have dominated the stage, whoa-ing audiences with their fatty appeal.  I am glad to see these vibrant, nutrient packed edibles get their trophies. That said, enough with cauliflower pizza making. I’m wheat and yeast free and can tell you NOTHING replaces a yeast rising doughy bite!!  Move over cauliflower because Brussel Sprouts will soon have their own youTube channel!!

This veggie craze is a good thing.  I've been doing it for awhile now. Which is why it's funny that years ahead of the raw craze and fascination with vegetables I served a shaved broccoli and brussel sprout salad.  My attempt back then was almost successful.  I say almost because I served it without testing it first. (As usual, but the no testing in this case didn't serve me well.) I didn't quite realize just how intense, sometimes bitter these greens can be when served raw.  I can't even remember what dressing I used, but I can attest that I didn't finesse them enough.  What a novice!  I've learned a thing or two.

My recent lure back to raw brussels came when my friend, Tecla, and I were enjoying each other's company for lunch at Lure, and we ordered a shaved brussel sprout salad.  We did so to be healthy knowing that we would be consume some Rosé wine and a few other items with a higher calorie count.  Yes, that's what ladies who lunch do. The salad was good. But it awoke a definite redemption itch in me.  I needed to conquer this salad on my own terms ensuring that I calm it's intense flavors and cox it's crispy freshness to palates far and wide.  

The opportunity was ripe when I bought a bunch of enormous brussel sprouts from the new organic market by our house.   Alas, I ran out of time to make them before we left on our trip to Miami. So what did I do??  NO, I didn't throw them away.  No, I didn't give them away, as it was too early in the morning to call anyone.  So, I did the next best thing.  I packed them in Juan Carlos' bag!  

Once in Miami, more good fortune came my way.  On our way to Key Largo we happened upon a farmer's market with glorious produce.  Even though we only had a few more days in Miami, I HAD to buy some. So I picked up the biggest radishes I'd ever seen (and a few other items including the sweetest cantaloupe ever).

As I cut the brussel sprouts, I knew I wanted to add more than what I've seen in other sprout salads including the one at Lure. Since I had those radishes they got shaved in.  With these two intense flavors some sweetness was in tall order.  Call upon the carrot to do what it does best, add sweetness.  Grated that up, added scallions and red onion, some chopped parsley for that earthy herb note, and for another crisp and refreshing bite I added some celery.

The salad at Lure was just brussel sprouts and pine nuts with a creamy dressing.  But JC can't eat dairy, plus I didn't have anything like that in our Miami fridge.  Also, I really felt that this salad needed to be fresh and bright with a hint a sweetness.  Orange was my answer.

Here's the nuts and bolts of this recipe.

The vegetable line up
The dressing ingredients

Ingredients

8 c brussel sprouts, shaved
2 c carrot, shredded
3/4 c radishes, shredded
2 c celery, shaved or sliced thinly
3/4 c red onion, thinly sliced
1/3 c scallion, sliced
1/3 c fresh parsley, chopped
2 oranges, segmented (blood orange if you can find it)


dressing

2/3 c juice of an orange
2 T lime juice
2 t balsamic vinegar
2/3 c Olive oil
salt, pepper


Instructions

Prep all your vegetables as noted above.  I used a mandolin on the sprouts, the onion and celery. I used a box grater for the radishes and carrot.  If you don't have, or don't feel comfortable with a mandolin then simply thinly slice the vegetables.  

Shaved, sliced, chopped and ready to go.

Shaved, sliced, chopped and ready to go.

Place all the cut vegetables in a large serving bowl and set as you prepare the dressing.

Segment the orange.  As I mentioned, I was fortunate to find blood oranges but you can use a perfectly good navel orange.  As you cut the segments, do this over a bowl so you can catch any of the juices that may drip down.  Squeeze whatever juice you can get out of the pulp. You will most likely need one whole orange to get 2/3 of a cup.  Whisk together all the remaining ingredients and pour over the salad, tossing thoroughly.  Add the orange segments to the top and serve.  This salad is best when it is dressed at least 15-20 minutes prior to serving.

Awaiting the marriage.

Awaiting the marriage.

When I made this salad in Miami, I didn't think of using orange segments in the salad, just the juice.  Mostly because I only had one orange and that got all squeezed up for the juice. This time around back in NY I found blood oranges and had that aha moment. When I cut them open and saw the ruby red glory, I knew these needed top the salad and shine their unique sweetness on this salad.  


I must say, and my niece, Gianna, will confirm these added a great, bright burst of flavor.  You don't really need me to list the pairing suggestions for this one, but here is a photo of who my sister, Alyssa, served it when I brought the salad to her house.  

Potatoes Anna turned Potatoes Dana

The pizzazz of the potato.  The fluffy filling, the creamy texture, the crispy crust, the endless uses. Oh, my love affair with this starchy spud is deep.

I adore the versatility of these lumpy tubers.  Slice 'em, dice 'em, fry 'em, mash 'em.  I could go on and on.  The adaptability of a tasty tater is so vast that you can create dishes that range from super simple to elaborate, from rustic and hearty to elegant at any dinner party.  Which is why I'm always on the hunt for new ways to serve them. Awhile back I was fishing around the web and happened upon a recipe for Potatoes Anna from Martha Stewart. It seemed super easy with a crunchy outcome.  As we all know by now, I love crunchy things so it seemed like a no brainier, except that the recipe called for butter which my hubby, JC, can't eat.  But there was an emergency in my house. Potatoes were in abundance coupled with my severe hankering for some starchy goodness.  A recipe intervention was desperately required. So with two types of potatoes about to expire, tons of onions on hand, and toss in the elimination of butter, the time was ripe to modify Potatoes Ann a and make it my own.

Click here for the original recipe, in case you want to try the butter, no onion version.

Here's how it went down the first time.  Keep on reading to see what I recently did to make them even more satisfyingly star spudded.

Ingredients 

Idaho potatoes, thinly sliced
Red new potatoes, thinly sliced
Red or yellow onion, thinly sliced
Magic 3 (olive oil, salt, pepper)

The reason I haven't given exact amounts is because you can make this if you have 3 potatoes or more. It depends on the size of our pan or how many layers you want. Also you may get more slices depending on the size of the potato.  I used a 12" cast iron pan for about 6-7 potatoes.

Instructions

First things first, using a mandolin start thinly slicing your onions and potatoes. If you don't have a mandolin, do not freak out. Do it the good old fashioned way and slice them with a knife, (or even a box grater on the widest cutter).  

Slices of potatoes and onions

It's best if you use a cast iron pan for this recipe, as it holds the heat and creates the crust you want.  Again, no need to freak, If you don't have one. (Although I would highly recommend investing in one as a cast iron pan has tons of uses.)  Just use a pan that is oven safe and start placing the potato rounds in an overlapping circular fashion around the pan covering the entire bottom in one layer.  Add the onions slices, drizzle some oil, salt, pepper. Continue layering alternating between the two potato types, adding the onion, oil, salt and pepper to each layer. Keep going til you fill the pan up or run out of potatoes, whichever comes first, but do not add onions to the final top layer.

Potato circles
Continue layering adding onions, salt, pepper and oil to each layer.

Continue layering adding onions, salt, pepper and oil to each layer.

On the burner, cook at medium high heat until you hear the sizzle.  You want to create a crust on the bottom. Then place the pan in a 450 degree oven for an hour.  Test it with a knife to see if the potatoes are done.  You want them to be tender in the middle but crusty on both top and bottom.  

A good amount of crust.  Now you can remove it from the oven. This will be on the bottom once you flip it over.

A good amount of crust.  Now you can remove it from the oven. This will be on the bottom once you flip it over.

Once they have reached the perfect crust on top, carefully, and with oven mitts, place a large plate over the top of the pan and flip over so the bottom crusty part is the top.  You are going to squeal with joy when this crispy creation is revealed.

SQUEAL!! Smaller version made in a cast iron pan.  Shhh, this one has the cheese!

SQUEAL!! Smaller version made in a cast iron pan.  Shhh, this one has the cheese!

Use a serrated knife to cut cake like slices.  Ok, here is the rundown of ways you can serve this. It's a great dish for a party since you can serve it room temp.  It's ideal as a side dish to any meat, fish or chicken meal. It's a no brainier plate for a brunch table to be served with eggs.  Or how about with some smoked salmon and sour cream.  Oh, you don't need me to tell you how to eat this satisfying spud.  Just dig in, damn it!

slice.sourcream2.jpg

 A slice with greek yogurt and scallions

A great complement to smoked salmon and sour cream.

A great complement to smoked salmon and sour cream.

Just recently I made this again but had the brilliant idea to add cheese to each layer.  Ok, so maybe I'm not so brilliant since it is a well known fact that adding cheese to anything makes it better. Here is an inside look at that version.  I used a Spanish cheese, L' Alt Urgell, since it was the only one I had in the fridge and it created cheesy, gooeyness that upped the ante on these layers of lusciousness.  I'm glad I had this cheese as it added an earthy, nutty flavor to the dish. Use whatever you like but I would avoid any really soft creamy cheeses like goat or ricotta, as it might ooze too much during the cooking process.  

I made this baby one using a smaller 8" cast iron pan.  I used about 4-5 potatoes.

I made this baby one using a smaller 8" cast iron pan.  I used about 4-5 potatoes.

If you love spuds like I love spuds you going to fall in love with this one.  Hope you enjoy how Potatoes Anna turned into Potatoes Dana!