Ba Ba Ba Basil-ed Potato Salad

Summertime and potato salad go together like hamburgers and buns. How many picnics, BBQ's and big family gathering tables don this starchy delight during the season?  It's the 'go-to' hearty salad that everyone expects. Yet, serving mayo in the hot sun might not be the wisest choice. Hell, it might be down right dangerous.  

I'm all about giving guests food they love, but I'm also hooked on introducing new dishes or serving old favorites with a twist.

Best approach. Use what's in season to make your statement. You know what's in glorious abundance now? Basil. Oh, that smell.  That floral, herbal bouquet that makes you want to actually BE a green leaf.  (I had an distant uncle who loved basil so much he used to roll it up and shove it up his nose.  As a kid, this grossed me out big time, but somehow now I'm feeling that nasal basil vibe. Funny how time and perspective can change.)

Uses for basil = a Zillion.  That is an understatement. Try infinite.  Given how many ways you can use it I even thought I would write a post entitled 3 ways to basil up your meal.  But settled on the laser focus of revamping potato salad instead.  

I have been making a version of potato salad like this for a while, and even more so now since JC and I don't eat eggs, thus no mayo.   But here are a few motives for you.

  1. It tastes frigging AWESOME.

  2. Without the mayo, it's less calories and as a bonus won't spoil in the sun.

  3. It's super easy with just a few ingredients.

(Seriously, I don't know why I count the reasons down since I could continue on and on. But three should be enough to convince you.)

I would say that basil is the star in this show with potatoes and garlic nudging their way to leading role status.  I'm not going to yammer on too much longer since we need to just get right to making this jacked up flavor bomb for potatoes.   The smell is going to knock you over.

The star, Basil and the rest of the gang: Potatoes, garlic, sea salt, oil. I used course Bevia Sea Salt from Despaña.

The star, Basil and the rest of the gang: Potatoes, garlic, sea salt, oil. I used course Bevia Sea Salt from Despaña.

Ingredients

8 c Potatoes (any style/ I like using new or fingerlings)
2 c Basil  
3-4 Garlic cloves. medium
1 t course Sea Salt
1/4 t Whole Peppercorns
1/2 c Olive Oil

Instructions

Cut the potatoes in bite sized pieces. Boil or roast them.  

While those are cooking away, prepare the dressing.  I like using a mortar and pestle for small batches but using a mini blender, processor is best for bigger batches as well as gives you a nice consistency.

For the mortar and pestle: Crush the garlic using coarse sea salt to break it down.  Add the peppercorns.  Add a handful of the fragrant basil leaves and crush them to make a paste.  Then pour in the oil and stir together.  

For the mini blender: Smash the garlic first then add all the ingredients minus the oil.  For this method, use crushed black pepper intead of whole peppercorns.  Pulse until minced. Then add the oil to blend.

basil.processor.jpg
Chopped up and packed with basil essence.

Chopped up and packed with basil essence.

A very important note that I often times do not write.  Taste as you go. Although I give ingredient amounts, the basil and garlic you are using may be more or less intense than mine. And when using so few and such fresh ingredients it's all about the flavor. It might need a little more salt or garlic.  Taste, taste, taste.  Once you love it, then pour the mixture over the 'taters while they are still warm.  The warmth helps the flavor absorb into the them. Stand back and let the aroma waft over you.

I once made this dish last minute when friends stopped over.  They were so blown away by the intense bouquet of basil and garlic that they could not believe how simple it was and how few ingredients it had. Use this over anything really.  Here I go again with a list that could go on, but this is a start.

  • Grilled Chicken or Meat

  • Grilled or Roasted Fish
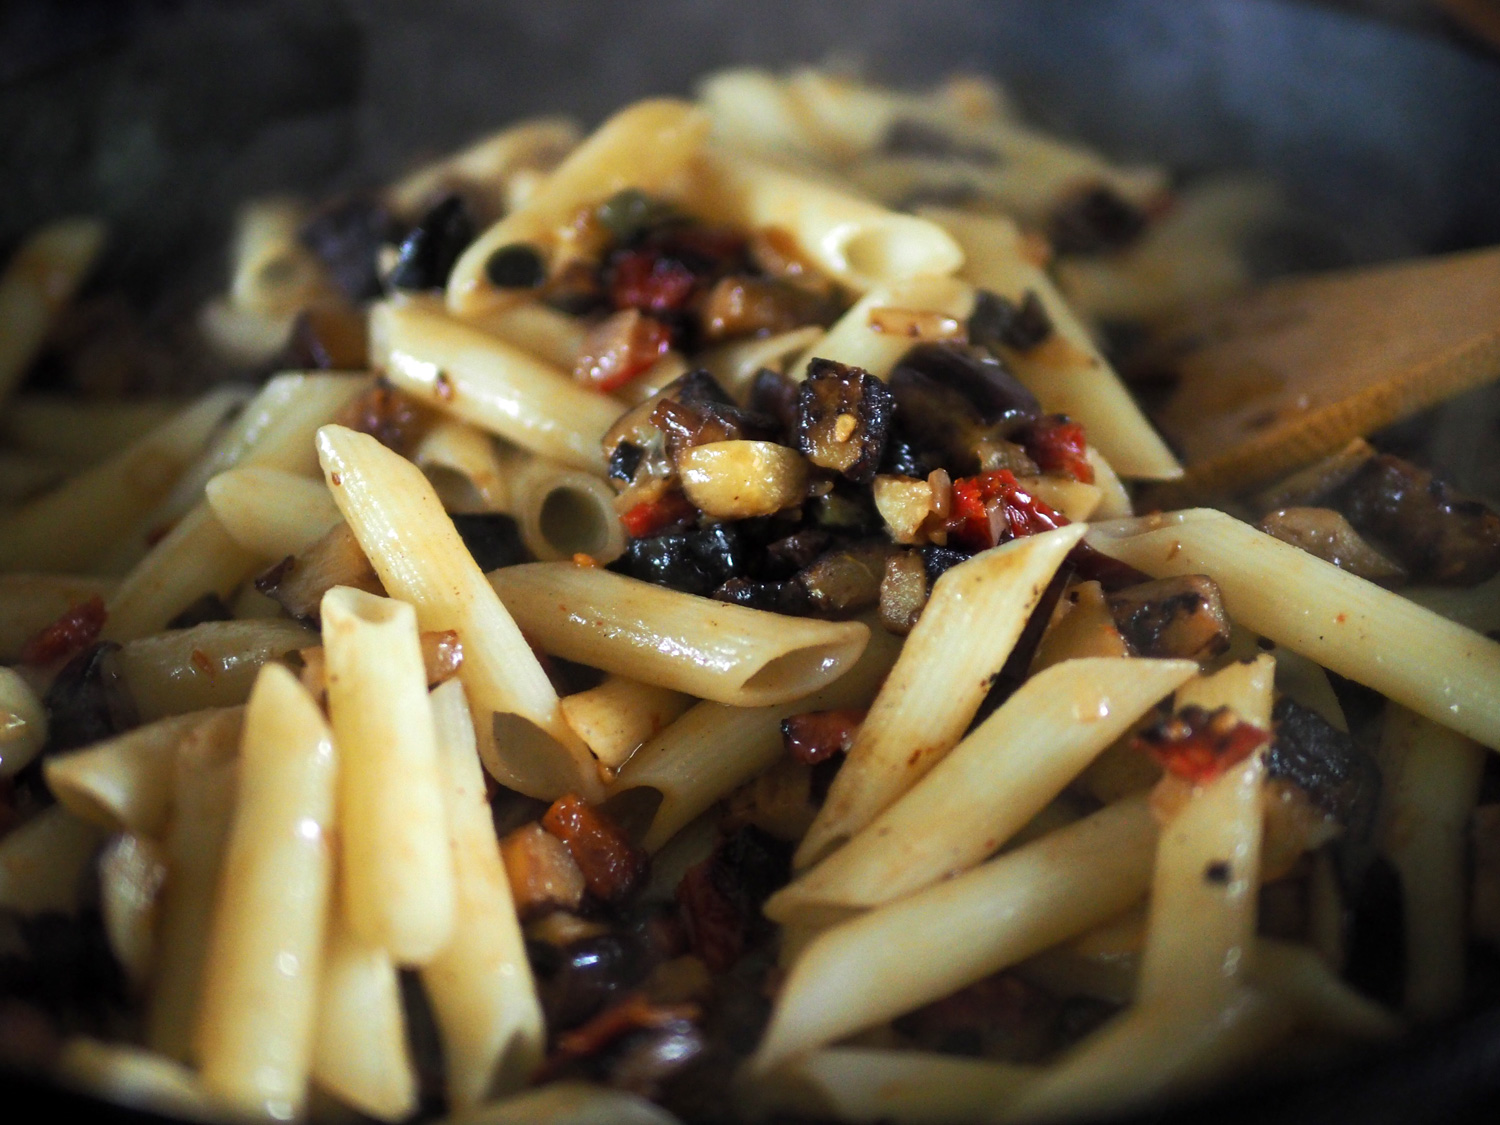
  • PASTA, duh

  • Rice

  • Roasted Cauliflower, Zucchini or any vegetable

Well, you get the picture.  No cook, no fuss Basil Blasted Sauce.  Use it on everything. Just a warning, because of the raw garlic, brushing your teeth afterwards is a good idea!

Geez, did I forget to add heirloom tomatoes to the list...  Happy Summer (without spoiled mayo!)

Pasta Making... in the Tuscan Hills

It should be crystal clear by now that I am a pasta fiend.  So much so that I am a walking rendition of pasta. My thighs can be categorized as part of the rigatoni family and my gluteus maximus are definitively classified as raviolo maximo.  Truly, I am what I eat. Yes, I am a Rubenesque kind of woman. I've come to accept that.   If I could, I would eat pasta every day. As a matter of formal record, when I lived in Miami, I did... more exactly, twice a day.  That is how much I adore pasta. So when I learned that I had a wheat, yeast and egg sensitivity I wanted to roll around in some flour one last time.

Fret not my fellow pasta hounds, I did find some great brown rice pastas that I have come to love. So, major pasta eating dilemma solved for when I'm in the U.S.  However, when I am in Italy (or Europe) I don't have any of the wheat, or yeast, issues that I do here in the states. Thanks to our government supporting Monsanto, and harvesters who don't properly pick and process wheat.   (Do NOT get me started...).  

Alas, I digress.  This post is about me making fresh pasta overlooking the Tuscan hills with the owner of the villa where we stayed during our last visit.  I was in my glory, and that pasta back story was essential in setting the tone for just how much glory I was feeling. 

Far warning folks.  This post is chock full of photos as I wanted to take you on a small journey of the breathtaking vistas of that day.  These are just a small smattering of the images we captured but enough to whet your whistle.

The view hilltop to our villa. No other description necessary.

The view hilltop to our villa. No other description necessary.

Making fresh pasta is not difficult.  It takes but a few ingredients.  And one important one. As with anything you want to turn out well it needs to be stirred with love.  If you rush it or don't take care and time, well then, quite frankly it will suck. But with gentle hands, a smile on your face and love in your heart, it will turn out divine.

Claudia, the owner of the villa, teaches cooking classes.  Due to some family emergencies and time restrictions, we only had a short amount of time for a lesson. So when she gave me a choice of what I wanted to do, I naturally chose pasta making.  Duh! We had just the morning to turn out some fresh pasta that would be served to friends, us included, later that afternoon.  Imagine my sheer joy at the thought of me making pasta for Italians. 

Ingredients

700 grams flour (3 c)
200 grams semolina (.8 c)
8 eggs

Instructions

1. Mix the flour and semolina in a bowl.  
2. Make a hole and crack the eggs in the center.  

3. Then using a fork, slowly work it together into a dough.

4. Knead until all the eggs are absorbed by the dry ingredients. The dough should feel as pliable as the thick part of your hand just below your thumb. If it's too dry then add a teaspoon or two of water.  

Once all together turn it out onto a board and begin the kneading process.

Once all together turn it out onto a board and begin the kneading process.

Ours was dry, so we needed to add water.

Ours was dry, so we needed to add water.

5. Wrap it in plastic wrap and let it rest for 15 minutes.  

6. Cut small pieces, flatten with your hand and place through a pasta machine on the first turn.  

Claudia showing me how it's done.

Claudia showing me how it's done.

You... beginner luck!

You... beginner luck!

7. Then pass it through again on the second notch.  You will have a smooth swath of noodle.

8. Let the pasta sheets dry, preferably under the Tuscan sun, or just on a towel in your kitchen or dining room table.  

These long doughy strips are like me, basking under the Tuscan sun.

These long doughy strips are like me, basking under the Tuscan sun.

9. Once dry, cut them into spaghetti or fettuccine or as I did, into tagliatelle.   

Cutting the pasta intro strips.

Cutting the pasta intro strips.

10. As with any fresh pasta, it takes but a few minutes to cook in salted boiling water.

They looked so beautiful. I must admit that I was tickled pasta pink with how they turned out.  

We tossed these long, luscious beauties with fresh pesto.  Oh, the taste of the basil in Italy... Oh, the taste of everything in Italy!

Lots of zucchini

Lots of zucchini

When in Italy, pasta is the primo piatto, which is the dish after antipasto and before the secondo piatto, or second/main plate. So when Claudia showed me her marble sink full of zucchini, I was quick to jump in and tackle them. (Can you believe it!? Once again I was faced with the dilemma of what to do with the ubiquitous zucchini.)  It was no time for cooking as the day was hot and we had plenty else going on.  A few nights earlier I enjoyed a raw zucchini dish, so I decided to prepare one similar to that.  This was my version of zucchini crudo with shaved parm and mint oil. (I promise there will be a future post on my new summertime favorite.)

My version of raw zucchini.  It was a big hit.

My version of raw zucchini.  It was a big hit.

The simplest of dishes; cannelini beans dressed with garlic cloves and olive oil.

The simplest of dishes; cannelini beans dressed with garlic cloves and olive oil.

There is a way a life in Italy that imparts a sense of what is truly important. It's not about work. It's not about rushing. It's not about what you have or don't.  It's about breathing in life.  All of it. The landscape. The people. The food. The moment. That afternoon was one of the most treasured gifts of our trip.  What an enormous honor it was to not just share a meal with the family but help to prepare it.  I was in my element. I was in my glory; cooking, setting the table and relishing in the genuine joy of spending time with interesting people who appreciate the simple pleasures of life. We devoured it all; the food, the company...  the view.  Take the journey with us and breath in the calm that is Tuscany.

On the hilltop above our villa.  See the yellow house on the bottom left? That's where I made pasta.

On the hilltop above our villa.  See the yellow house on the bottom left? That's where I made pasta.

I could get used to this... Will you come visit if we move there???

I could get used to this... Will you come visit if we move there???

Dry cured meats for antipasto.

Dry cured meats for antipasto.

Il primo piatto and the star of the lunch, if I do say so myself.  As a side note, and an important one.  In Italy, pasta IS consumed daily (just as I did) but in small portions.  That is why it is the primo piatto, a small plate befo…

Il primo piatto and the star of the lunch, if I do say so myself.  As a side note, and an important one.  In Italy, pasta IS consumed daily (just as I did) but in small portions.  That is why it is the primo piatto, a small plate before the main meal.  So eat like an Italian and enjoy your pasta daily, like taking vitamins. That's how I see it!!

Braised shanks, fall of the bone good.

Braised shanks, fall of the bone good.

Cheese plate for dessert.  My favorite kind of after dinner snack!!

Cheese plate for dessert.  My favorite kind of after dinner snack!!

I kid you not, these strawberries' flavor were as bright as their glorious color.

I kid you not, these strawberries' flavor were as bright as their glorious color.

In the end, all the food was thoroughly enjoyed. Imagine my sheer joy when all my pasta and the zucchini was polished off.  Remember my glory?  Well, I was truly in it, and I think I had some accomplices. 

Paola, our friend Tecla's dad. Who was also our guide and host.

Paola, our friend Tecla's dad. Who was also our guide and host.

Nothin' left

Nothin' left

JC, under the Tuscan sun

JC, under the Tuscan sun

No matter where you look, there is beauty.

No matter where you look, there is beauty.

Since traveling to Italy may not be possible, hopefully these images whisked you away for a moment. If you can, take the trip. If you can't then I would highly recommend making your own fresh pasta at least once in a Tuscan moon.  I recognize that our lives are busy and this method is best played when overlooking rolling hills and valleys of the greenest countryside.  But when you do have the time, do it. You won't regret it.   It will carry you away to a time long ago when we all had more time to make things truly from scratch.  It will transport you to another land, where the air will make you feel alive and grateful.  Yes, pasta can do all that, and more.


A Jewel of a Salad: Arugula, Orange & Pomegranate

I think I can safely say that the summer has arrived.  We waited a long time and endured rain, cold and a much drawn out winter plus a non-existent spring.  So it's time to bring on the summer and bring out the salads.  

Now you know from previous posts that salads can be made from any ingredient and are definitely not limited to summertime.  But I will admit that Summer and salads seem perfectly made for each other. As Forrest Gump once declared, "We was like peas and carrots, Jenny and me."  (I guess back in the day peas and carrots were a common combo.)  

Some summer salads can be filling like Orzo Pasta Salad, while others can be light and refreshing like Graped Up Bibb Salad or Salad Baby.  Today's salad version is the latter, a refreshing burst of both color and flavor. Although I must have winter still on my mind, since this salad I often like serving in the fall and winter, but actually works equally well for summer.  

Ingredients

6-8 c Baby Arugula
2 navel oranges, segmented
3/4 c pomegranate seeds
1/3 c red onion, thinly slice
1.5 c hearts of palm, thick slices
2/3 c Medjool Dates, sliced (optional)

Dressing
1/3 c juice from orange
1 tbsp balsamic vinegar
1 tbsp lemon juice
2/3 c olive oil
salt/pepper to taste

Instructions

This is fairly self explanatory, so no need for any complicated directions here.  A simple assemble 'em up kinda salad.  

  1. Segment the orange, capturing the juices in a bowl as you cut them.
  2. Slice the onions.  I use a mandolin to get them super thin.
  3. Cut the hearts of palm into 1/2" slices.
  4. Remove pit and slice or dice the dates.
  5. Open the pomegranate and remove the seeds making sure to take off any of the white pith.
  6. Whisk the dressing ingredients together.

Arrange the platter in any way you see fit and drizzle the dressing over top. Recommendation: enjoy a crisp glass of white wine while you platter this up. I guarantee it will increase creativity and the overall enjoyment level of preparation.

I love the colors of this salad which is why I dubbed it 'A Jewel of a Salad', the tones are just that. What I really relish is the diverse flavors and textures that this offers.  The arugula is peppery while the orange is cool and refreshing.  The hearts of palm are mild and soft then the pomegranate offers up crunch and tang.  The red onion gives the spicy note, and if you decide to use the dates, their sweetness is a perfect counterbalance.  This is a salad that reaches all sensory notes, and shows how well sweet and savory, tangy and peppery play off one another.  BBQ's are a-calling so bring this jewel of salad along to brighten any plate, or palate for that matter.


Pasta Mescolanza - Mesco What?

Now I bet you are wondering about the title of this post. No, it doesn't mean eggplant which is ironic since that IS the main ingredient. Basically it means mixed up pasta.  This is the word my grandmother used to dub my dishes whenever I made up recipes that seemed odd or foreign to her.  So it seemed quite fitting to give this dish that name since it is typical of my  'what do I have to cook with?' style.

It all began this past Monday as I was driving home from the city right around lunch time.  I was so hungry that my first instinct was to stop on any city street corner and grab some food.  I even considered one of those nasty looking carts that didn't look quite...well, shall we say "healthy". Lucky for me my natural tendency was to not spend money needlessly when I knew there were items at home.  It just required some patience.  I endured the ride home and used the time to mentally survey what contents presently existed in my refrigerator. I knew I had two things that needed to get used soon. Eggplant and feta cheese.  (I zealously over bought fresh feta from our local Armenian market because it looked oh so beautiful and I wanted to do a taste comparison between French & Greek Feta.)

I also knew I had potatoes and for a split second starting building on that.  Until my Italian roots kicked in with deep rumblings from my stomach crying out PASTA. Which is how that became the base for whatever it was I was about to cook up.  As with any 'something from nothing'  creation, you build as you go.  I got home and immediately put water up to boil for my pasta.

Pasta boiling away.Doesn't that look like the start of something heavenly.  

Pasta boiling away.Doesn't that look like the start of something heavenly.  

Then I opened the fridge to see what else might tag along on this eggplant, feta, pasta ride.  Staple items sitting in the door shelves screamed out 'Use me, it's been awhile.'  In order of loudest screams were:  sun-dried tomatoes, oil cured olives, and capers. The shallot and garlic were a given to be used.  Earthy, strong, powerful flavors taking a stand for pasta.

eggplant.cook.jpg

While the pasta was boiling away, I cubed the eggplant and in a screaming hot cast iron skillet I added a small amount of oil and the eggplant.  Key here, do not add too much oil or touch the eggplant.  It's a sponge.  The more oil you add the more it will absorb and then it gets mushy.  Not stirring them around allows them to sear, which is what I wanted.  


Whilst that was cooking away, I chopped up sun-dried tomatoes, black oil cured olives, shallot and garlic.  

Once I gave the eggplant a stir, I added a bit more oil along with the shallots and garlic to let them cook.  Then in went the rest of the items.  Do not add any salt to this before you taste it. Between the sun-dried tomatoes, olives and capers the salt level is already at a pretty good pitch. (If you like heat, add some red pepper flakes.)


The Mescolanza coming together.

The Mescolanza coming together.

The pasta was just shy of al dente, so it was the perfect time to add it to the eggplant pan and combine.  And a little of the pasta water helps binds it altogether.

As I mentioned I had a ton of feta so that is what I topped this dish with.  However, goat cheese would be great too. This dish has an very earthy flavor to it.  Not for the shy at heart since all those flavors pack a punch.  When you are starving with but one fresh element to work with, pull from your reserves and create your own Pasta Mescolanza.  Perfect for Monday or any day.  

Below are the rough amounts for this dish.  Honestly, I would have never measured a single item for this creation, as a true something from nothing creation is all about whatever you have in whatever amount you have. But I did want to give you a guide, so below is what I used.  This only took 15 minutes to pull together and my stomach was as happy as any Italian could be.

ingredients

1/2 lb pasta
1/4 c approx. Baby eggplant, cubed
1/3 c sun-dried tomatoes, chopped
1/4 c black oil cured olives, chopped
1/4 c shallots, minced
1 cloves garlic, minced
1-2 t capers
Olive oil
Feta or goat cheese, amount to be determined by you

While writing this post, I ate the whole bowl and forced myself to stay in my office so as not to go back for a refill. The two things I would do differently.  Mince or thinly slice the garlic, and add fresh parsley or basil if I had any. Also, I ate the leftovers the next day and used creamy goat cheese.  I must admit that I prefer that over the feta as it mellows out the intense flavors of all the other ingredients and creates a creaminess to the dish.  A Mangiare!!


Goat Cheese Stuffed Piquillo Peppers

Yes, these vibrant and delicious wonders make the perfect appetizer. They are red pockets of yum. But fair warning, these are not entirely my recipe.  The Spanish are famous for stuffing piquillo peppers, and goat cheese is one of the most popular fillings. I made some alterations to the stuffing to create my own version plus added a little dressing to coat them.  

Courtesy of Specialtyproduce.com

Courtesy of Specialtyproduce.com

What is a Piquillo you ask?  And that would be a good question because it looks just like a regular red pepper, and it is.  But these are a variety of chili peppers in the capsicum annuum family.  Although, this chili pepper is sweet and doesn't harbor any heat, much akin to a traditional red bell pepper.  They are grown in Northern Spain near the town of Lodosa, and have a real reason for being called piquillo.  Simple answer.  In Spanish it means "little beak" which is exactly what these look like due to their small size, making them ideal for stuffing.  If you used a traditional red bell pepper and stuffed it with goat cheese it would be quite the grotesque amount of filling. Unless you are a cheese monster in which case you would be in goat heaven.

(I use the Dantza brand whole piquillo peppers from Despaña.  The round can shown below was specifically designed by request of Despaña.  All of the peppers are selected for their size and packed by hand to ensure all peppers remain whole, as that is the key for a stuffing pepper. Some piquillos come in strips for other uses. )

Speaking of stuffing, because of their sweet and supple flavor they are compatible with so many stuffing options. You can create a stuffing out of anything you like really, but I like cheese. Whenever I have had a goat cheese stuffed piquillo in a restaurant I have found the straight up goat cheese to be a bit dense and just one flavor note. That is why I decided to create my own version combining goat cheese with whipped cream cheese, parsley and some lemon zest.  I also went another step and added a little dressing to pour over top.  I think it adds to the overall freshness of the dish as the acidity combines well with the peppers. Plus, it doesn't hurt to have some dressing to soak up with the piece of bread you serve alongside these.   Your guests can also place an entire pepper on the bread which aids in delivering this tasty bite directly into the mouth.  Which I highly recommend.

These aren't hard to make, just a few ingredients.  They can be made in advance and stored in the refrigerator until ready to dress and serve. The only slightly slippery part of assembling these is filling them.

Goat cheese, whipped cream cheese, parsley, lemon, shallot, and of course, the star, piquillo peppers. I buy mine from Despaña.  

Goat cheese, whipped cream cheese, parsley, lemon, shallot, and of course, the star, piquillo peppers. I buy mine from Despaña.  

ingredients

yields approx. 25 peppers

16.6 oz can whole piquillo peppers        
10.5 oz goat cheese log           
8 oz. whipped cream cheese        
1 heaping tbsp chopped fresh parsley        
1/2 tsp fresh lemon zest                  
1/2 tsp salt
dash of pepper  


Dressing
1/3 c Oil
1/4 c red wine vinegar
2 full tbsp shallots, minced
splash of lemon juice
salt & pepper to taste
Basil to garnish, optional

The mixture: goat cheese, whipped cream cheese, chopped parsley and lemon zest, salt.

The mixture: goat cheese, whipped cream cheese, chopped parsley and lemon zest, salt.

To aid in the filling, I use a piping bag.  I use piping bags for a lot of things.  It just makes it easier, especially for this recipe since the filling is too dense to spoon in. Plus if you use a decorative tip, you can create a lovely little flourish at the top of the pepper. Isn't that special. Sometimes it's the little things that mark the difference, and it doesn't take any more effort than if you didn't use a decorative tip.

The easiest way to stuffing anything... a piping bag!!

The easiest way to stuffing anything... a piping bag!!

instructions

  • When using these or any roasted peppers often times there are seeds.  Try to remove as many as possible being as careful as possible since the peppers are delicate. 
  • Using a hand mixer, whip the goat cheese, cream cheese together, then add the parsley and lemon zest. You can also add shallots to this mixture, as I have done in the past.
  • Fill the piping with the cheese mixture and using a wide tip, begin filling each pepper.
  • Place them on a decorative serving platter.  If serving immediately, then drizzle the dressing over top.  If you are making them ahead of time, cover well with plastic wrap and refrigerate. Then dress them before serving. These should be served at room temperature so remove them from the fridge 1/2 hour prior.

You can also stuff these with cod, or a mixture of tuna and piquillo blended together to create a mousse.  Those are a few traditional ones to get you going.  I leave it up to you and your imagination to create some more. Whatever you choose, cheese, cod, tuna, spinach, etc these make the most vibrant and tasty appetizer platter that works all year long.  There are a thousand ways to use these peppers, many of which don't require stuffing them at all. I will have more recipes in the future with these delicious tiny red babies, so keep on the look out.

I recently served a bountiful platter alongside my homemade flatbreads at an outdoor dinner party. In the end, not a one was left.. of either.

Post note:  In the set up picture you may notice that I included endive. That is because you can also use fill the endive leaves with the goat cheese mixture and then lay a piquillo pepper on top.  In the coming weeks, I will be posting Endless Endive, which showcases several ways to serve them.