For years my mom used to make stuffed breads as part of her antipasto offerings. Some had spinach, others ham & cheese all rolled up in 'soft on the inside, crunchy on the outside' bread. That big roll was then cut up into large slices. These have always been a favorite of anyone who has tasted them. When I was still able to eat bread, I loved these stuffed breads and made them this way often. When I lived in Miami, I used to make them while friends looked on so they could see how to learn just how easy it is. Yes, they are that popular. But all too often I have found that people love them so much they eat more than one big slice and get filled quickly, not leaving enough belly room for the other nibbles being offered. So I got to thinking...
I'm sure you are wondering why screw with a good thing, but size does matter so this seemed like the opportune time to reinvent the wheel. Since I was in need of exactly this type of nibble idea for a little Post Thanksgiving cocktail/tapas event.. bingo, these could work! Given that this party was not a sit down dinner but instead a buffet of many bites for people to pick and choose, this was the perfect setting to try my tiny rendition of my mom's rolls.
I will admit that this version is a tad more time consuming than the one large roll, but in my opinion, worth the extra time. (When I say tad, it's because the other version takes but 3 minutes, so this is slightly longer than that!) Also, what I loved about these little nuggets is that you can make them ahead of time and just warm them in the oven.

Seriously, it's just these few ingredients that make bite sized magic
Ingredients
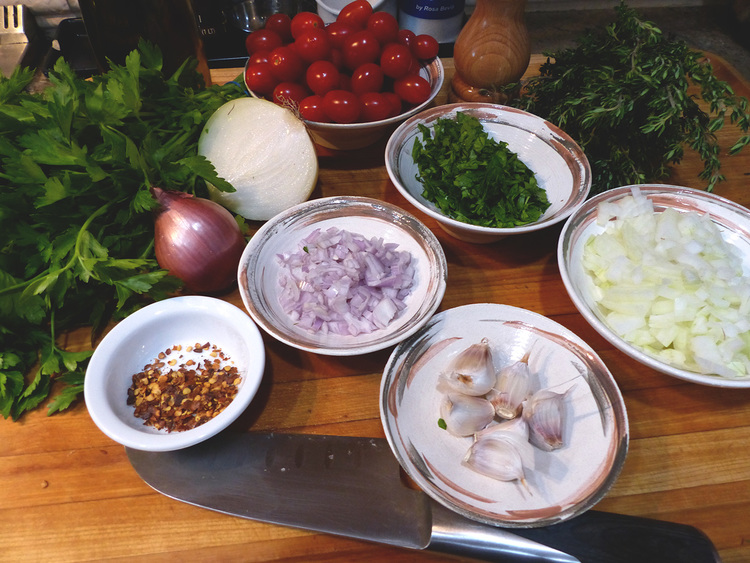
1 head of escarole, chopped in small pieces
2 garlic cloves, minced
1/4 c shallots, minced
1/4 c onions, minced
Magic 3 (oil, salt, pepper)
Dough (honestly, with parties like this I buy a good pizza dough and let it rise)
Instructions
First things first, get your dough plumping up and doubling in size by placing it in an oiled bowl and cover with plastic wrap.

See the nice bubbly, yeasty wonder doing it doubling magic trick.
Sauté the shallots, onions, garlic in oil adding salt & pepper to taste. If you like a little heat, then add red pepper flakes. That would be lovely. I would have added some but was thinking of my dad who isn't a fan of spicy food. Once nicely translucent add the chopped escarole and cook until wilted. Set aside and let cool.


Chop in small enough pieces so that it is easy to roll up.
At the point that the dough has risen, punch it down and roll it out to its fullest size. You really want it as thin as possible since each strip will be rolled up. Then cut 1.5" strips. Place the cooled escarole along each strip. Then cut the strips into thirds so each are about 4-5" long. Longer than that and your rolls won't be bite sized anymore. Roll up each piece and pinch on the end. Place them in oiled mini cupcake tins.


Roll out the yeasty wonder to the largest piece you can before it begins to stretch back.

Using the good ole pizza wheel, cut 1.5" strips.


Roll 'em up!

Place your rolled up delights into lightly oiled mini cupcake tins.
Bake at 350 degrees for 25-35 minutes until the dough is nicely toasted. Definitely serve these warm. But remember, these little bundles can be made ahead and warmed up right before serving.

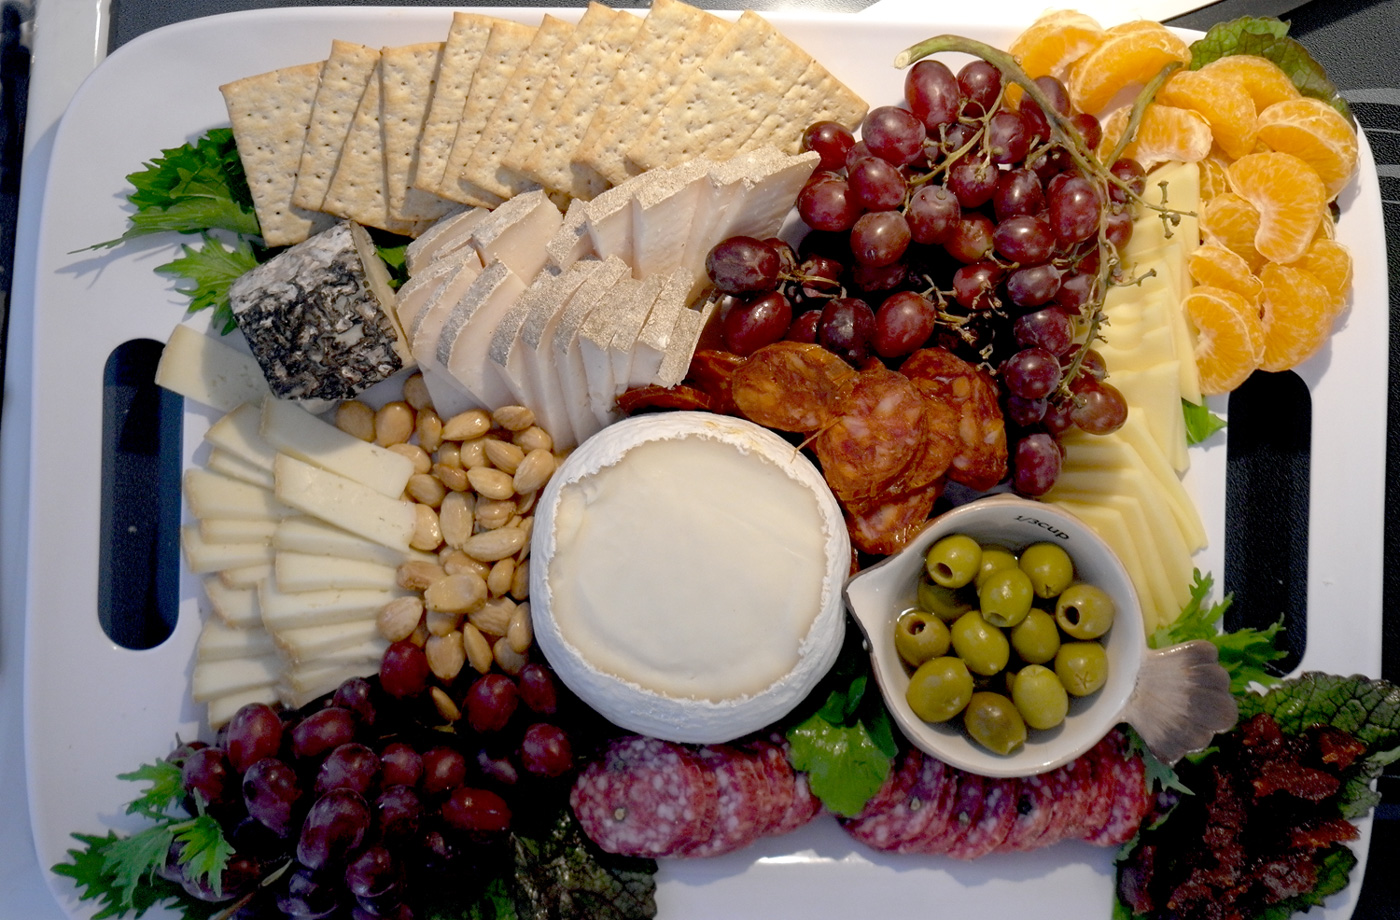
That's my beautiful sister, Alyssa, eyeing what to choose. See the rolls in the lower right hand corner of the table...
I'm pretty tickled with this bite sized version of my mom's stuffed bread. The wheel reinvented turned out to be the perfect way to add that doughy comfort food to our buffet table; and without filling up our guests too much. That is unless they eat a dozen! Which they just might.
P.S. This is just ONE stuffing idea. I almost added cheese to these but opted not to since I had other cheese offerings. But please start making your list of other stuffing options. Here's a jumping off point :
- Spinach with red pepper flakes & parmesan cheese
- Strips of salami and grated provolone
- Sautéd zucchini
- Ground sautéd sausage and peppers
That's a start at least. Continue please!