Halibut en Papillote
My cousin, Therese, loves to eat healthy, as do I. So whenever she visits the menu is focused on fish, vegetables, and no carbs. Just recently, she and her husband, Tom, took a drive from NJ to Westchester to visit to my parents in their new home in Westchester. This past January we moved them from Long Island to be closer to us, and fortunately our family and their friends have been willing and gracious to make the trip to visit them. We hadn’t seen Therese and Tom since before the pandemic so it made perfect sense to feed two birds with one crumb. They started out early in order to extend their stay to include dinner at our house. Lucky us.
Keeping it light yet ensuring it would be filling was my main goal. So, we started off with mezze-style appetizers that would do just that.

All make ahead appetizers. Just plate before guests arrive.
Also, top of mind was trying to make as much ahead of time as possible. This was a Friday night dinner and I was going to be busy most of that day. Whenever you can give yourself a running advantage to ease your work load on the dinner day, the better. Here’s what I prepped the day before.
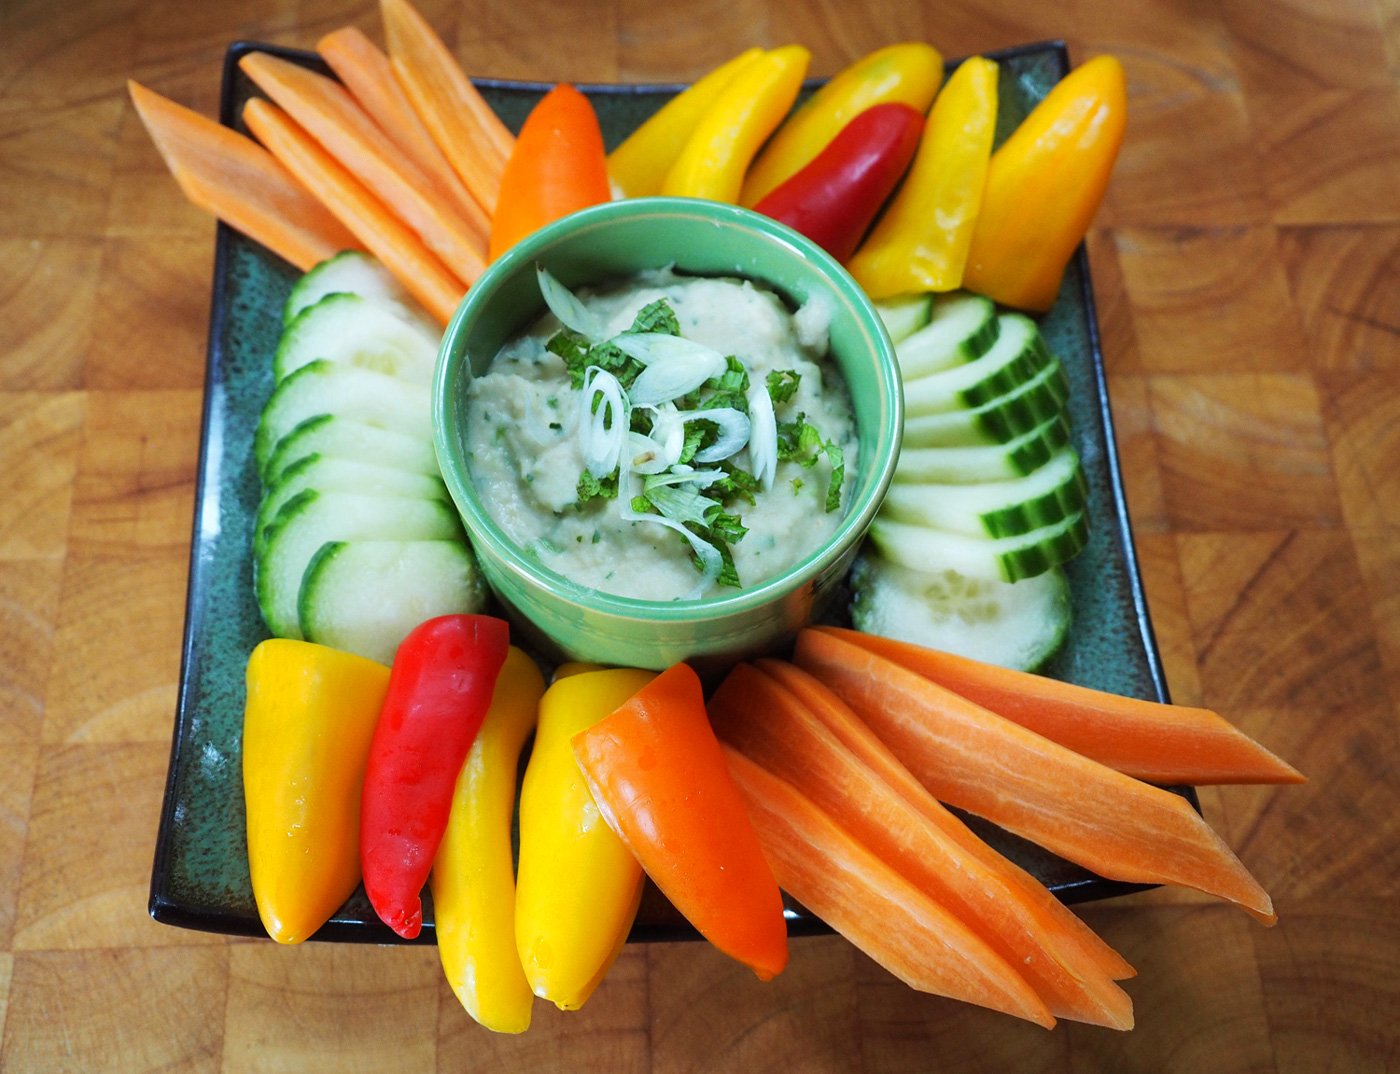
Cut the crudite and kept in glass jar with wet paper towels. Carrots are kept in a covered jar of cold water.
Made White Bean dip
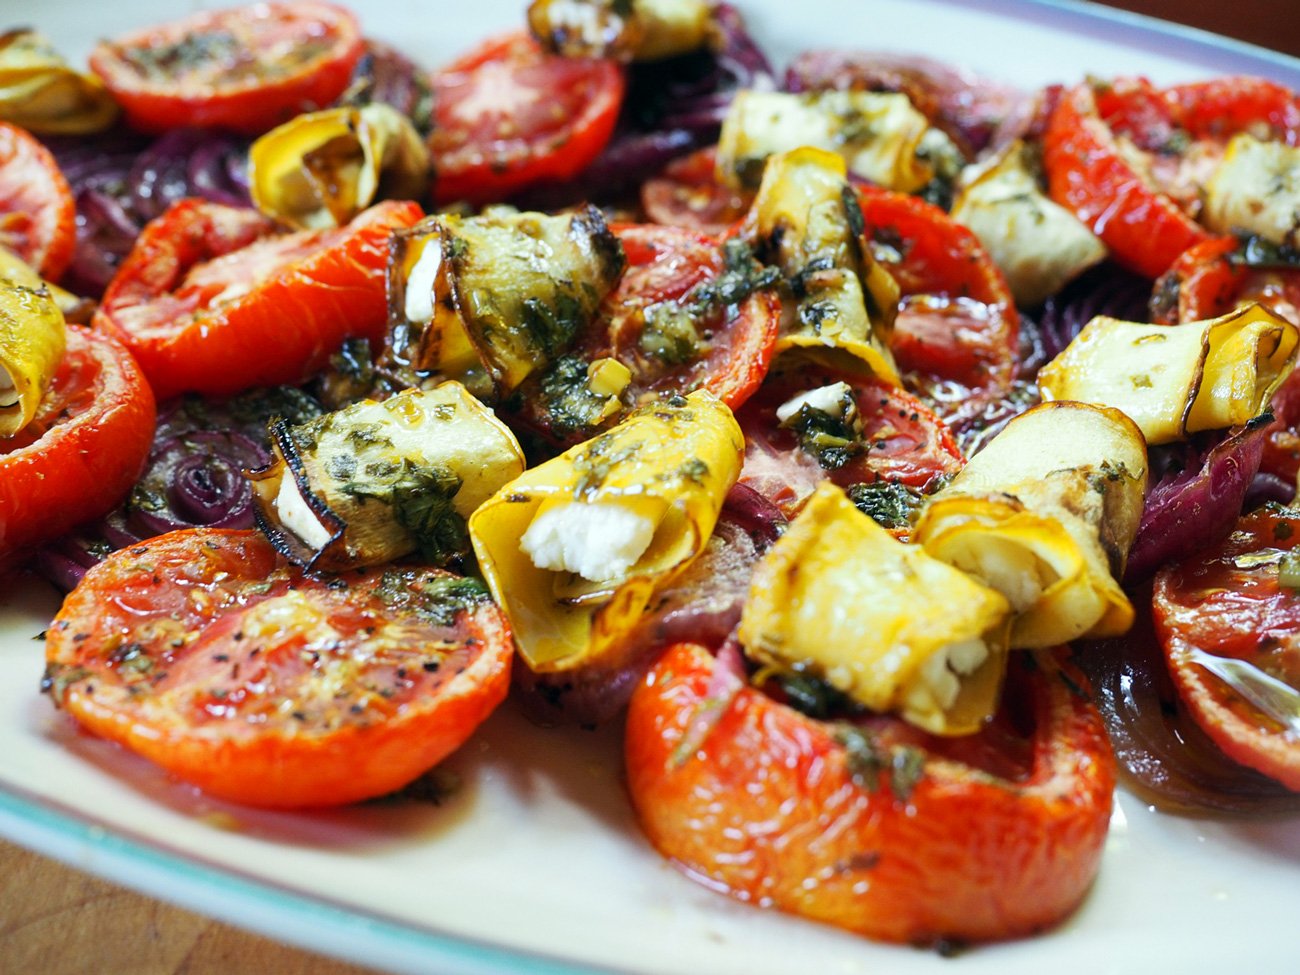
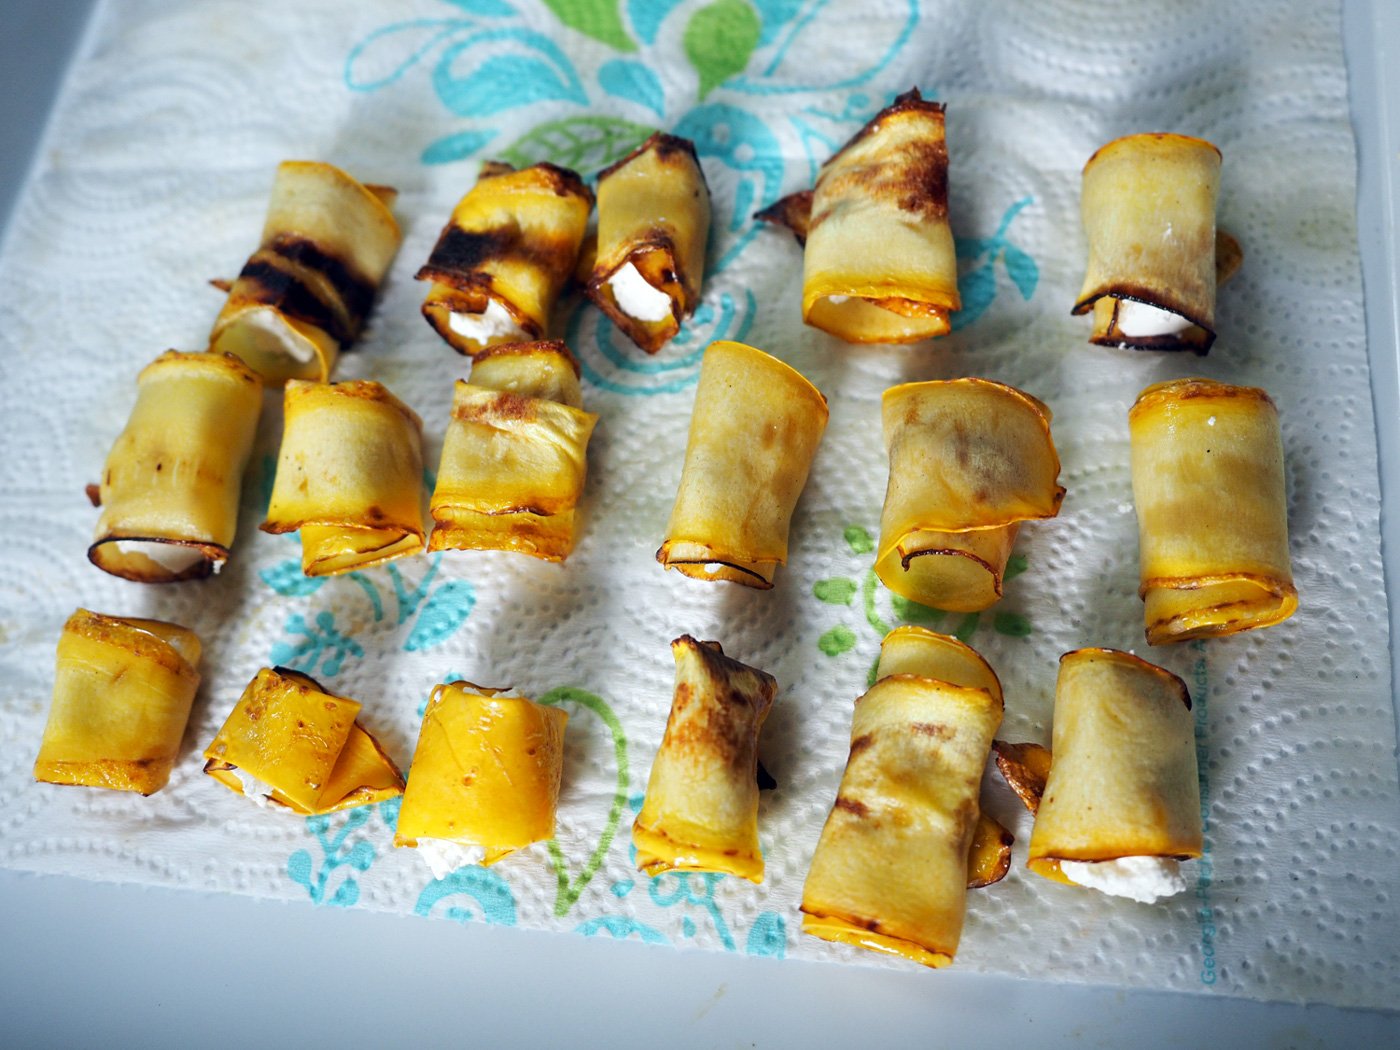
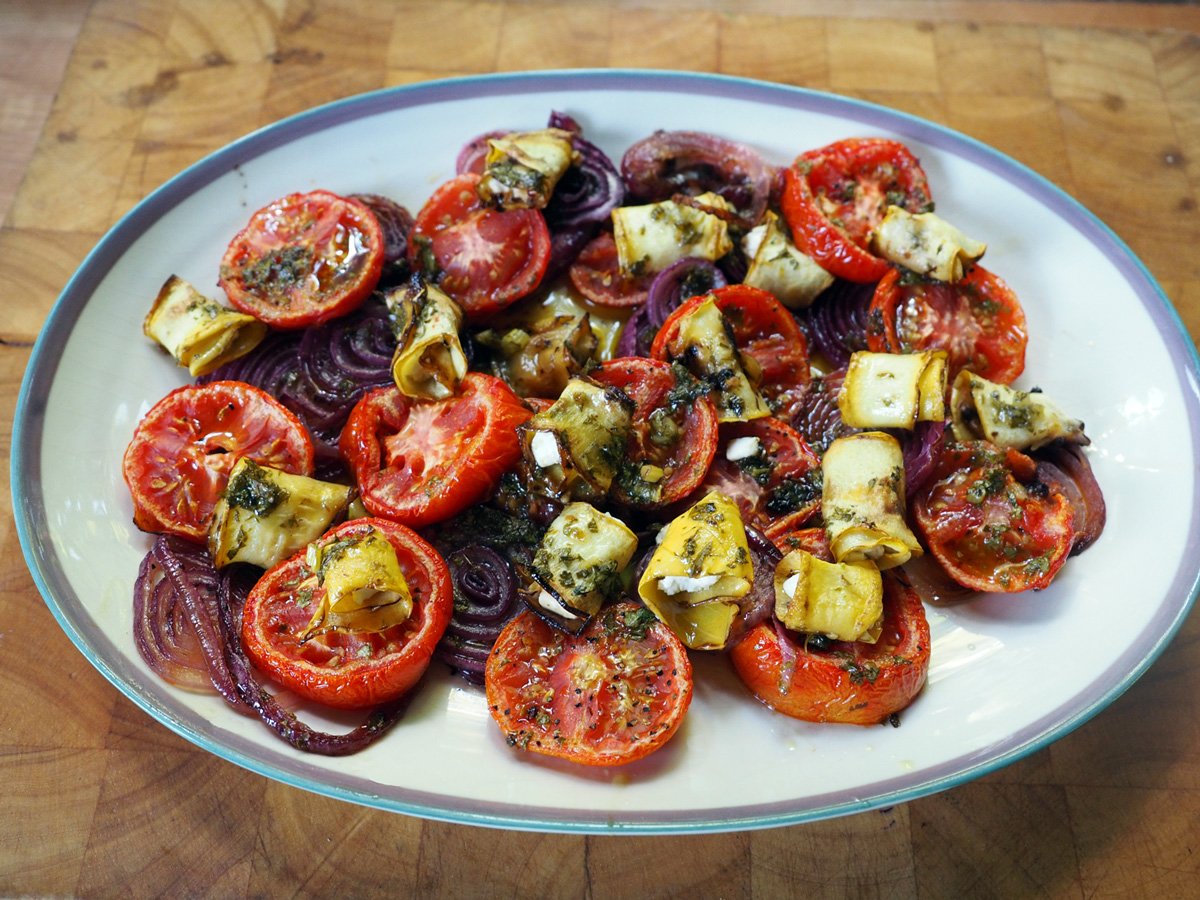
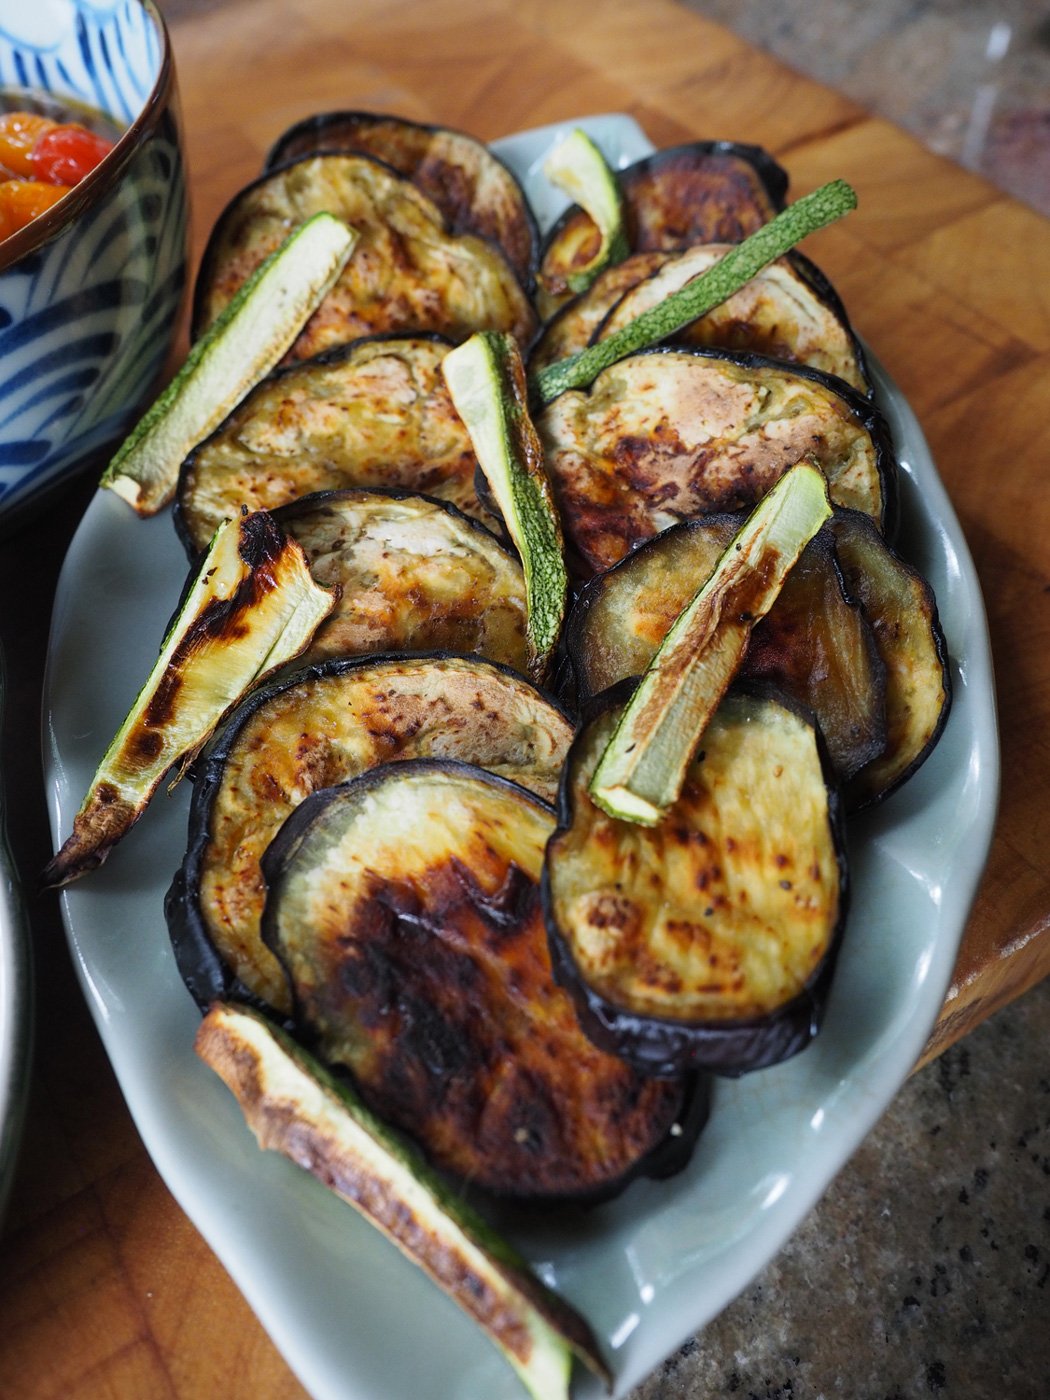
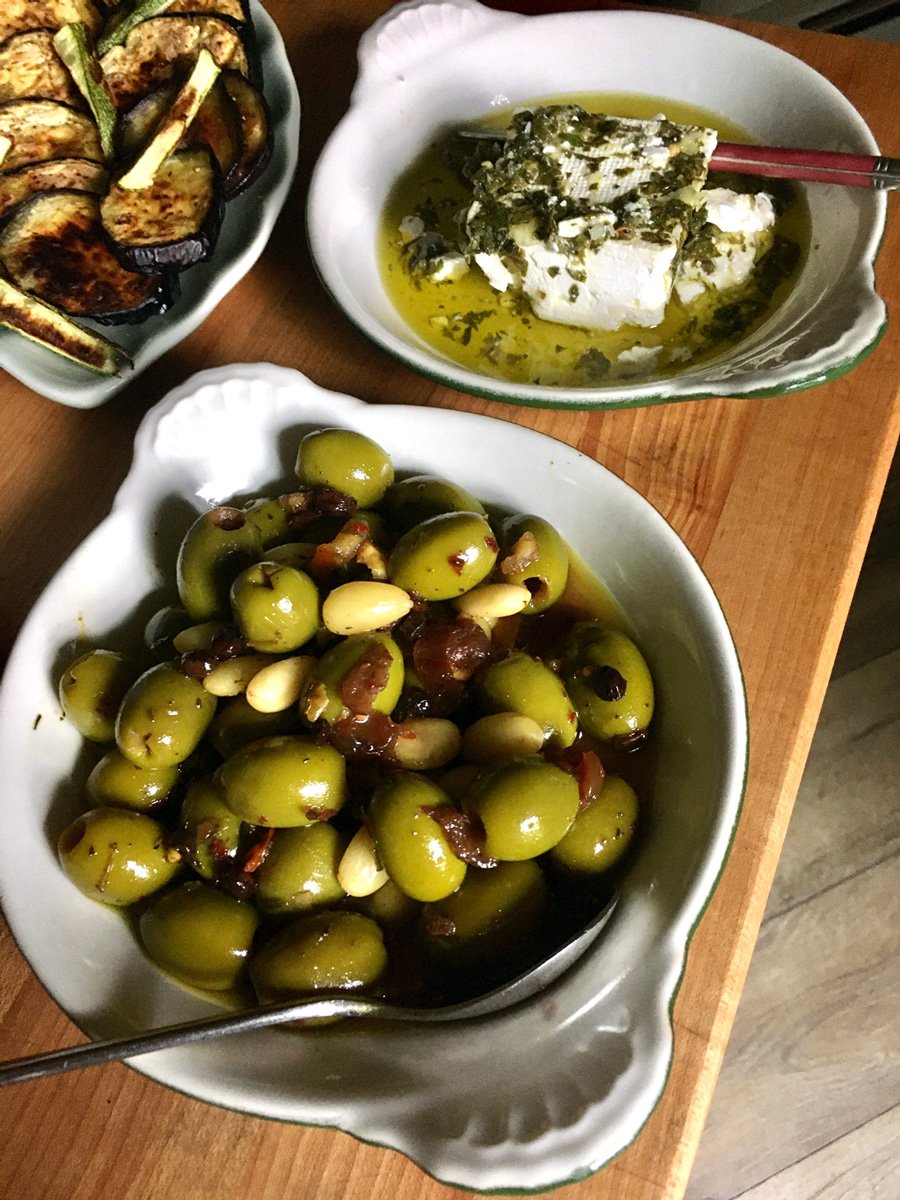
Grilled Eggplant
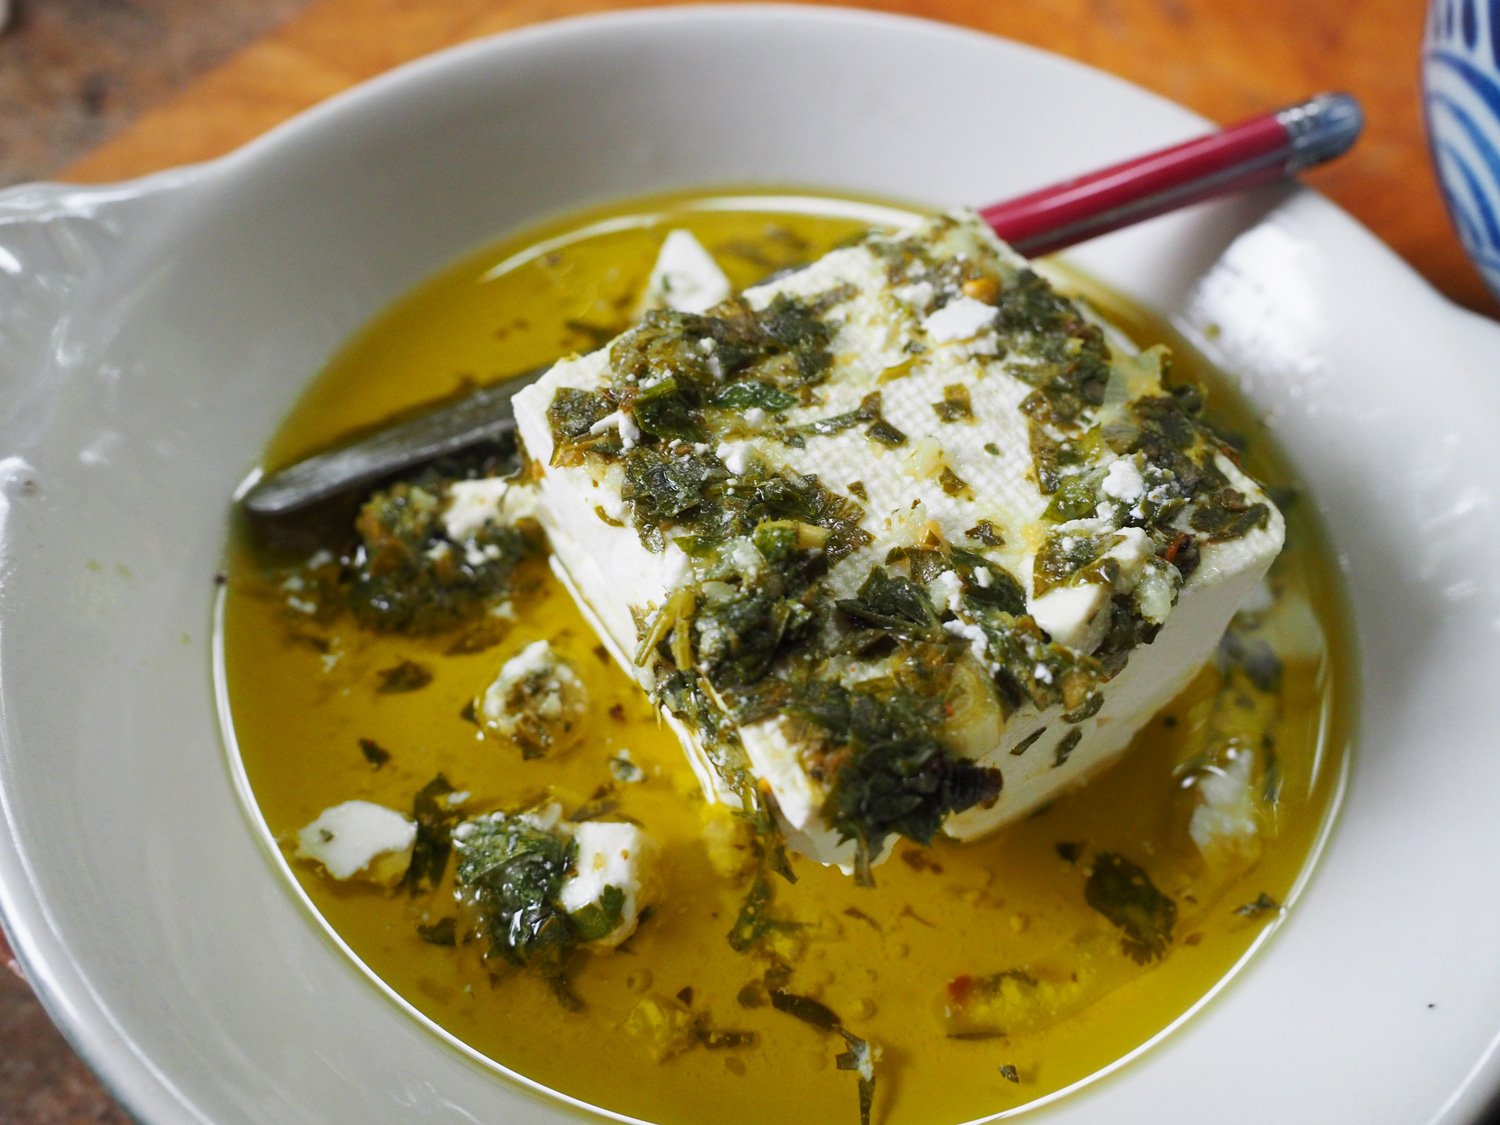
Made Marinated Feta
Store bought olives (Offering store bought items also helps ease the work load.)

Made ahead on the day of:
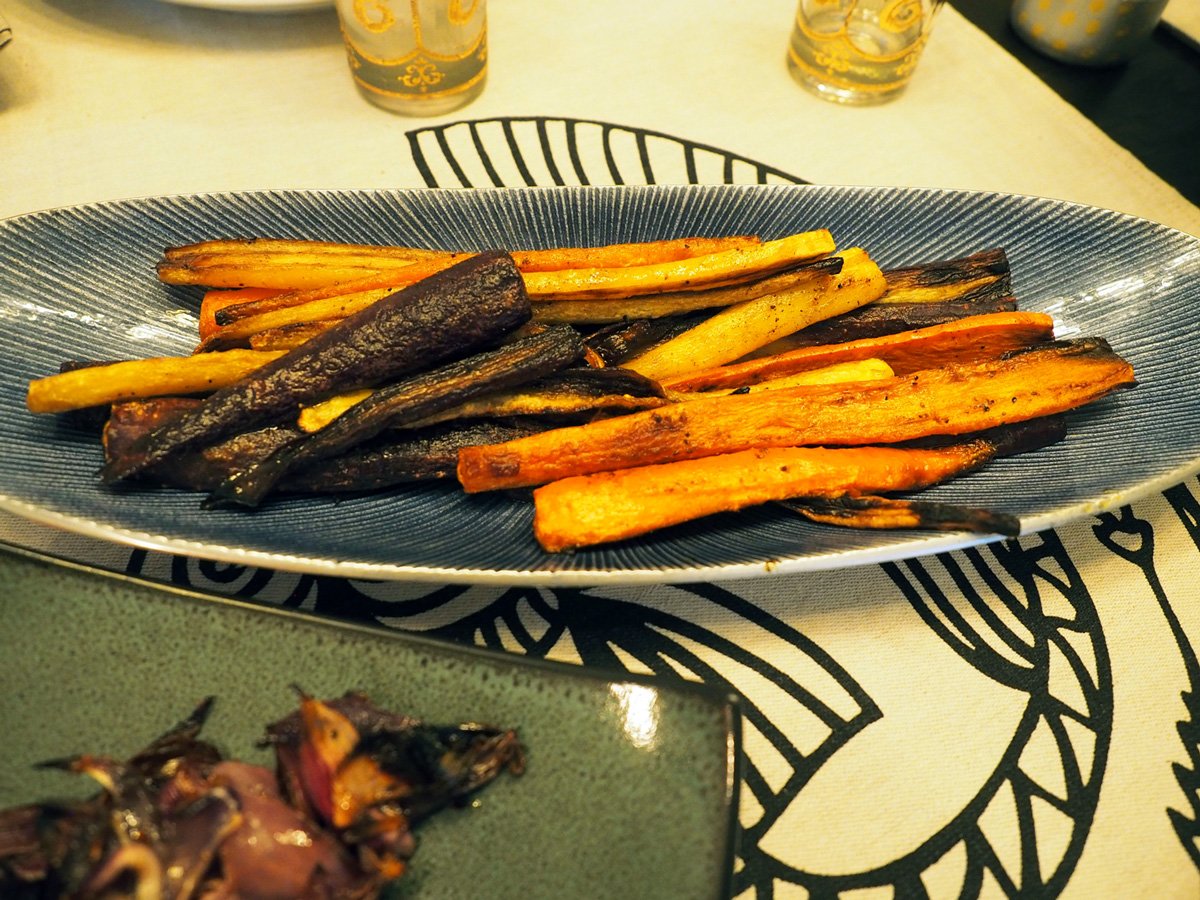
Roasted Spiced Carrots
Cut carrots lengthwise. Season with cumin, cinnamon, turmeric, salt, pepper, oil. Roast at 425 degrees until tender and browned. I made this in the afternoon, then warmed it up at the same time the Halibut baked
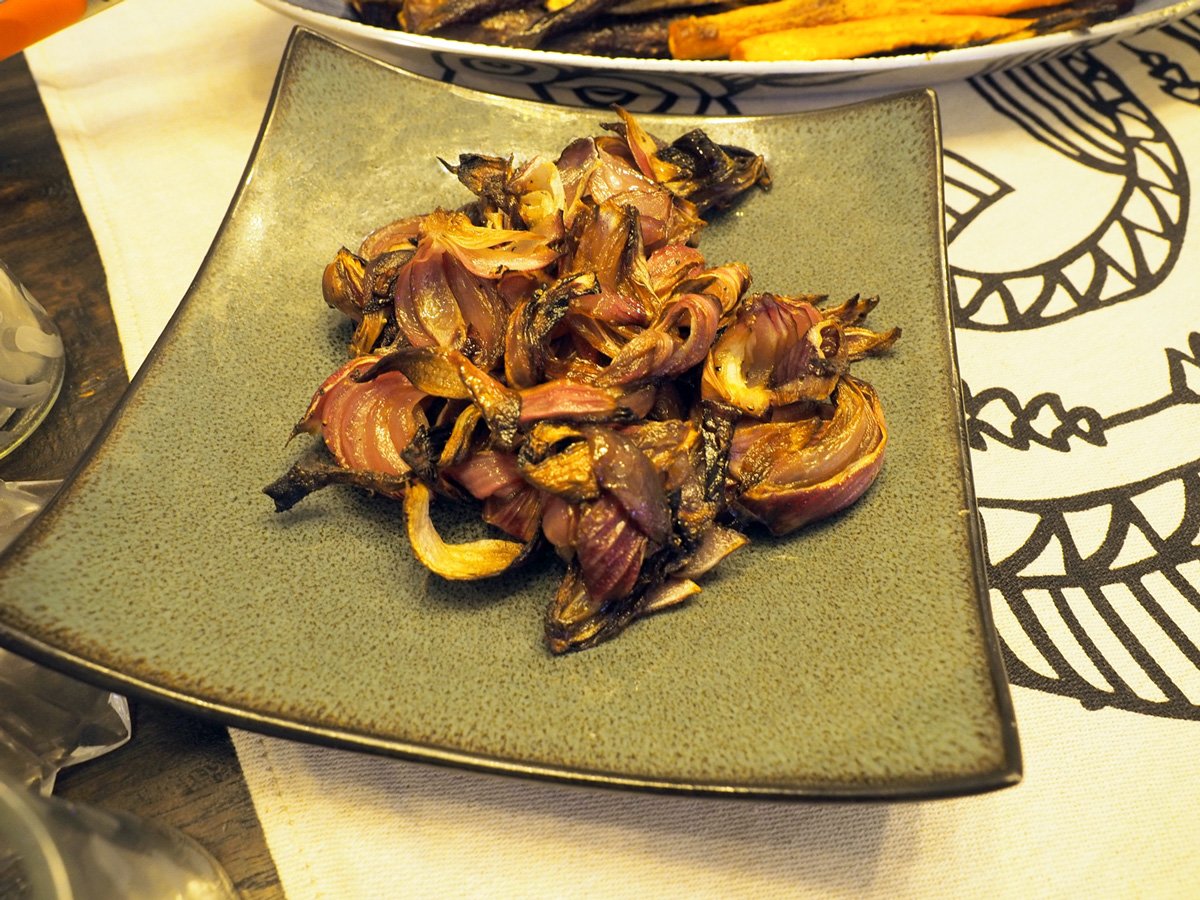
Roasted Onions
Cut in thick slices or in wedges. Season with Magic 3 (oil, salt, pepper). Roast at 425 degrees until caramelized. I made this at the same time as the carrots, then warmed it up at the same time the Halibut baked.
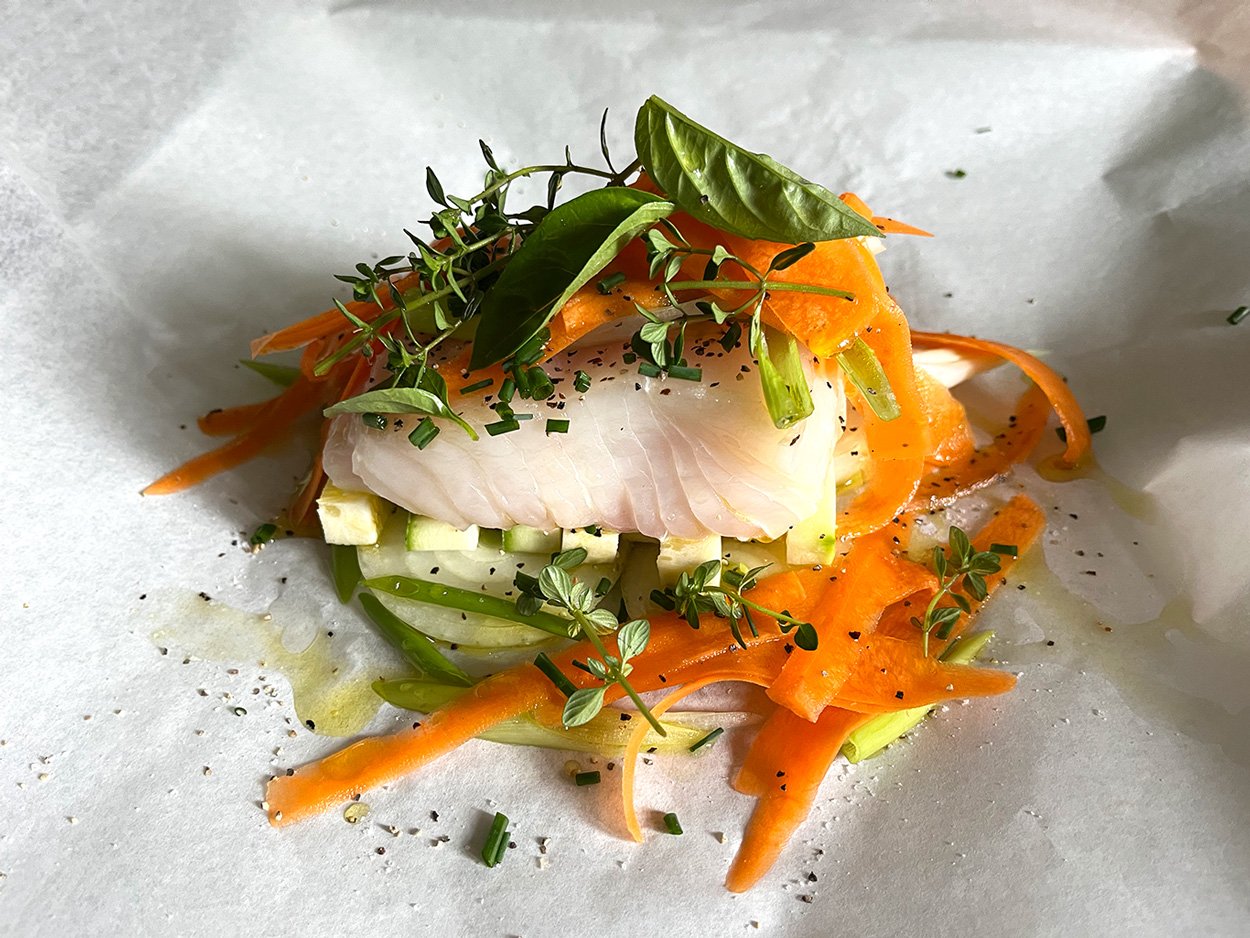
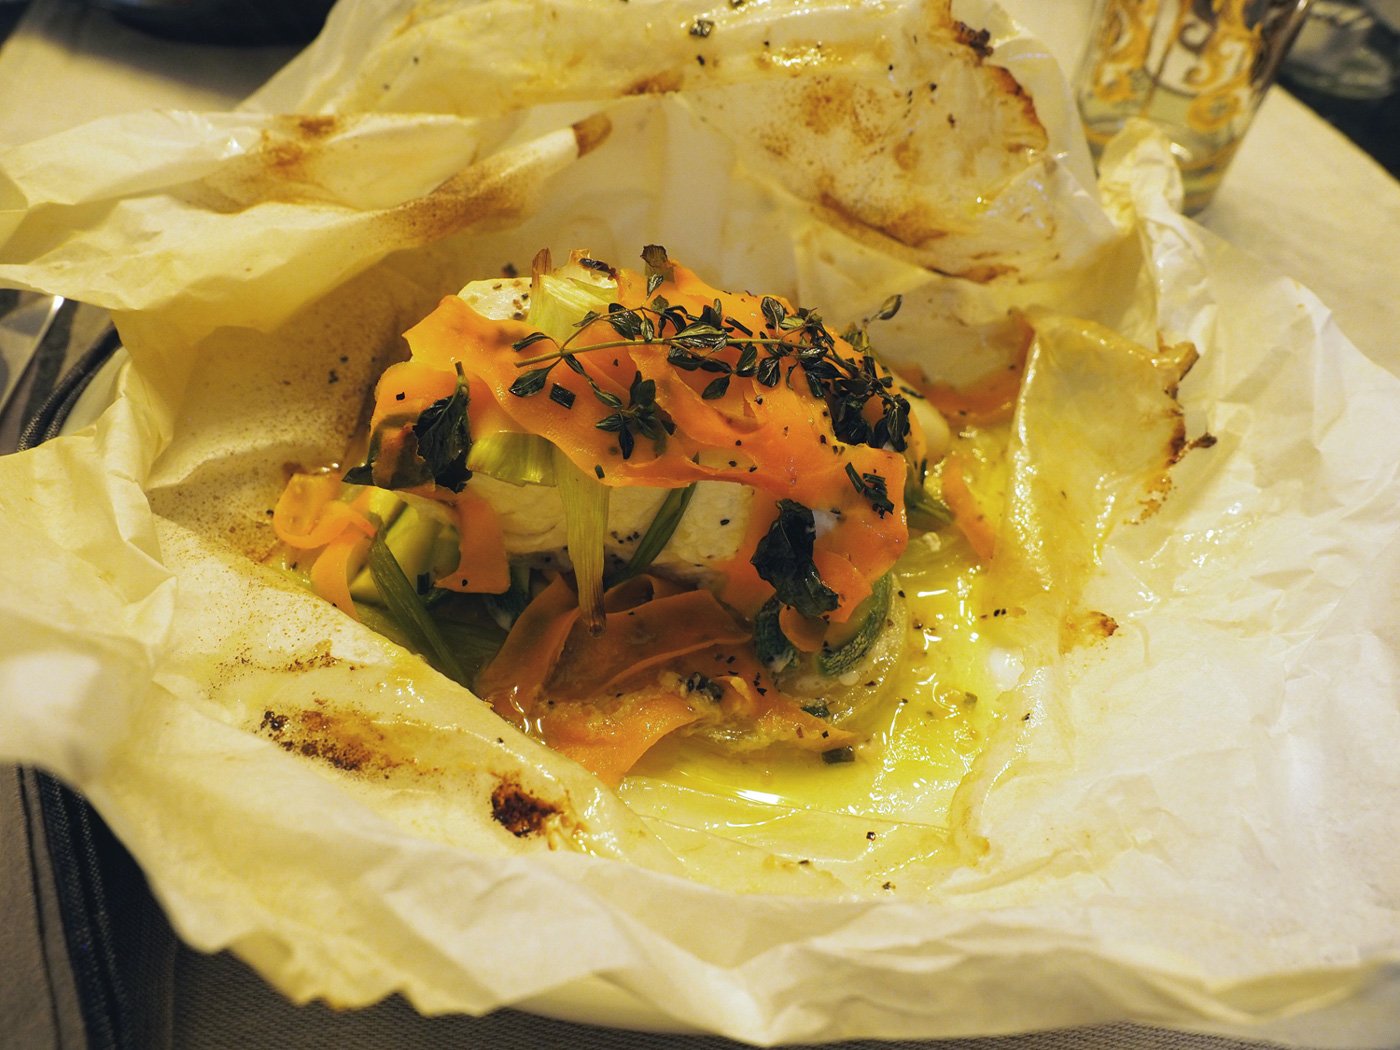
Halibut en Papillote
While the onions and carrots were roasting I prepped each packet and refrigerated them. Then baked it while we enjoyed the appetizers. You can prep this up to 4 hours ahead of time.
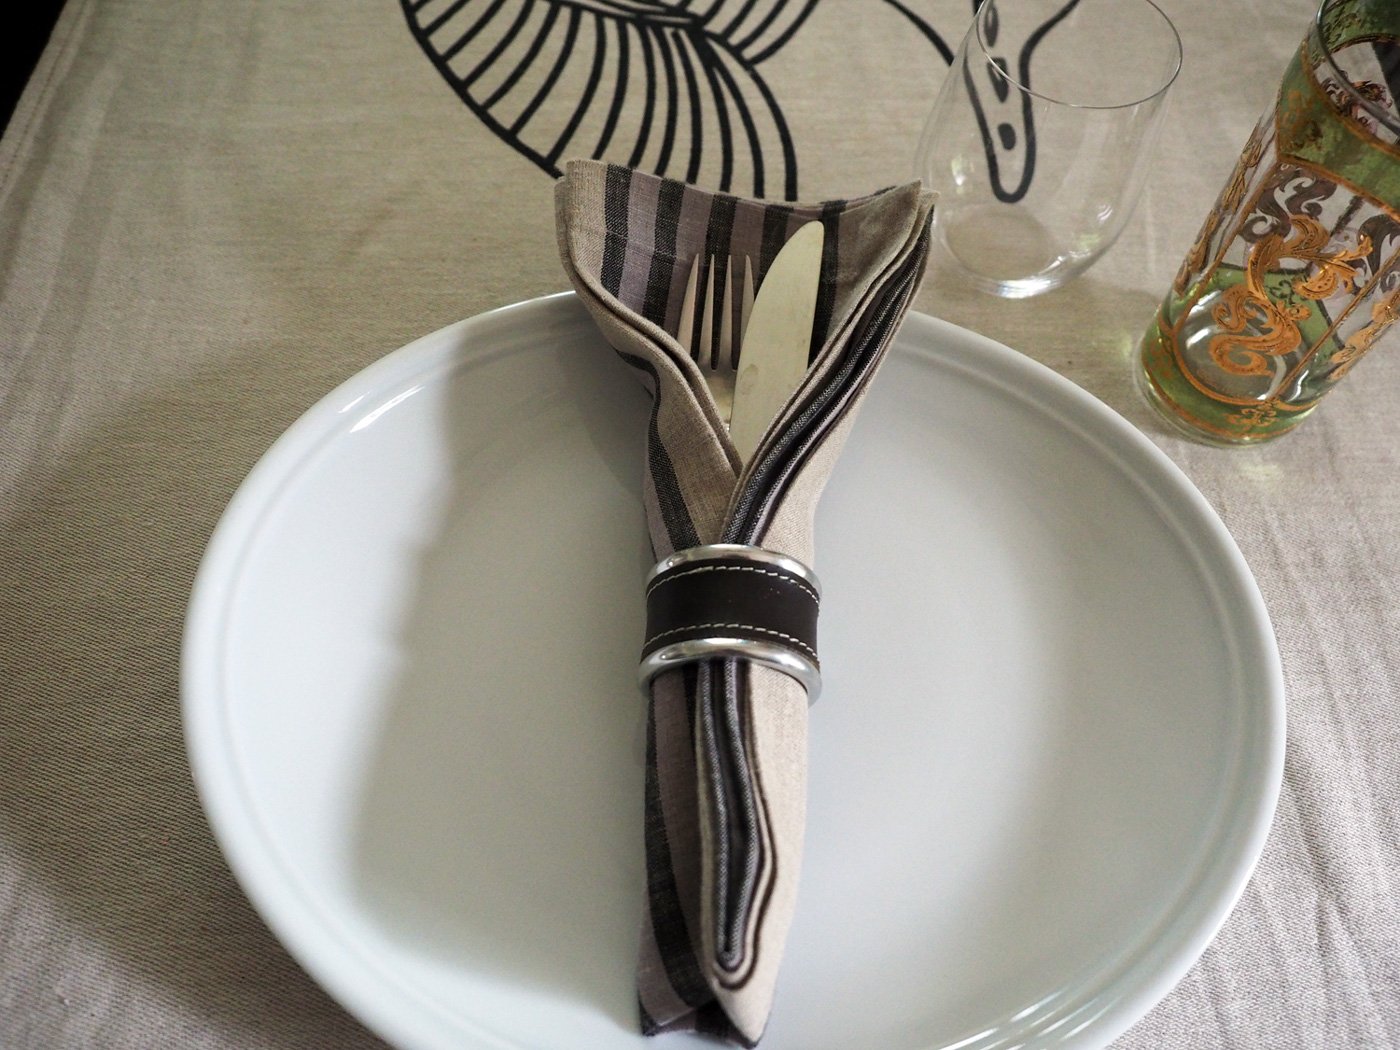
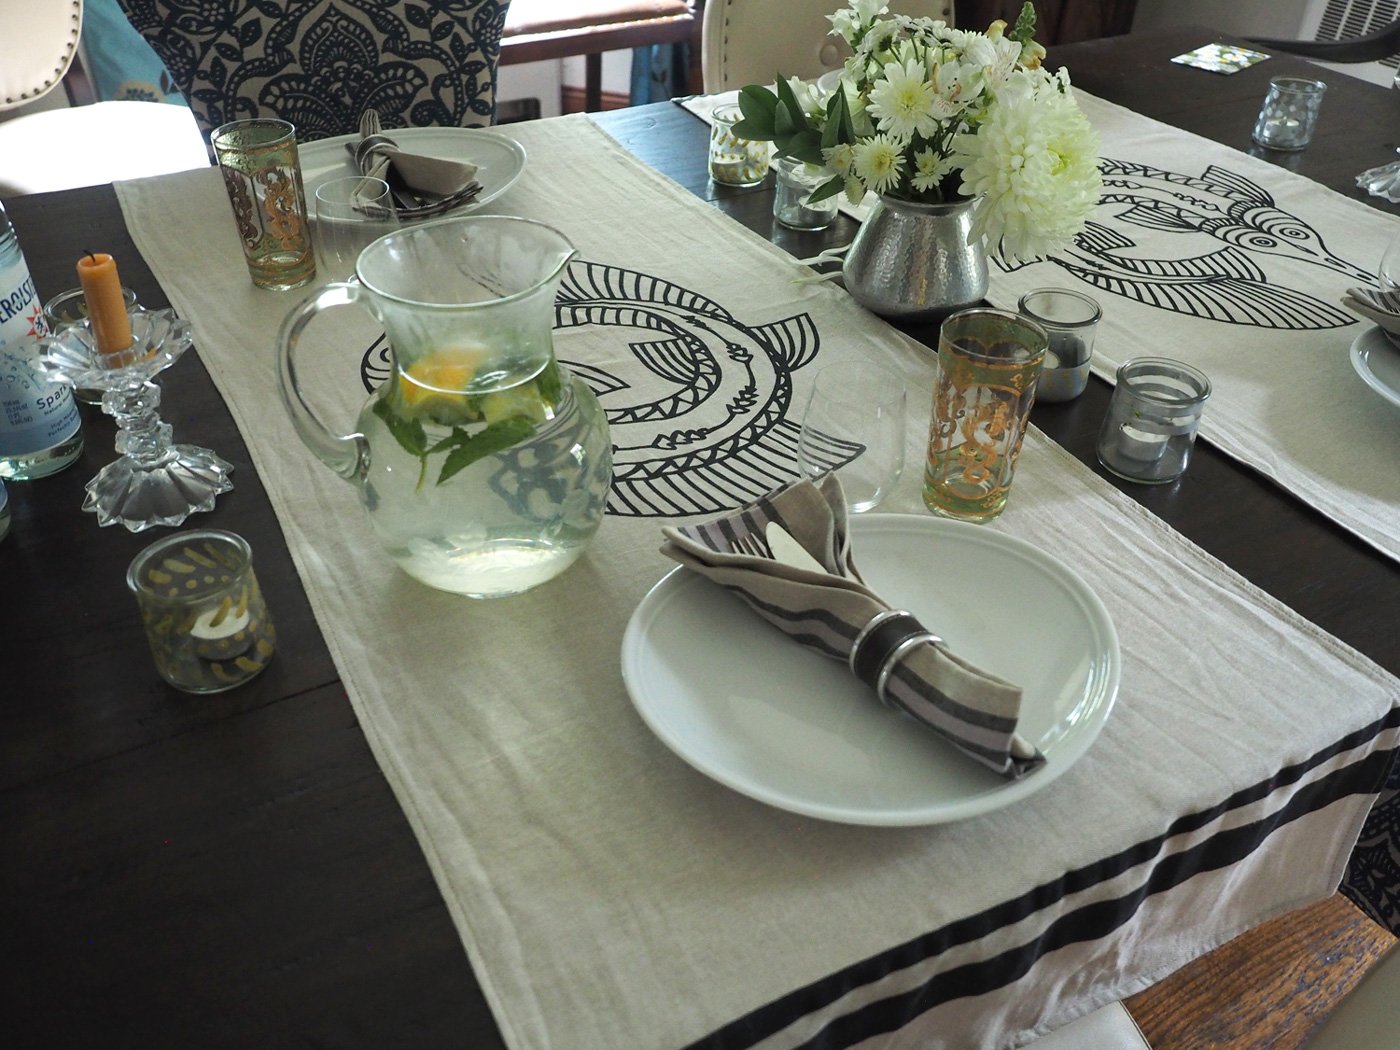
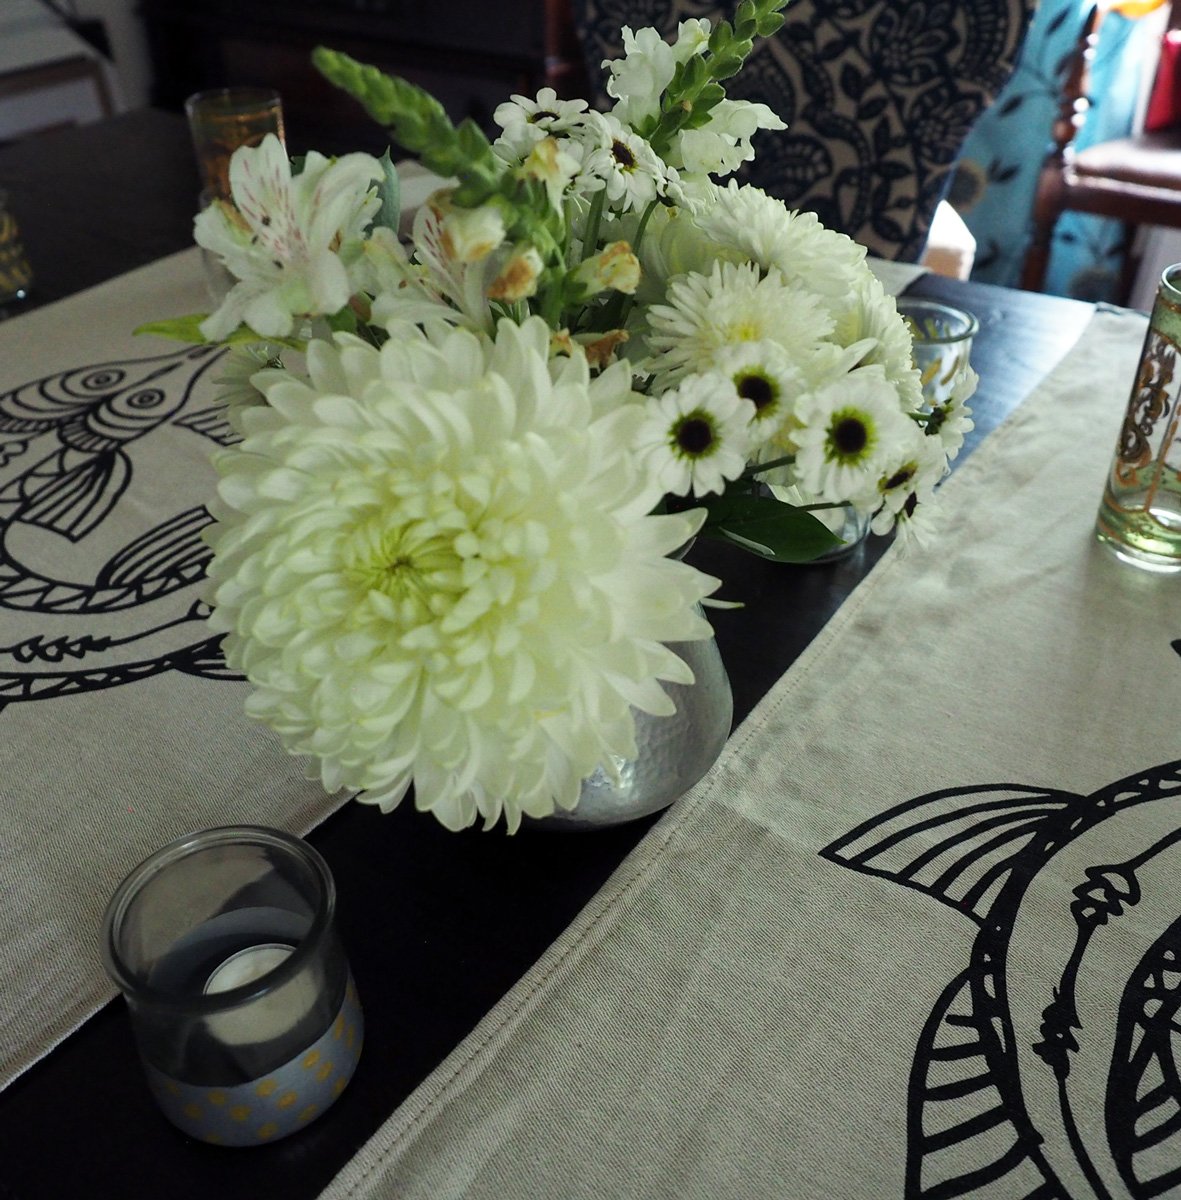
The night before while the tomatoes were roasting I set a simple but fun table. I wanted to give a nod to dinner. So I pulled out two matching runners that featured a sea creature and laid them across the short end of the table. This create a bridge from one side to the other. I picked up these runners at IKEA years ago, and have used them in so many ways. I love the bold, graphic contrast to the neutral tone. An inexpensive purchase that has paid off. I then chose complimentary napkins, swaddled the silverware in the center, then secured it with a napkin ring. The flared top of napkin gave the illusion of a fishtail. Another nod to dinner. The flowers were trimmed and rearranged from the ones my niece, Gianna, brought over for dinner earlier in the week. Glasses and some candles to make it moody, and we can call the table done.

This meal was a strike right down the alley for Therese’s palate. But not to worry, everyone else enjoyed it, too.
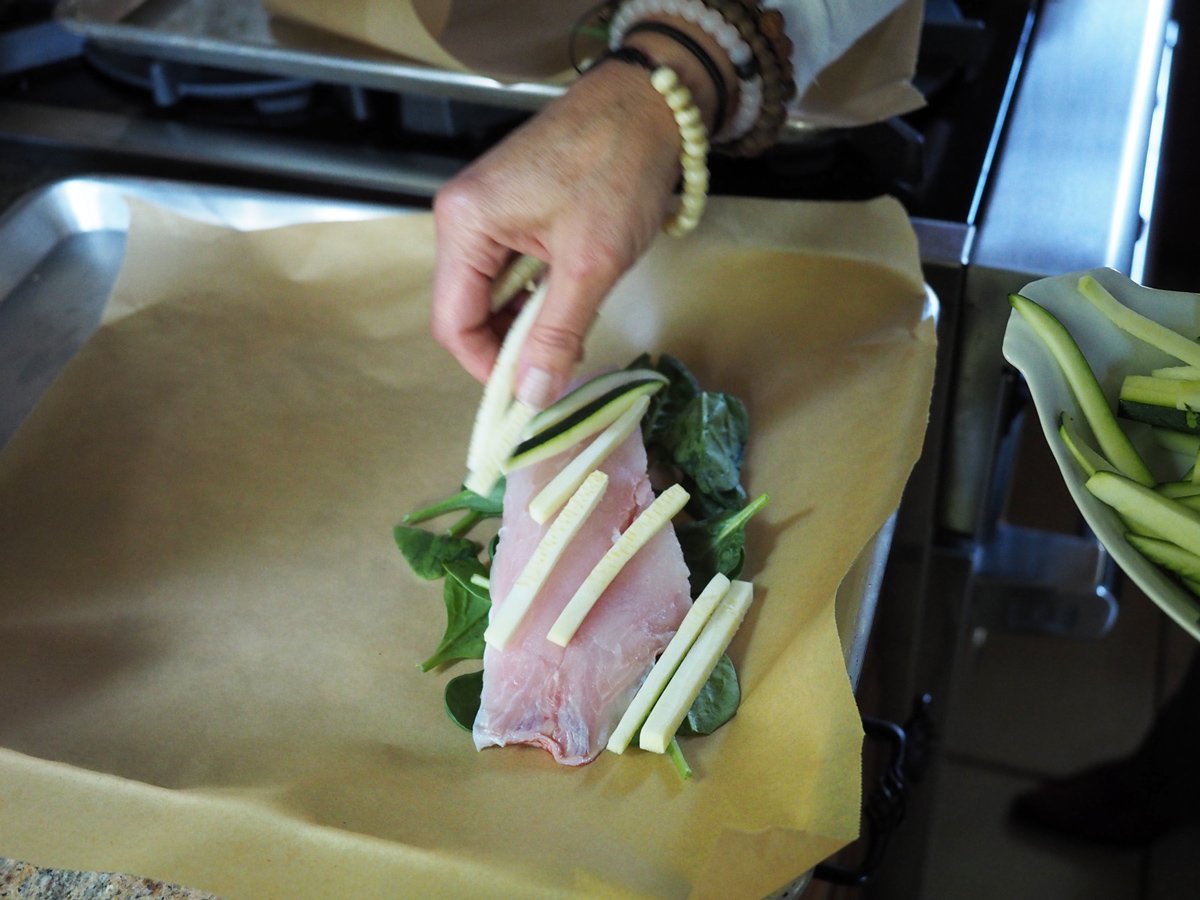
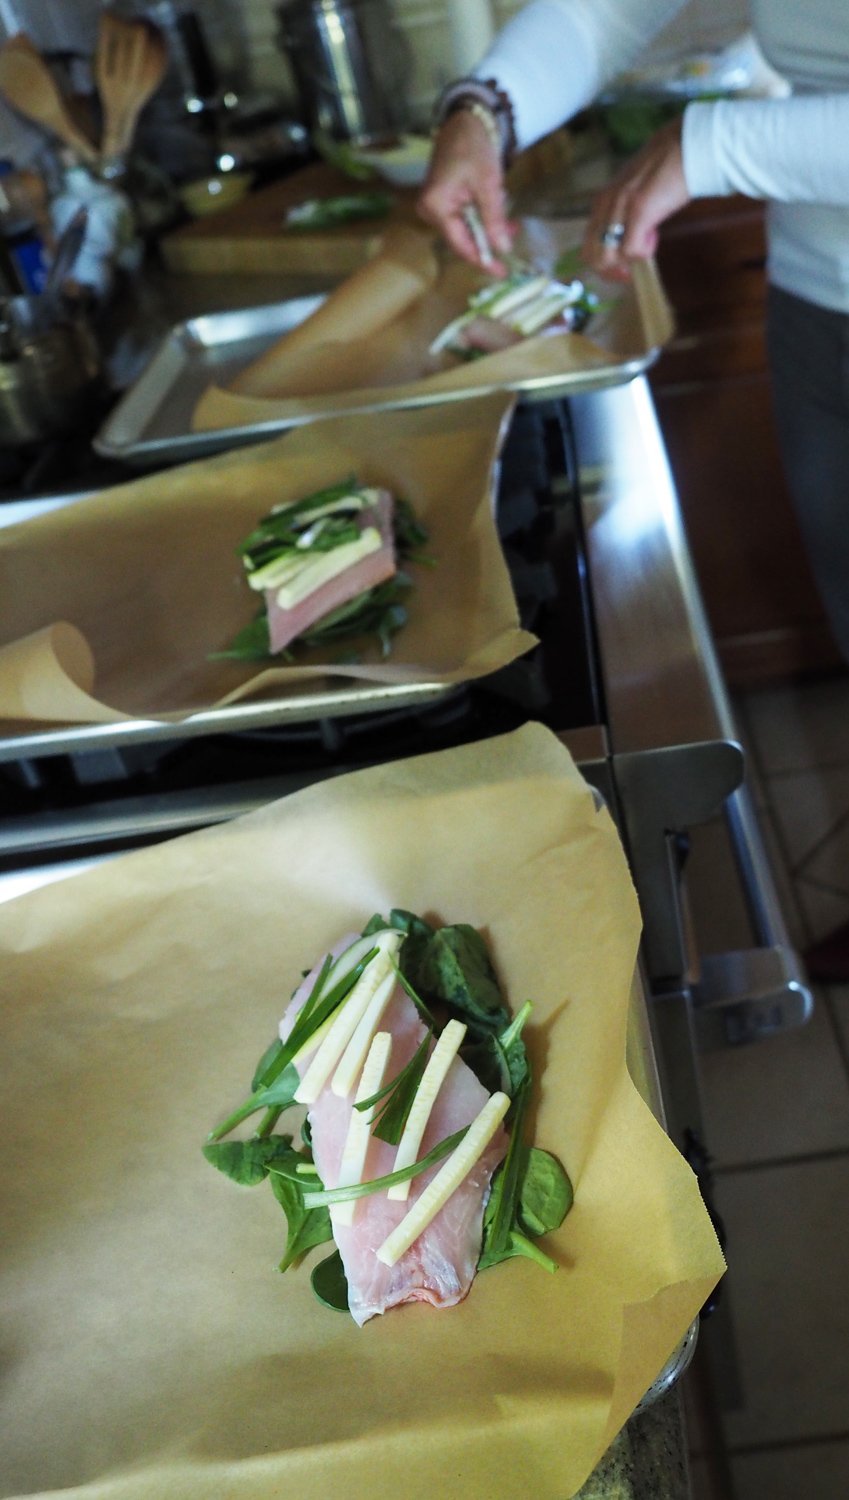
Making fish en papillote is not only a fun way to serve the main course but can be prepped ahead of time, placed in the fridge and baked right before serving. Oh, and wait, there is more; you don’t need exact amounts, or exact ingredients. Something near and dear to my heart. Use the type of fish and vegetable in the amounts that work for you and your guests. And if that wasn’t enough, it’s protein and veg all in one neat packet so you don’t need a side dish of vegetables. (I made more veggies because Therese loves, loves, loves vegetables.)
Ingredients
Halibut 6-7 oz/person ( you can use cod, snapper, flounder, salmon)
Onion, rounds
Scallion, long strips
Carrots, strands
Zucchini, rounds
fresh thyme
Lemon slices
Olive oil, salt, pepper
White wine
Instructions
Slice the vegetables accordingly. This is an important step since everything will be baking together at the same time. It is essential that the ones that need more cook time be cut more finely than those that don’t. I used a vegetable peeler for the carrots, while the onions and zucchini I cut in thicker rounds. The scallions I cut in long strips.
Place the parchment paper on a baking sheet. Start placing the lemon slices, onions, zucchini on top of each other at the center of the parchment. This way when you fold over you will have enough paper to fold and tuck.
Then place the fish, carrots, thyme and season with salt, pepper a drizzle of oil and splash of white wine.
Fold the parchment paper over the fish/veg pile then starting at one corner fold the paper all the way around creating a seal. You can either bake right away or if you are making ahead, place the entire baking sheet in the fridge until you are ready to bake.
Bake at 400 degrees for 12-15 minutes depending on the thickness of the fish.
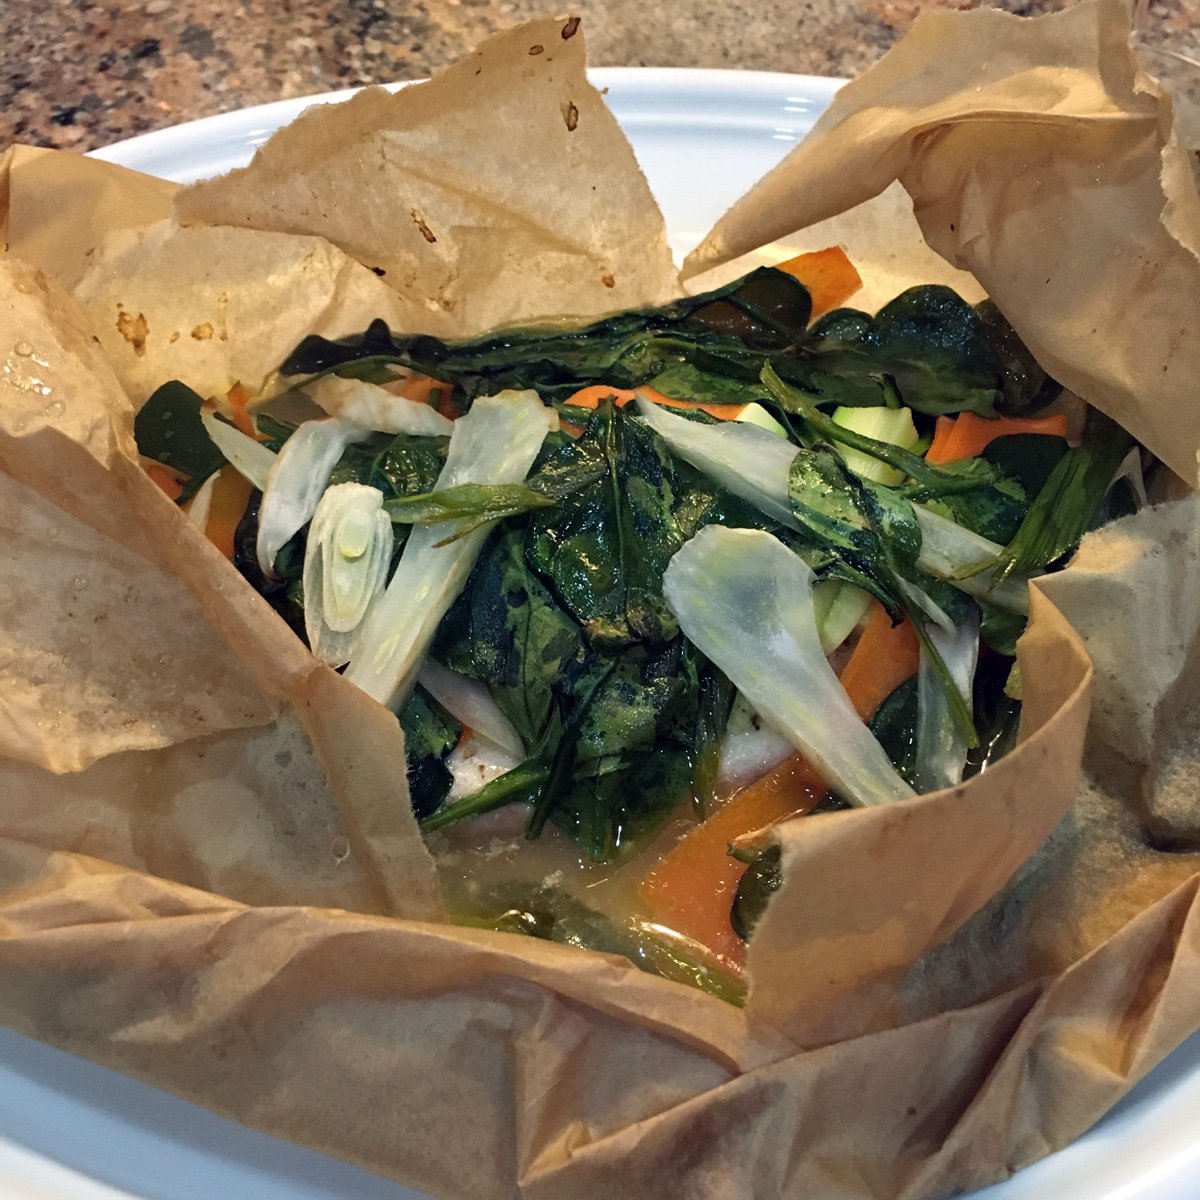
As I mentioned, I was short on time. Therefore, I didn’t have time to photograph the en papillote part. However, I did have images from the time I made it with red snapper. Which is actually an excellent example to demonstrate the many variations of this technique. In the pictured below, I used Red Snapper, Spinach, Zucchini Strips, Scallions.

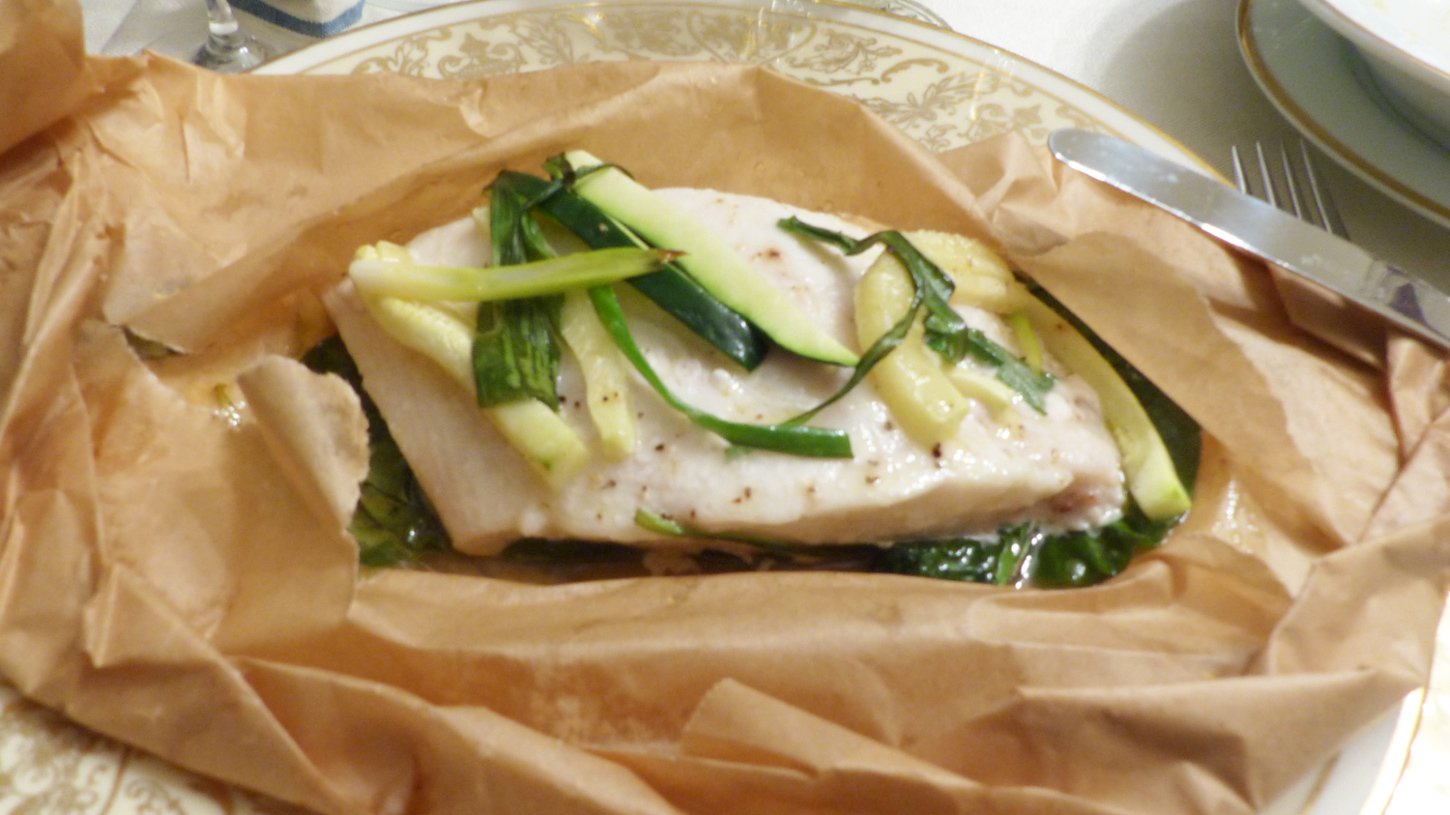
With the many variations that can be made the list seems endless. But let me give you a few ideas. Other vegetables that work well: Asparagus, Spinach, Kale, Yellow Squash, Cherry Tomatoes, Olives, Capers, Basil, Sun-dried tomatoes, Broccolini.
You can even use potatoes if you slice them thin.
As you can see, this method affords a huge range of flexibility and versatility depending on your guests tastes. That is also another huge benefit. Since they are made in individual pouches, you can customized them for each guest. This might seem like asking for trouble having to make different combos for each guest. But it does allow you to accommodate guests who have allergies or food sensitivities. Or just the pesky ones who don’t like certain veggies!)
All in all, it was a fun evening of healthy eating and a great time catching up with family we love.