Sure, I recognize that Cinco de Mayo is coming up, and maybe you were expecting a taco or fajita recipe. I'm figuring... No, I'd bet the farm that there are a gazillion other sites that will provide you with oodles of Mexican celebratory dishes. I like Mexican food but I'm Italian (well, as we all know now with 1/4 Polish, shhh). Plus, you're gonna need a dish for Sunday.
What can I tell you? I'm a creature of habit and I love me some pasta on a Sunday. Well, any day really, but Sundays are a must. And it's usually the kind of pasta dish where I'm just throwing together things that I unearth from the back of the fridge or from a pantry rummage. As my grandmother, who didn't quite understand my need for experimentation, used to call it, Mescolanza. Roughly translated; 'mixed up mess' which doesn't sound very appealing, right? Consequently, the need for another title was apparent. Thus the renaming of these types of creations to Something from Nothing Specials was born. Although not super sexy, it does sounds more creative and less like a mistake. I have to admit, with some pride, that I can't recall a time when I experimented with pasta and it didn't taste good. Could bias play a role by sheer virtue that I crave pasta like a smoker craves nicotine? Sure, but I have confirmation from others that they like my creations, too.
So this past Sunday began a bit slow and lazy. When I woke up I had in the back of my mind that it was a pasta day. Although Spring had been trying to eek its pretty little neck out, this particular day was quite chilly, and even a bit nasty. Pasta always warms my soul and my belly. Heck, who am I kidding? It's Sunday. I don't need any other excuse to make pasta. So, after doing some Spring cleaning, my reward was to whip me up some comfort and serve it up like a trophy for my work. (I think I might have a serious pasta problem.)
Sure, I had fresh tomatoes. I even had mushrooms. But that big, hunking jar of sun-dried tomatoes was staring me down as I opened the refrigerator door. Those jewel colored, intensely flavored bites reminded me of how often I cooked with them in Miami. I was immediately transported back with memory waves of the other ingredients that were my favs: artichoke hearts, capers and olives. Always trying to keep some solid staples on hand, of course I had capers and olives at the ready. But with artichokes in attendance, it seemed imperative that I resurrect an old dish. Also making an appearance, but as a new addition were some baby Italian eggplant. Throw in a few aromatics and we have a pasta dish, y'all.

The main line up.
Ingredients
1 lb pasta (I used gluten free Tinkyada ziti but use whatever you like)
3 small Italian eggplant, cut in 1/2" strips (approx. 4 c)
1 c artichoke hearts, quarters
1/4 c sun-dried tomatoes, chopped
1 medium yellow onion, sliced (approx. 1.5c)
2 T Kalamata Olives
3 large garlic cloves, sliced
1.5 T capers
3 T olive oil
1/2 -1 t salt
1/2 t red pepper flakes
2 c basil, chiffonade
Goat or Feta cheese, or Pesto, optional

Instructions
Put a pot of salted water to boil for the pasta. Sauté the onions in oil, adding 1/2 t salt and red pepper over low heat. Let soften while you slice the eggplant and garlic.


Add the eggplant and slightly raise the flame to medium low. You want to brown the eggplant a bit. While the eggplant is cooking, prep all the remaining ingredients, and add the pasta to the boiling pot. Once the eggplant has browned, add a tad more oil in the middle of the pan to cook the garlic. Then add the capers, olives, sun-dried tomatoes and artichoke hearts. Lower the heat and let warm through. At this point, give it a taste for seasoning. Capers, olives and sun-dried tomatoes can be salty which is why I only started with 1/2 t salt to start, and then added another 1/2 t before adding the pasta.

It's important to not overcook the garlic, so only add that once the onions and eggplant are browned.

The aromatic line up: Sun-dried tomatoes, capers, Kalamata olives, artichoke hearts.(Notice I only had a few olives, so that's the amount I used.)
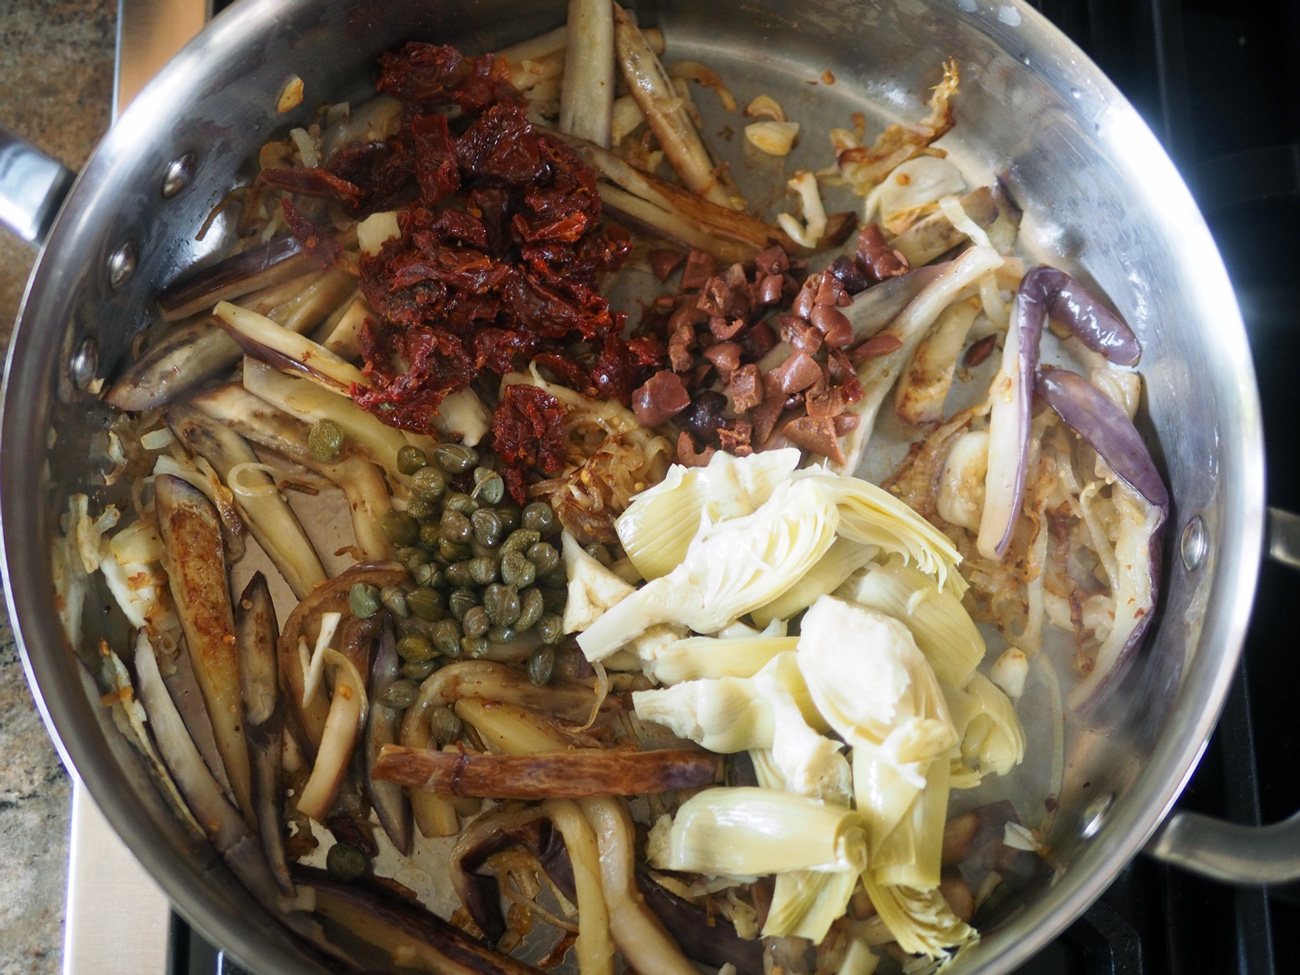
Add them all to the pan so they cozy up together.
By this time the pasta should be ready. Reserve some of the pasta water, then drain the rest. Add the pasta to sauce pot, stir together. Add the pasta water as needed to loosen up. Turn off the heat and add the basil. Serve immediately.
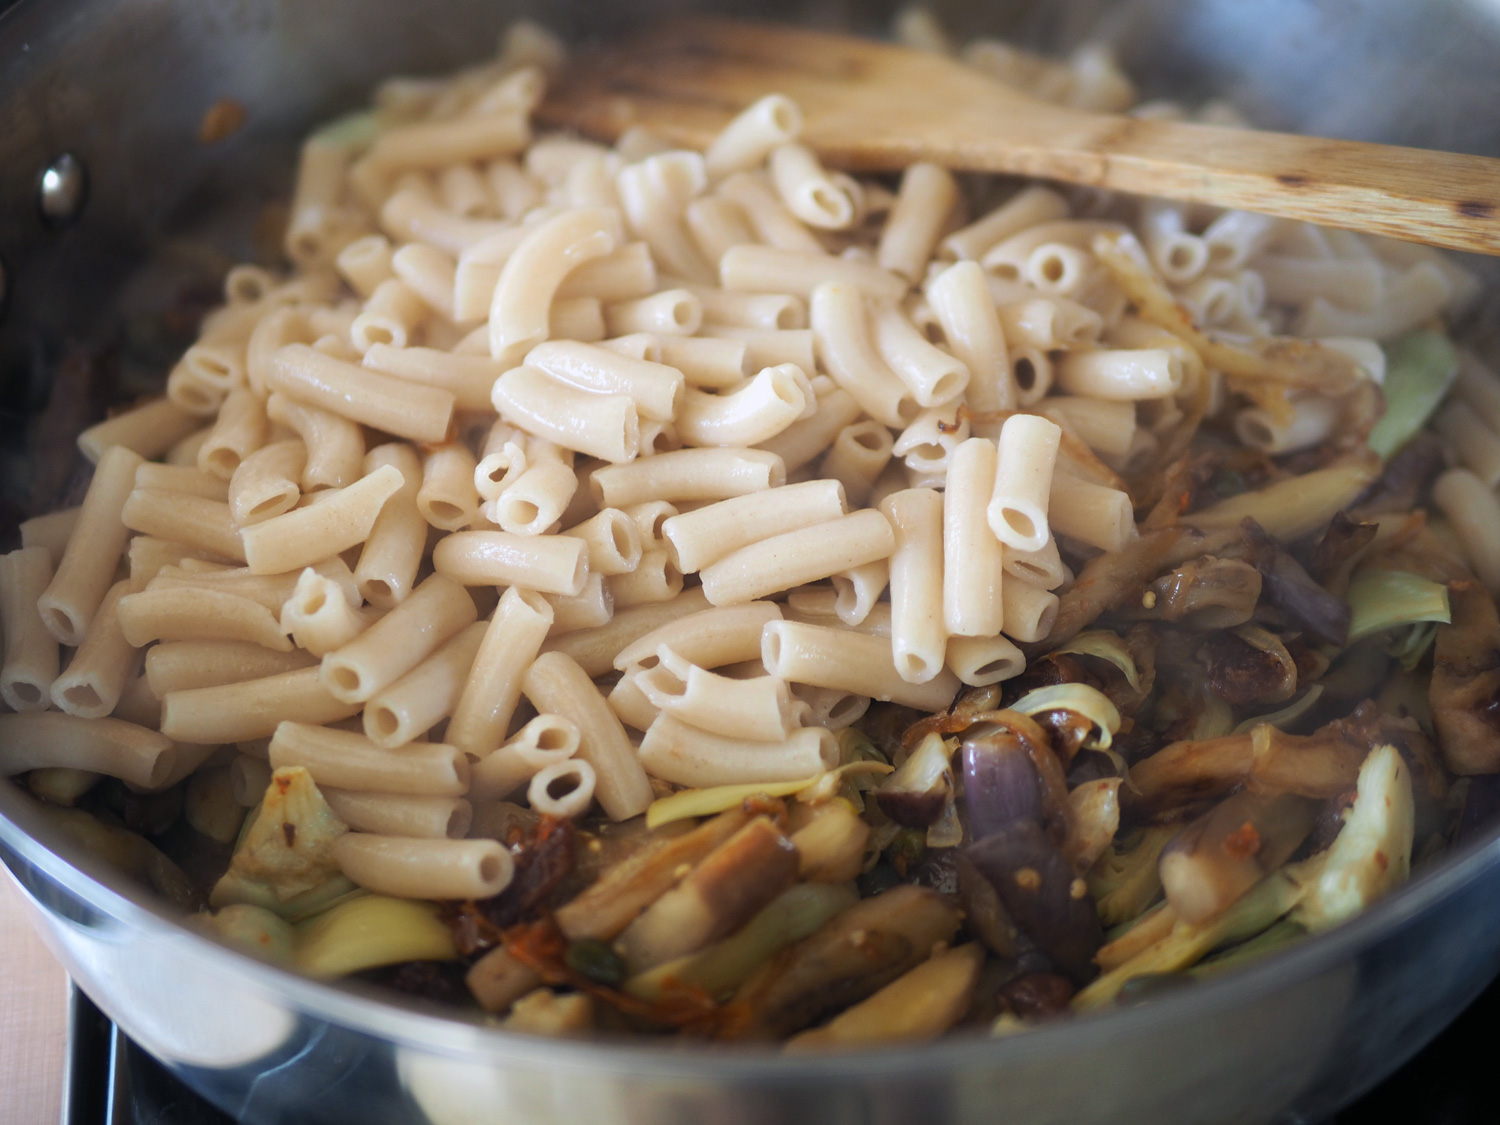
Add the pasta to the mix and stir together. Now is the time to add the pasta water to your liking.

Add the basil at the end to keep it from cooking all the way through.
Grate some cheese over top. This dish would also be delicious with chunks of feta or goat cheese stirred in. I didn't have either but can completely imagine and taste it in my mind.


Since I had so much basil, I made walnut pesto which I used to warm up the leftover pasta. Let me tell you that was a winning combination.
Happy Sunday or any day.