The Not Sweet Fruit Tart

final.pie.jpg

I’d venture to say that most of us have had recent conversations about food allergies, food intolerances, and just plain avoiding foods we think we shouldn’t be eating. It has become another whole food industry - Gluten Free, Vegan, Non GMO, Dairy Free, No Refined Sugar, Plant Based. There are Instagram feeds dedicated solely to a niche food category. I actually think it is fantastic that people are becoming more aware of what they are ingesting. We truly are what we eat. Food can either heal or harm, so why not be uber selective in what we consume. But at the same time, it has become increasingly difficult to decipher all the information and determine what to eat each day. And trying to host a dinner and side step all the allergy mine fields, can be explosive. More than that, it just plain saddens me knowing that we have poisoned our food supply resulting in this food intolerant epidemic. Which is why I mostly stick to eating as organic as possible, loads of seasonal vegetables and grains. And fruits, which is how I decided to make this tart. I bet you were wondering where all my ranting was going.

I, too, am a sufferer of food intolerances, so I get it. I annoy myself sometimes. I can, and will write another post detailing how I navigate the world side stepping foods I love but can’t eat. For now, this post is about understanding people’s choices, honoring and trying to accommodate them. Hey, it’s all good for me. These challenges only present opportunities to push myself to find new food ideas. Ain’t nothin’ bad about that.

Recently, I met up with my two friends to celebrate all three of our birthdays, and to just plain ole catch up. (That’s another subject I can write at length about - how we are all so busy that it takes months to find a mutual date to meet up. Do not get me started on that one!) At first, I was supposed to host but then plans got switched around and Donna graciously took up the mantle to host. She made a most delicious dinner featuring a salmon dish with a salsa that has my lips licking just thinking about it. I will beg her for the recipe to share. Since she was handling the dinner, she asked if I could make a dessert. Our friend Lisa was avoiding sweets. So how do you make a non sweet dessert? Fruit to the rescue. I was banking that it’s own natural sweetness would do the trick.

I did cheat ever so slightly by adding homemade strawberry jam that I reduced down with orange juice and zest to intensify the flavor. But nothing else had added sugar.

I wasn’t actually looking for an easy dessert to make but this one somehow ended up being pretty easy. The only baking portion was the puff pastry shell. Everything else was pretty much assembly.

Photos first, recipe follows.

Whip a heavy cream. Traditionally, powdered sugar is added for sweetness. Not here. I only added orange zest to brighten the flavor.

Whip a heavy cream. Traditionally, powdered sugar is added for sweetness. Not here. I only added orange zest to brighten the flavor.

The puff pastry has a buttery flavor that adds richness to the overall dessert. Spreading just a small amount of strawberry jam gives another layer of flavor, and a tart and sweet component.

The puff pastry has a buttery flavor that adds richness to the overall dessert. Spreading just a small amount of strawberry jam gives another layer of flavor, and a tart and sweet component.

Fluffy and light, the non-sweetened mix of whipped cream and mascarpone makes it luxurious and not heavy at all.

Fluffy and light, the non-sweetened mix of whipped cream and mascarpone makes it luxurious and not heavy at all.

Spread it out and fill it to the top. See all the orange zest flecks. I do believe these added a fresh, brightness to the cream mixture.

Spread it out and fill it to the top. See all the orange zest flecks. I do believe these added a fresh, brightness to the cream mixture.

Make it pretty. One thing about simple desserts is that it should be visually appealing. Decide on a design, then make it gorgeous!

Make it pretty. One thing about simple desserts is that it should be visually appealing. Decide on a design, then make it gorgeous!

You can use any fruit you like. These were the ones that were readily available and work well together. Plus the colors play nicely, and that always helps making a dish look more appealing.

Ingredients

Puff Pastry sheet
1 1/2 c Mascarpone Cheese
1 pint Heavy Cream
1 Qt Strawberries
2 c Blackberries
1.5 c Raspberries
1/3 c Strawberry Jam
Juice of an Orange & Zest

Instructions

  1. Roll out a puff pastry sheet large enough to fit a 10” pastry pan with removable bottom. Once placed in the pan, use the rolling pin to cut a clean edge of pastry.

  2. Blind bake* the shell until completely cooked. Then set aside to cool

  3. While the shell is baking, simmer the strawberry jam with 2 T of juice of orange & 2 t zest, reducing until thick. Set aside and let cool.

  4. Whip the full pint of heavy cream until stiff peaks. Remove half and reserve for extra topping.

  5. Using a spatula, gently fold in the mascarpone cheese, orange zest and blend until combined. Do not over mix in order to not deflate the whipped cream.

  6. Spread a thin layer of the jam on the bottom of the pie crust.

  7. Fill with the cream mixture.

  8. Cut the strawberries and arrange all along the outer edge. Then fill in with the rest of the fruit.

  9. Add mint leaves for decoration as well as a refreshing addition. Serve with more whipped cream

*Blind baking: Baking a crust without the filing. Some bakers use tin foil filled with dried beans, rice or baking weights to weigh the pastry down. I simply use tin foil and smaller baking pan on top.

Note: When I rolled out the pastry dough there will be left over pieces. I decided to use a small leaf shaped cookie cutter to create little decorations. I baked them at the same time as the crust, then used them in the final decorations. I added cream on one side to adhere them to the pie then topped them with jam to make them look like strawberries. Sprigs of mint not only added a pop of color but acted as the leaves to the faux strawberries.

final.pie2.jpg

This was a huge hit meeting the task of providing a dessert while also being refreshing and Not Sweet. Granted this was not gluten free but it served the purpose while also putting big smiles on everyone’s faces.

Espresso Ice Cream

I recently had the awesome opportunity to work as an intern in the prep kitchen for a James Beard Award winning restaurant group.  I know, pinch me, I’m a lucky woman.  I will definitely write more about that experience, and share some of the many pastry items I made, but first since it’s summer, let’s start with ice cream.  I made several ice creams during my 4 week residency.  Two of my absolute favorites were Popcorn Ice Cream. Yes, you read that correctly.  And Espresso Ice Cream.  Both were made using a traditional cream base then whisking in egg yolks, cooking them to temperature, then using an ice cream machine.  Velvety smooth result.

Since I don’t have one of those big hunky things in my home, I searched for easier ways to bring home the flavor, and make my hubby happy. He loves ice cream, and devoured both those flavors when I brought home samples.
In researching homemade methods, it seems that without using an ice cream machine, most recipes eliminate the yolks. Just as well.  No yolks. No stress. Without the eggs, the whole process is much easier, since tempering the eggs, then cooking them slowly is a lengthy and delicate process. In a split second you can end up with scrambled eggs. (Although, then you would have a complete breakfast - espresso right inside your scrambled eggs.) 
A no egg ice cream is just as yummy and 10 times easier.  I think we can all agree that making our lives simpler is a good thing. Believe me when I say, I am always looking for more efficient ways to do anything. (As a matter of fact, during my time in the kitchen there, I came up with a different ways to punch donuts. And they were gracious enough to let me reorganized the menu books.  Reorganized the utensil and gadget areas.  And were open to a suggestion on assembling the coconut cakes. I am an efficiency junky.)  So, let's get right to making this eye opening Espresso Ice Cream, shall we?  Just in time for the 4th of July weekend.

Ingredients

2.5 c whole milk
4 c heavy cream
1 c sugar
1 t vanilla
4 T instant espresso , diluted
pinch salt

But a few ingredients, and all mixed together. You can't get easier than that, my friends.

But a few ingredients, and all mixed together. You can't get easier than that, my friends.

Instructions

Mix all the ingredients in a mixer.  Whisk until combined. I diluted the espresso powder with a couple tablespoons of warm water. 

Pour in the cream and milk

Pour in the cream and milk

Sugar

Sugar

Espresso and vanilla.

Espresso and vanilla.

Whisk it all together. Seems silly to show you but I have a thing for telling a story with images.

Whisk it all together. Seems silly to show you but I have a thing for telling a story with images.

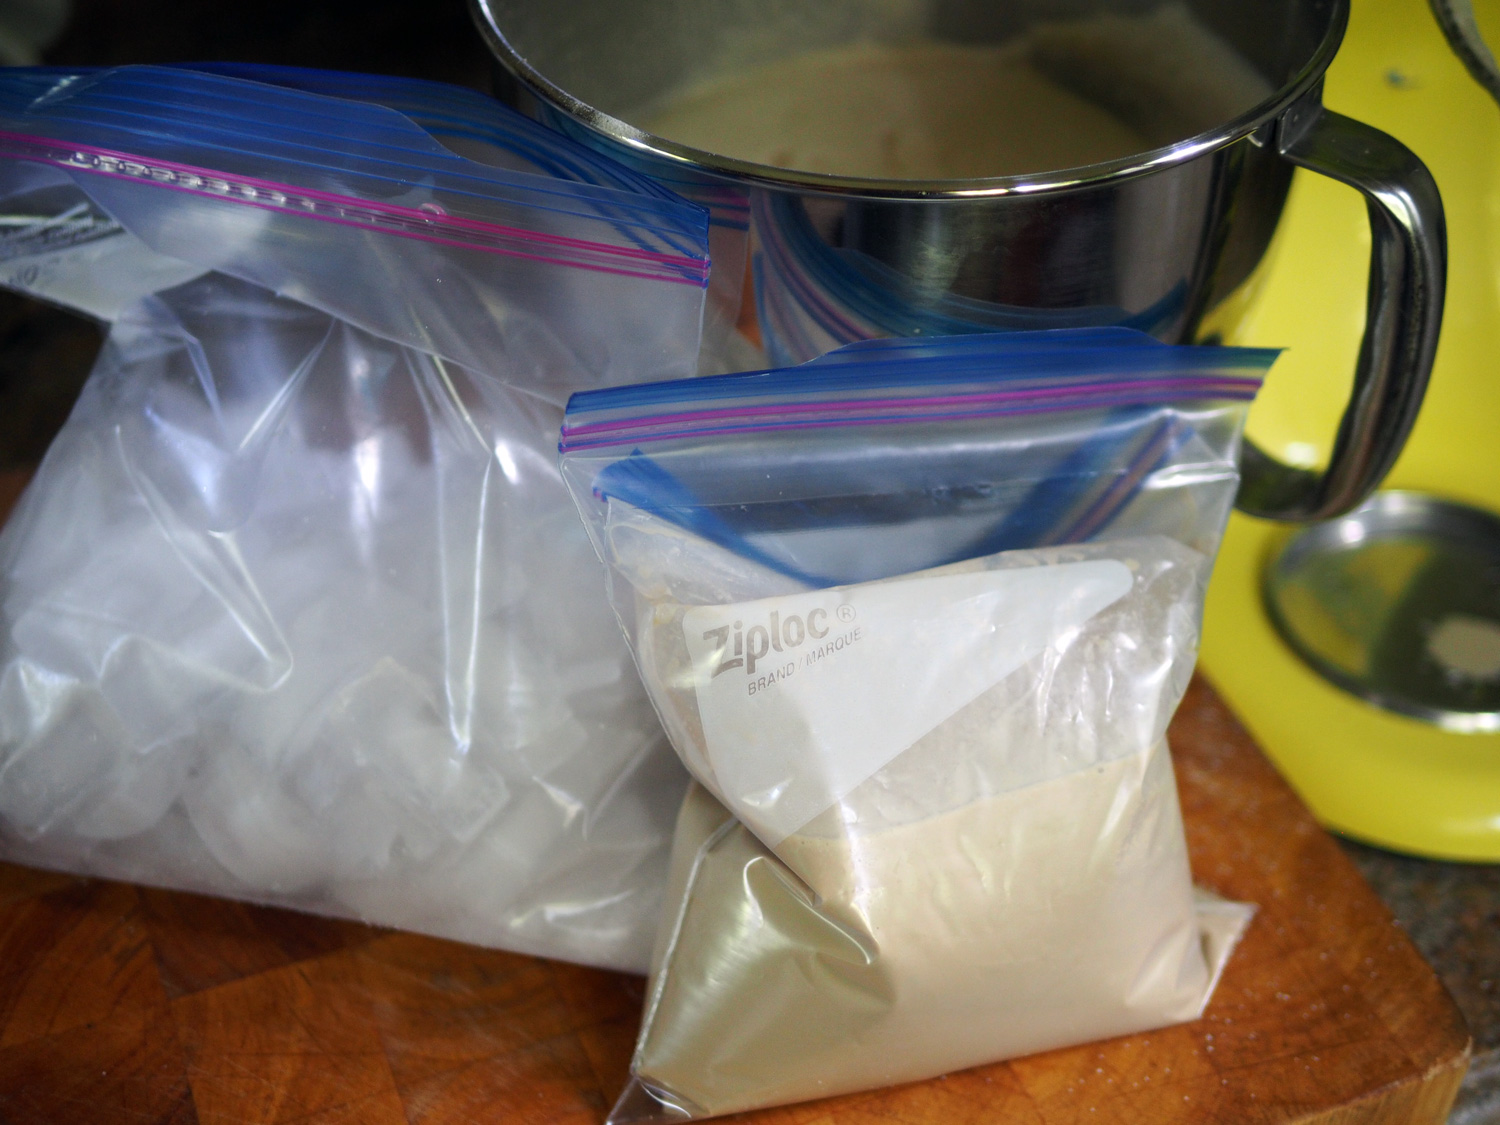
For the next step, there are a few different methods to get it to soft ice cream state. Some people eat the ice cream at that stage. It seemed a bit too soupy for me. Mine went into freezer so the mixture to get to a harder consistency. I split my batch into two so I could use two methods for comparison. (Experimentation is hard work but I'm willing to do it for you to bring the best results. Who I am kidding? The end result was ice cream!!)

Shake Until Your Arms Scream Method:
The first method I used was the plastic bag method. I poured the liquid in a quart plastic bag, and doubled the bag to prevent leakage. Then placed that bag into a gallon plastic bag with 4 T coarse salt and 4 cups of ice cubes.  Sealed and vigorously shook it for 10 minutes. This was a work out for sure. I never knew how long 10 minutes lasted until my arms screamed out, "Is it ice cream, YET?" Once thickened, I poured the semi soft ice cream into a container and placed in the freezer to allow it to harden more. 

ice.cream.bags.jpg

That version seemed tiring, so I was thrilled that the other method was much less strenuous. 

The Lazy, Just Freeze It Method:
I continued to whisk the mixture until it thickened.  Then I place it in a glass loaf pan with plastic wrap covering the surface to prevent freezer burn. Then surrounded by ice and placed in the freezer. My arms thanked me.  However, I forgot to continue to mix it every 1/2 hour or so as was suggested, but it seemed to freeze up just fine.  So this is truly the lazy way, all benefits version.

Here are a few videos for you to watch.

Ice Cream in a Bag

Ice Cream without Machine

Freeze and Whisk Method

In the end, everyone seemed to love both versions. So you pick. 

  • Work out with benefits.

  • Or straight up benefits.

Either way, this ice cream will get you raring to go. Other huge benefit ...bringing joy to your loved ones.  I know it did mine.

JuanCarlos trying to eat with moderation.

JuanCarlos trying to eat with moderation.

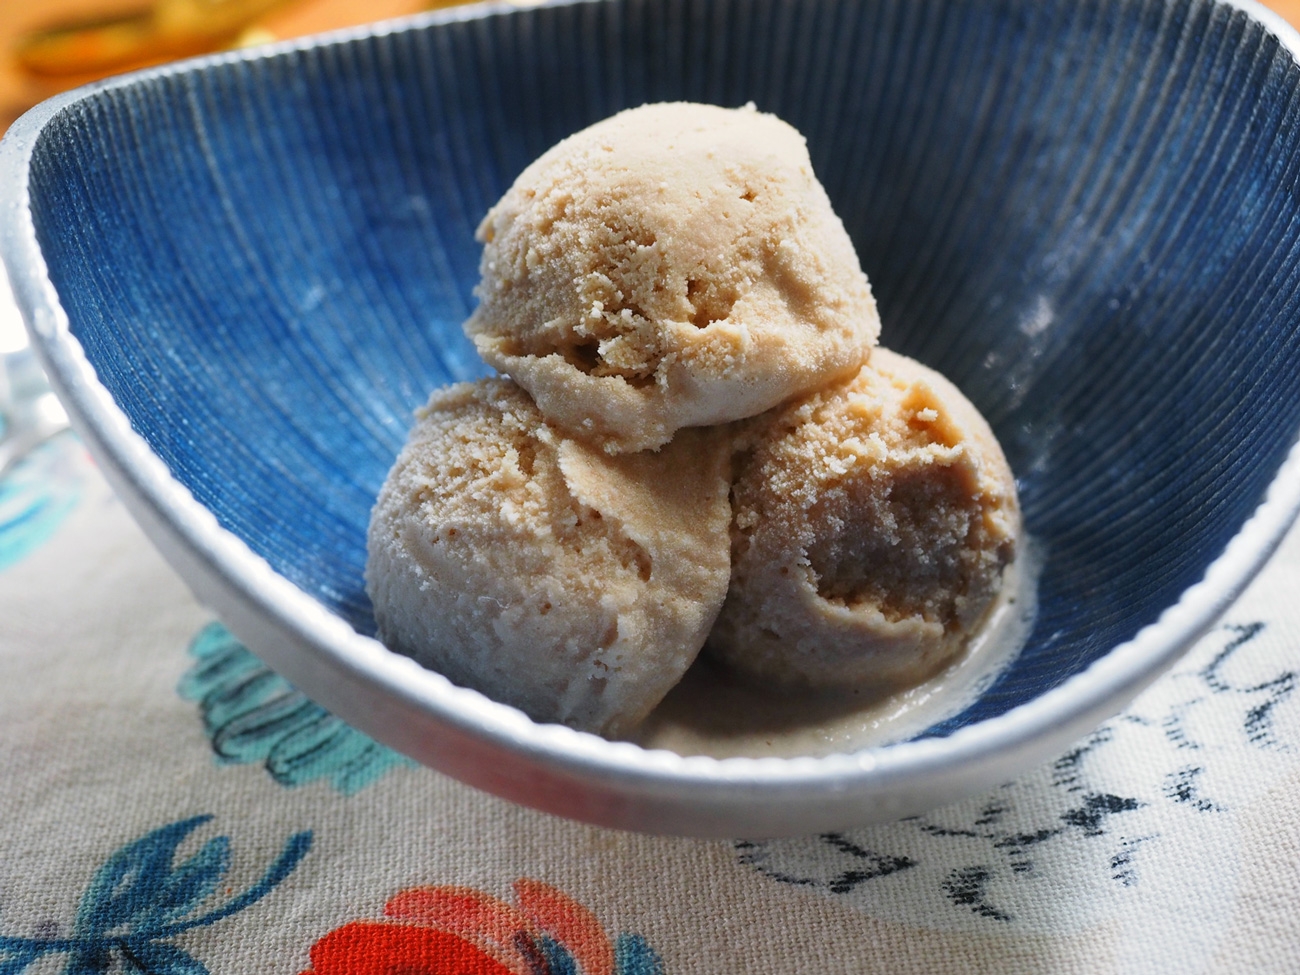
Espresso ice cream scoops

Espresso ice cream scoops

My handsome husband enjoying a bowl of espresso ice cream with his other latest favorite, red wine from Châteauneuf-du-Pape.

My handsome husband enjoying a bowl of espresso ice cream with his other latest favorite, red wine from Châteauneuf-du-Pape.

Happy 4th, and summertime fun!


Leek, Onion & Fennel Tart - Gluten & Egg Free

My memory must be fading... like a distant memory.  I can't recall what exactly prompted me to make up this tart. It might have been that I was craving a tart-like something, or maybe I saw a quiche and had slice envy.  All I remember is a deep desire to eat crust. The solution for when you have a hankering for something?  Go shopping.

It's been stated that you should never shop when you are hungry but I was on a mission, which helped keep this buying event to a minimum.  I was lucky enough to find a gluten free tart shell that didn't have a lot of crap in it. Happiness in the frozen section propelled me with glee back to the produce isle. 

There I found leeks and fennel which were looking fresh and seemed like a fine fit for my crust craving creation. I knew I had onions and goat cheese (which apparently are in endless supply in my house).  Last item needed to make myself a luscious tart that would halt my hankering for quiche was cream. I don't eat eggs.  Pity me.  Yes, pity me because I love eggs and they are in EVERYTHING. But alas, eggs don't love me.  An epic unrequited love story.

Since no eggs, no quiche.  No problem. This tart was going to kick the butt of any egg laced tart dish. 
And yes, although this is gluten and egg free, I did not say calorie free.  So this one may not be my healthiest share but it might become a special favorite for when indulging is on your mind.

There aren't too many steps to this making this, minus a little slicing.  But you have to do that in most recipes, so stop any belly-aching. Homemade food does require a tad of effort.

Ingredients

Pie Crust 9" (I used Wholly Gluten Free)
4 c leeks, sliced and thoroughly washed
1 heaping c onions, sliced
1 heaping c fennel, sliced
4 oz. goat cheese
1 c heavy cream
fresh thyme, optional
1 T butter
Magic 3 (Olive Oil, Salt, Pepper)

The onion family ready to be tarted.

The onion family ready to be tarted.

Instructions

Using a fork, pierce holes in the bottom and sides of the crust.  Bake at 350 degrees until lightly brown.  Set aside.

Prep the crust by making fork holes to prevent from bubbling up.

Prep the crust by making fork holes to prevent from bubbling up.

Perfectly pre-baked crust

Perfectly pre-baked crust

While the crust is baking, slice the leeks and soak them in water. Removing and rinsing several times.  (Leeks are laden with sand and you want to ensure there isn't a grain left.  When changing the water, remove the leeks from the water using a strainer or big slotted spatula as opposed to dumping the water and leeks into a strainer.  If you do the latter, all the sand will go right back through the leeks.  By removing the leeks, the sand stays at the bottom of the water. Then just dump and refill with fresh water. )

Wash, soak, dump water. Wash, soak and dump again. Do this until no more sand appears at the bottom of the bowl.

Wash, soak, dump water. Wash, soak and dump again. Do this until no more sand appears at the bottom of the bowl.

While the leeks are soaking, slice the onions and fennel.  Once all vegetables are ready, sauté in butter and oil, seasoning with salt and pepper.  If you decide to use the fresh thyme, add it now. Cook these until fully caramelized. 

Onion slices

Onion slices

Fennel slices

Fennel slices

The best combo. Butter and Oil

The best combo. Butter and Oil

All veggies in: fennel, onions, leeks

All veggies in: fennel, onions, leeks

Sauté slowly until they are completely broken down and beautifully caramelized.

Sauté slowly until they are completely broken down and beautifully caramelized.

Now with all the items ready, fill the pie crust with the vegetable mixture, top with tons of goat cheese and pour in the cream. You can also just mix all these ingredients together in a bowl and then fill the pie.  Your choice.  I didn't mix it because I envisioned the pie I saw layers in my head.  Silly me, it truly makes no difference.

Vegetable mixture, goat cheese, heavy cream and crust waiting to join forces.

Vegetable mixture, goat cheese, heavy cream and crust waiting to join forces.

Fill the bottom with the sautéd vegetable mixture. (Or you can mix the veggies with the cream and goat cheese and then pour in.)

Fill the bottom with the sautéd vegetable mixture. (Or you can mix the veggies with the cream and goat cheese and then pour in.)

Lots of cheese and creamy goodness tops this tart off.

Lots of cheese and creamy goodness tops this tart off.

Place the pie in the oven and bake for 40-45 minutes until center stops wiggling and when tested with a toothpick it comes out clean.

Let it cool slightly to allow it to set.  You can serve it warm, at room temp or even cold.  Slice and pair it up with a soup or salad.  This is ideal for brunch, lunch or dinner side dish.  I made it when my friend, Emilce came for an overnight stay.  We both had a slice, leaving the rest of the pie all to myself for days.  Bliss!

Print Friendly Recipe

DP-stirredwlove-ID1.jpg
final.pie3.jpg
 

Cream Puff -What Did You Call Me?

Cream Puffs have been a part of my life for a long, long time.  My mom has been making them ever since I can remember.  Quite honestly, since she always made them, I never did.  That was until a caterer friend of mine hired me to bake for one of her clients.  One of the orders was for 100 mini cream puffs.  Thus began the start of MY cream puff making. 

First,  a little culinary lesson for those who may not be familiar with these little, light puffs. The pastry used for cream puffs is called pate a choux.  Yup, just like a lot of good pastry, it's French.  This is a very specific type of pastry that when baked at a high temperature puffs up with a crispy but tender exterior and hollow interior.  This creates the perfect pocket to fill with any type of stuffing you can imagine.  The classic fillings are a vanilla pastry cream for the traditional cream puff or ice cream drizzled with chocolate, which are known as profiteroles.

Because experience whether good or bad always serves, here's a bit of valuable info and full disclosure.  My first attempt at making cream puffs was a complete disaster.  They turned out like portobello mushrooms.  And when I say portobello, I mean large, flat and blackish brown. How did that happen, you ask? Ha, I certainly asked myself that same question.  So what do you do when you need answers to life questions? Call your mom. Which is what I did. She explained that the choux pastry is very delicate and temperature has a huge effect on it.  Well, there you have it, my answer in spades.  I had been baking for 9 solid hours to fulfill the catering order and the kitchen was piping hot. Worse possible scenario for this recipe. However, this was a great lesson that yielding an enlightening tip which I am now passing along to you. I recovered that day by turning off the ovens, letting the kitchen cool down and starting from scratch at 10pm so I could fulfill the order. I have been making these tasty little puffs perfectly ever since.

Here is the basic recipe for pate a choux.  (Don't let the amount of photos make you think this is hard.  It's not.  I just loved some the images and also wanted to show some of the steps.)

 INGREDIENTS

Yields approx. 44
(2" puffs)

  • 1 c water

  • 1 stick butter

  • 1 c flour

  • pinch of salt

  • 4 Lg. eggs


Instructions

Heat the oven to 450 degrees. Meanwhile, in a saucepan, melt the butter in water then add the salt and flour. Take pot off the heat and stir until the mixture comes together in a ball.  Let the mixture cool slightly and add one egg at a time.  I use a wooden spoon to combine but you can also use a hand mixer.  

Butter melting in water

Butter melting in water

Add flour

Add flour

Stir quickly to bring together

Stir quickly to bring together

One egg at a time

One egg at a time

When you add the egg the dough will separate. Not to worry.  Keep stirring it until it combines, and it will combine. Then add the next egg.  Continue until all eggs are incorporated.

Notice how the pastry seems to get gloppy. Just keep stirring.

Notice how the pastry seems to get gloppy. Just keep stirring.

For quickness, ease and to make the puffs all the same size, I have found that using a piping bag is the best method. Fill the bag and squeeze out the size you desire.  My mom makes hers on the larger size.  I make mine smaller.  If you don't want to use a piping bag, you can use two small spoons to dollop the pastry onto a greased baking sheet.  

Spoon into piping bag. You can also use a large plastic bag and cut the corner off.

Spoon into piping bag. You can also use a large plastic bag and cut the corner off.

Traditionally, cream puffs are not fluted like seen here, but this was the piping tip I had so I used it. It makes them pretty so why not.

Traditionally, cream puffs are not fluted like seen here, but this was the piping tip I had so I used it. It makes them pretty so why not.

Two important notes.  Try to make them as close to the same size as possible so they will cook evenly, as well as they look nice when you present them for dessert.  Consistency in size really ups the level of presentation in anything you serve, especially in baking.  Second; swirl the top so as to not create a long tip or tail, since it will burn.  If you do get a little tip, wet your finger with some water and dab the tip down.


single.tray.jpg

Bake for 10 minutes at 450, the lower the oven to 400 degrees and bake for another 10 minutes. Remove from the oven and let cool.

Lines of perfectly baked puffs awaiting their filling.

Lines of perfectly baked puffs awaiting their filling.

Filling - the Classic

The classic filling is vanilla pastry cream which can be made using this link recipe.  But my mom took a short cut which seems to work well and is quick and simple.  It may be a cheat to the traditional method but it tastes pretty darn good.  Here's what she passed down to me.
 

Ingredients
 

1 box Jello Instant Vanilla Pudding
1 c milk
2 c heavy cream
Powdered sugar for decorating

Instructions
 

Add the milk into the pudding mix and beat until combined.  Refrigerator while you whip the heavy cream to soft peak.

pudding.mix.jpg
Combine the two together to get a light filling.

Combine the two together to get a light filling.

Once the cream is whipped, fold the pudding into the cream and thoroughly combing.  Fill a piping bag.

Clearly, I love using a piping bag. It really does make things so much easier.

Clearly, I love using a piping bag. It really does make things so much easier.

Using the tip, gently push a hole into the bottom of the puff and fill 'er up.

Once you have all your puffs filled, stack them on a cake plate and sprinkle with powdered sugar.

And there you have it.  Light and fluffy filled with creamy lusciousness.  If that's the definition, then go ahead and call me a Cream Puff!  Enjoy with an espresso and don't forget to share the love.

Other fillings:  Oh there are so many that this post would go on for pages and pages.  Why would I do that when I could use all those good ideas to write another blog post... which I will.  You can fill these little delights with whatever your heart desires.  I promise to post a handful of savory ideas in the near future.