Summer Lunch - All Day Eating with Friends

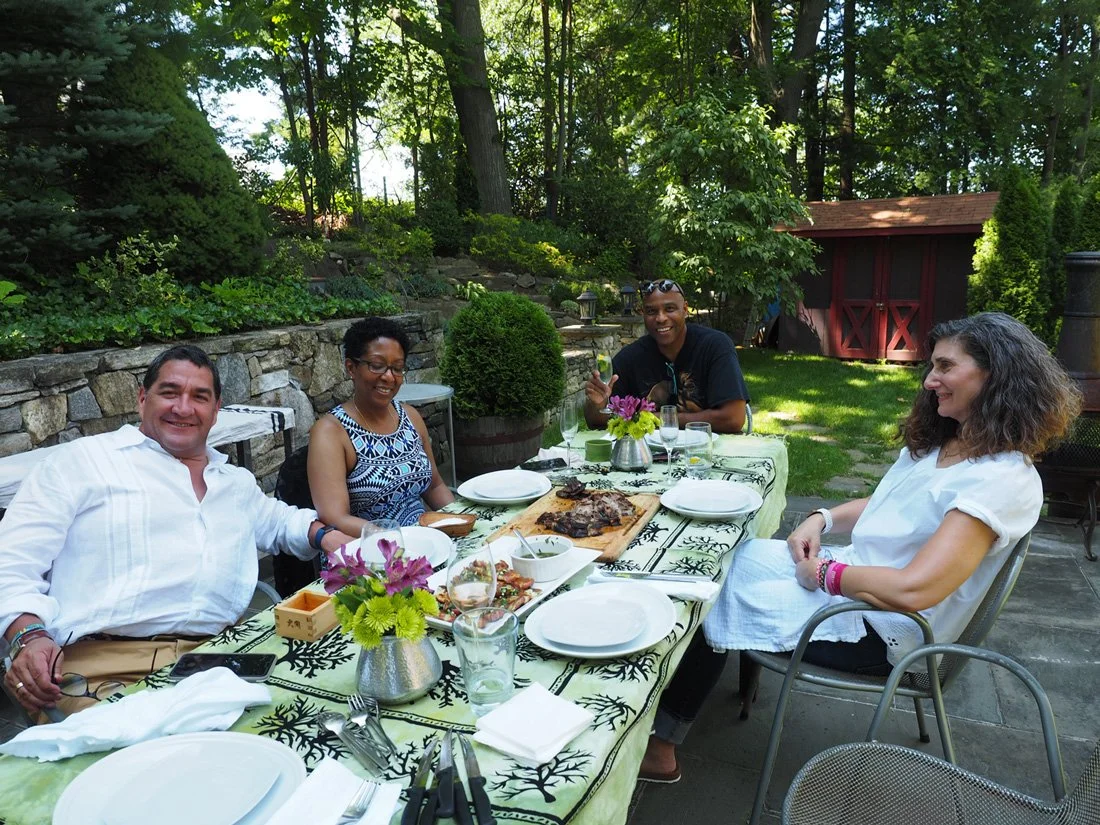
JuanCarlos and I are super fortunate in many ways. And when it comes to the friend category, we absolutely score. We have the most amazing friends, all over the country. One such lovely group lives in Princeton, NJ and are always willing to make the long drive to visit us. Given the time they invest in traveling, JuanCarlos and I make sure that we prepare an all day affair filled with delectable bites. The food ranges from easy and simple mixed with some other items that require a tad more prep. But the fun part is that we keep it casual and flowing, bringing out items as they are ready. It allows us to mingle, chat, and relax without any formal schedule yet with plenty of food from which to choose. It’s like a grazing event.

Louisa & Rocco sampling the appetizers.

I actually love this type of entertaining because it affords me the opportunity to prepare a variety of different plates. Sometimes I get overly enthused, and just want to offer up the world… on a platter. It feeds my need to experiment plus have a group of food lovers to test out my ideas. I will admit that often times I have to reign myself in for parties. I get so excited, wanting to make more dishes than are humanely possible to consume, unless an army shows up. That said, I do a good job of keeping to amounts that makes sense.

I know I’m always giving advice about making a plan, having a budget, being organized, etc. All of which are necessary. Having a list, knowing what to buy, prep and what to make when, plus staying within your financial limits all are essential. I keep to the first rules diligently. List making, organizing, prepping; that’s my jam. Which is why I included a printable complete shop/prep/menu list at the end of the blog if you choose to replicate this menu. However, one thing I will admit openly; we rarely, if ever, follow a budget. JuanCarlos and I are both of the same mindset. If we are hosting, we will make whatever we deem is appropriate for the occasion and not be concerned about the cost. I don’t recommend this approach for everyone. Having a budget in mind helps to keep you on track and from over buying.

Ok, enough chit chat. This post is going to be chock full of food, so the least said the better. Although, I believe I’ve past that point already. Onward!

Table Setting

I’ve said it a thousand times, as my many posts dedicated to table settings will prove, and I will continue to say it. DO NOT skimp on your outdoor table. Plain and simple: Make it inviting.

Note: If you want me to stop saying it, send me some photo examples of your tables and I will dispense with the repetitive table setting suggestion.

I chose a bold green and black tablecloth that is similar to the one I recently featured Green & Black: A Graphic Table Setting.

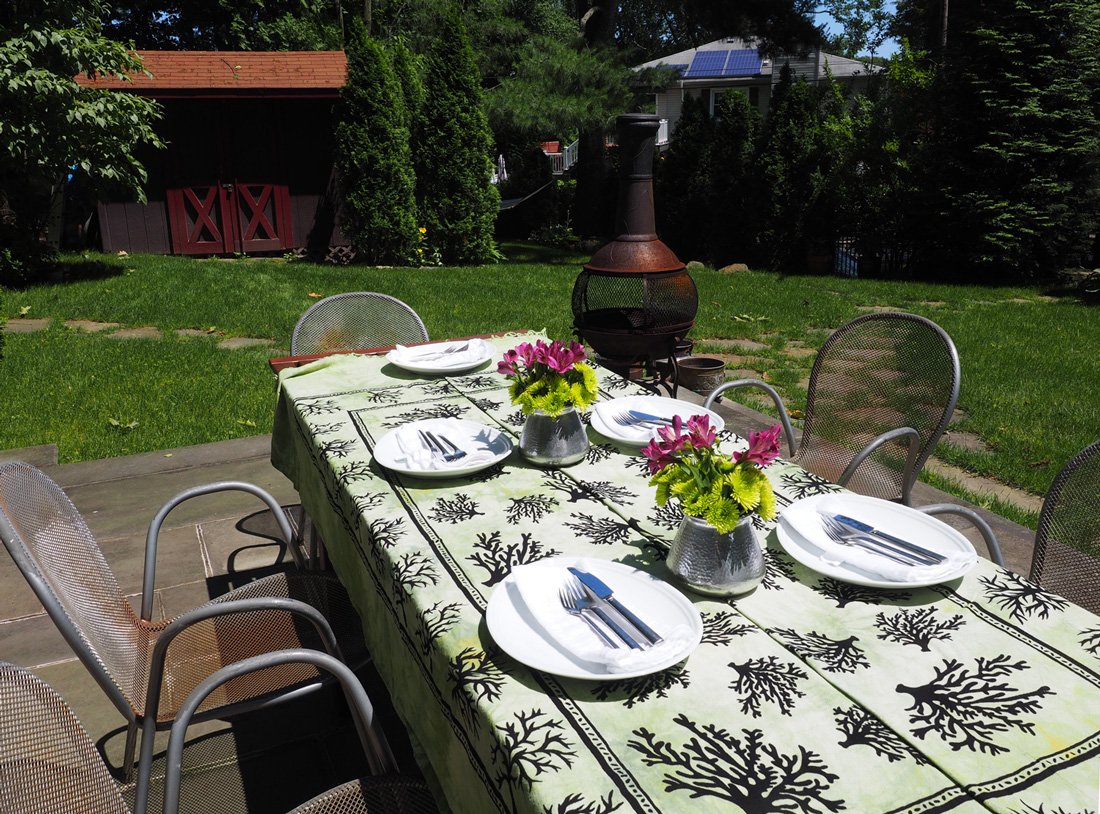
I laid a neutral table runner with a bold, black graphic design across the wooden table that was used as a buffet. . I felt that the dramatic outline paired well with that of the tablecloth. I then kept everything else extremely simple.

I bought this khaki colored table runner from IKEA. It was the stark, graphic print that attracted me.

Big white plates, white napkins with a simple rectangle fold placed on the plate lengthwise with the utensils atop. Flowers were from Trader Joe’s. Nothing expensive or extravagant put a fresh pop of color that complemented the tablecloth colors.

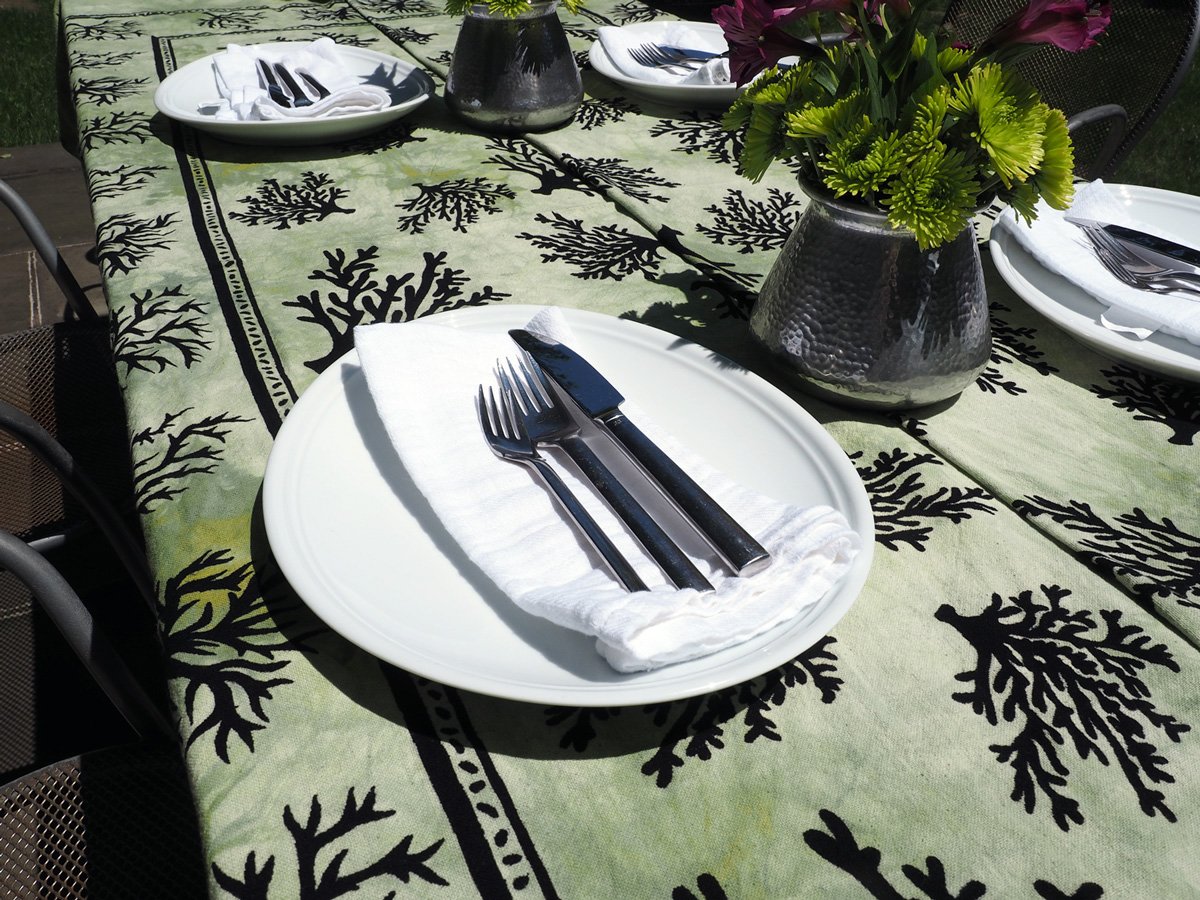
Simple but still feels special.

I love the contrast of magenta and lime green. In a pinch, you can’t beat Trader Joe’s for flowers.

Drinks
Have a variety of drinks, but don’t go overboard. I can tell you from experience, people aren’t expecting to have every drink option under the sun. We used to offer a full bar, but through the years have pared down considerably on our offerings.

First tip, know your crowd. If most of your guests enjoy beer over wine, buy accordingly. Our groups are typically wine drinkers. No surprise there. So we offer a variety of wines, sparkling and flat water plus I usually make home iced tea as a non alcoholic option.

Second tip, be gracious; pour and refill your guests glasses. Sure, you would hope they feel comfortable serving themselves, but not everyone will. And it certainly makes them feel special when you are an attentive host.

Keep ‘em refreshed!

Starter | Appetizers

Have a 2-3 different dishes.

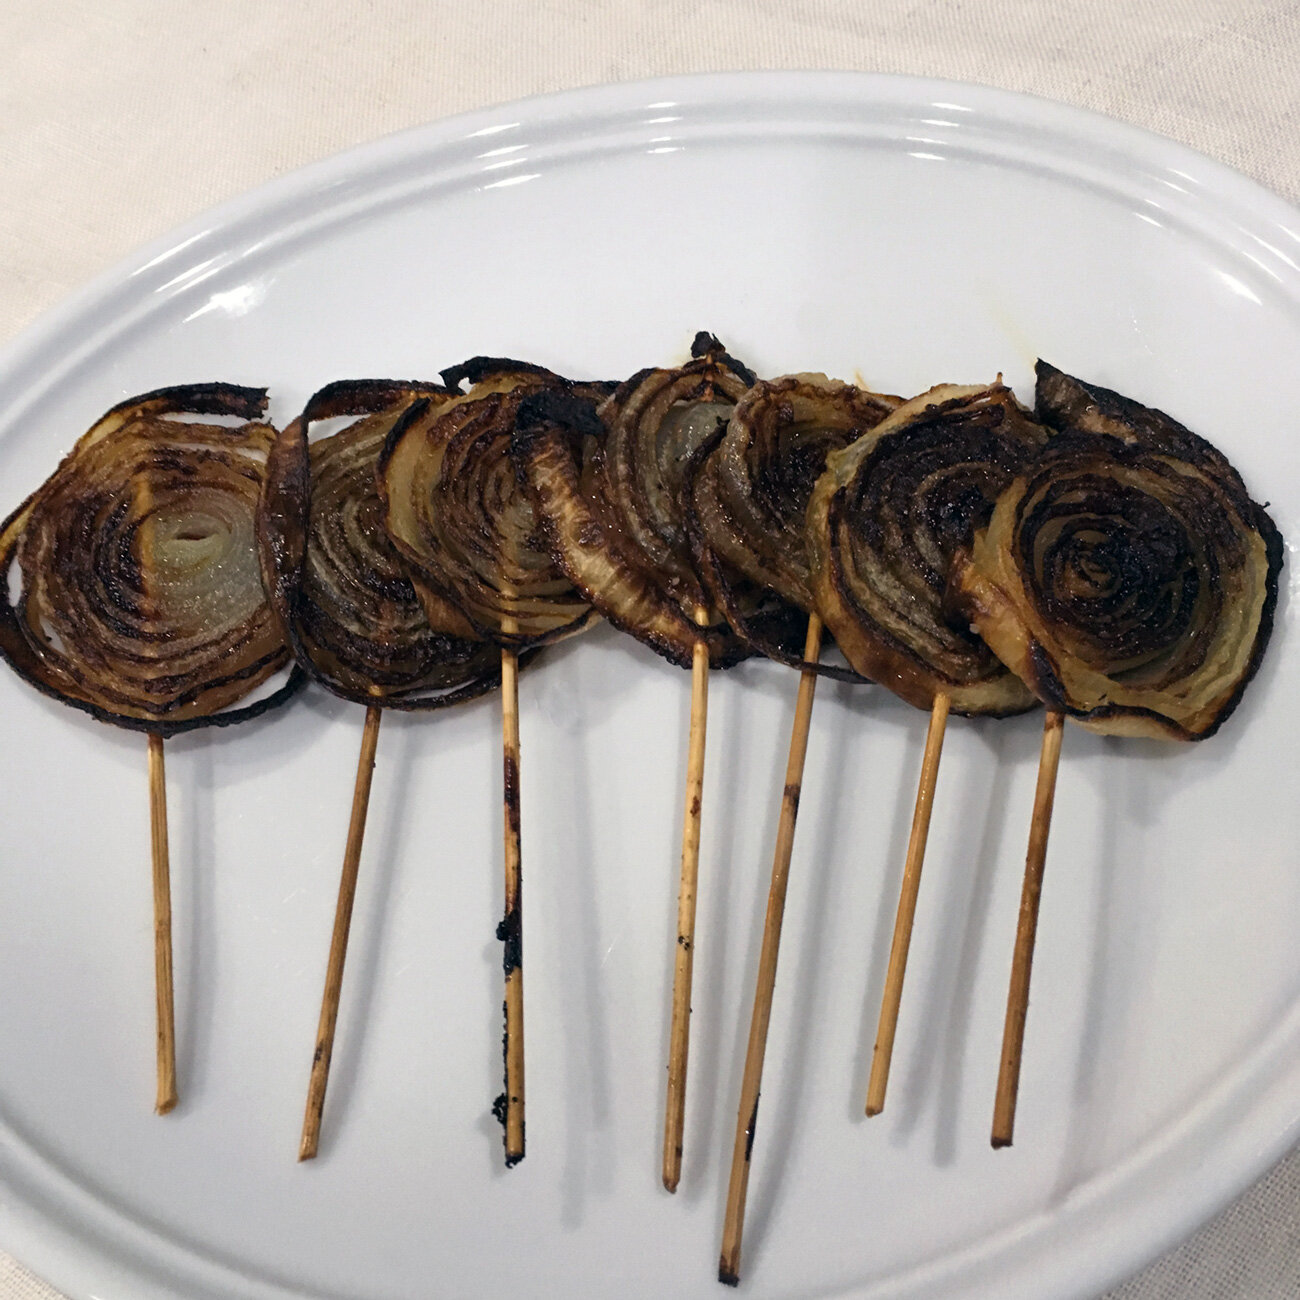
You all know that I’m a huge fan of the ubiquitous cheese/charcuterie platter. Since this was a warm August day I wanted to keep the starters less fussy without tons of cheeses melting in the sun. Instead I skewed this a bit lighter with a more tamed grazing platter.

Grazing Platter

Mortadella, French Breakfast Radishes with herb salted butter, salchichon, marcona almonds and dates.

Instead of the big cheese/charcuterie platter, I opted for a more simplified version I dubbed The Grazing Platter.

Watermelon Salad

Watermelon Squares topped with feta, pickled red onions & mint drizzled with balsamic vinegar over a bed of arugula

Nothing more refreshing than watermelon. Up the ante and top it with tangy feta, sharp pickled onion and the fresh herbaceous hit of mint, a drizzle of balsamic adds sweetness. It’s a party in your mouth.

Stuffed Endive

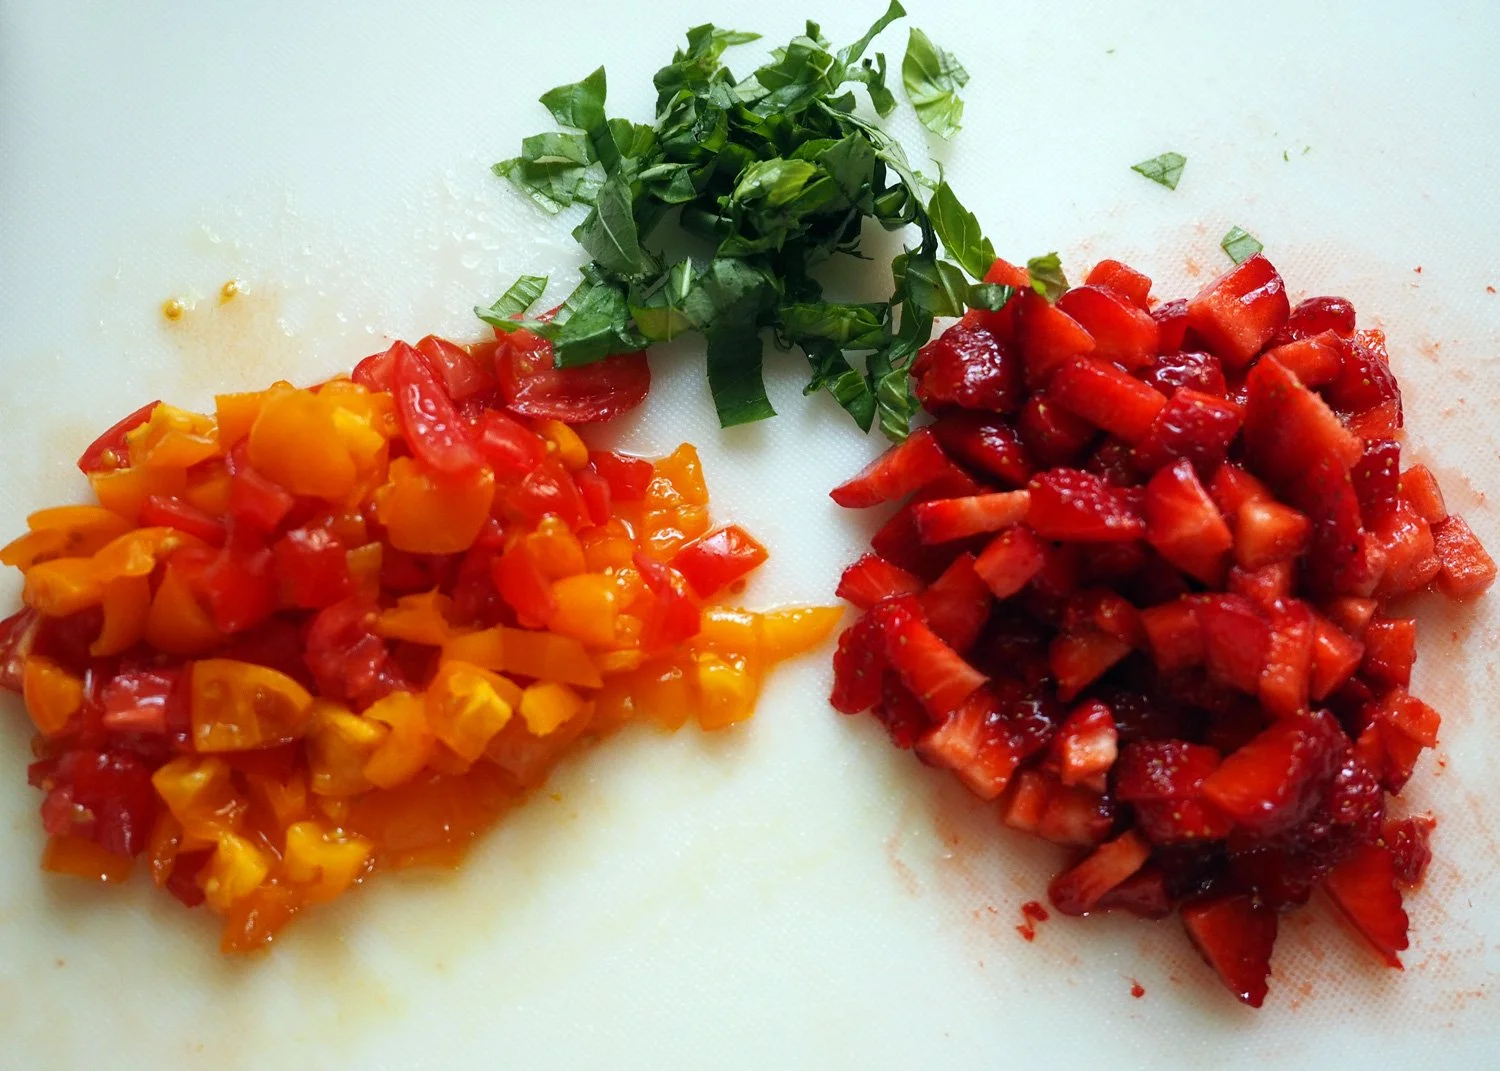
Endive stuffed with whipped cream cheese & goat cheese two ways:
Strawberry | Grape tomato | Basil
Sautéed Peas | Shallots with Pea Shoots.
Click here for recipe

Endive are the perfect vehicle to deliver food into your mouth. I love stuffing them with tons of fillings. These offerings were perfect for a hot summer day.

Intermezzo

This is a small course that we like to serve in between the appetizers and the main meal. I know what you are saying… Food in between the food courses? Well, I did say it was an all day eating affair. For this occasion we served a surf and turf tasting of scallops and grilled meats.

Butter Seared Scallops with Peas/Shallots

These scallops were seared in a cast iron pan on the grill. I used some of the pea/shallot mixture leftover from the endive dish to accompany the scallop. It was a beautiful pairing, and a tasty bite.

Seared scallop with peas

If you can’t get fresh, use frozen peas.

Grilled Meat

No explanation necessary. Grill up some of your favorite meats and serve it family style on a wooden board.

My husband loves, loves, loves to grill. He also loves to have his friends around him while he grills. So offering up both the scallops and the meat right off the flames is right up his alley.

Pluma is the end of the pork loin from an Ibérico pig from Spain. It is moist and tender, and quite the special bite of grilled pork.

My happy grill master, JuanCarlos, chatting it up with Ivor.

Dinner

Salmon Burgers

with Buns & all the fixings (raw red onion slices, pickled red onions, heirloom tomato slices, basil & pea shoots. People can choose whatever floats their boat.

Click here for recipe.

Build a burger station.

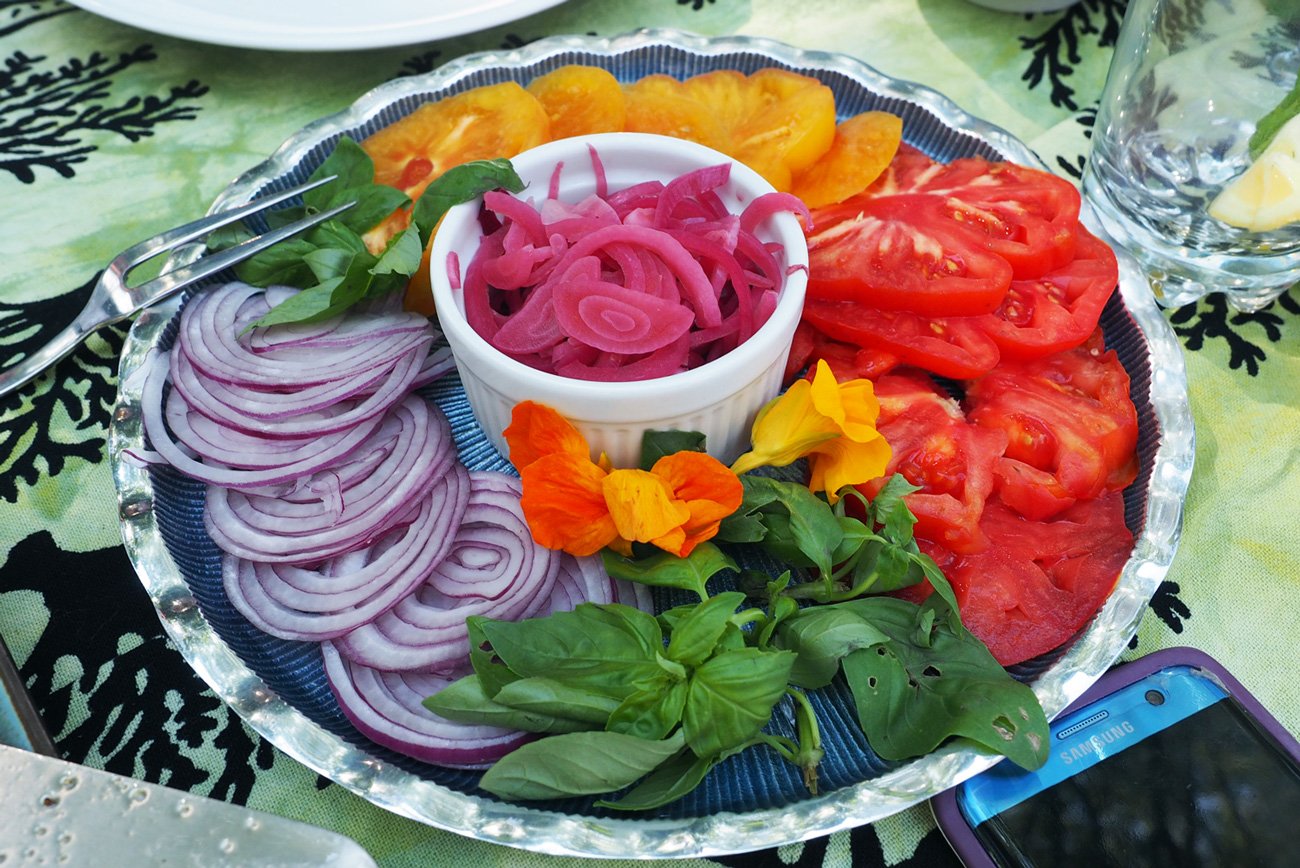
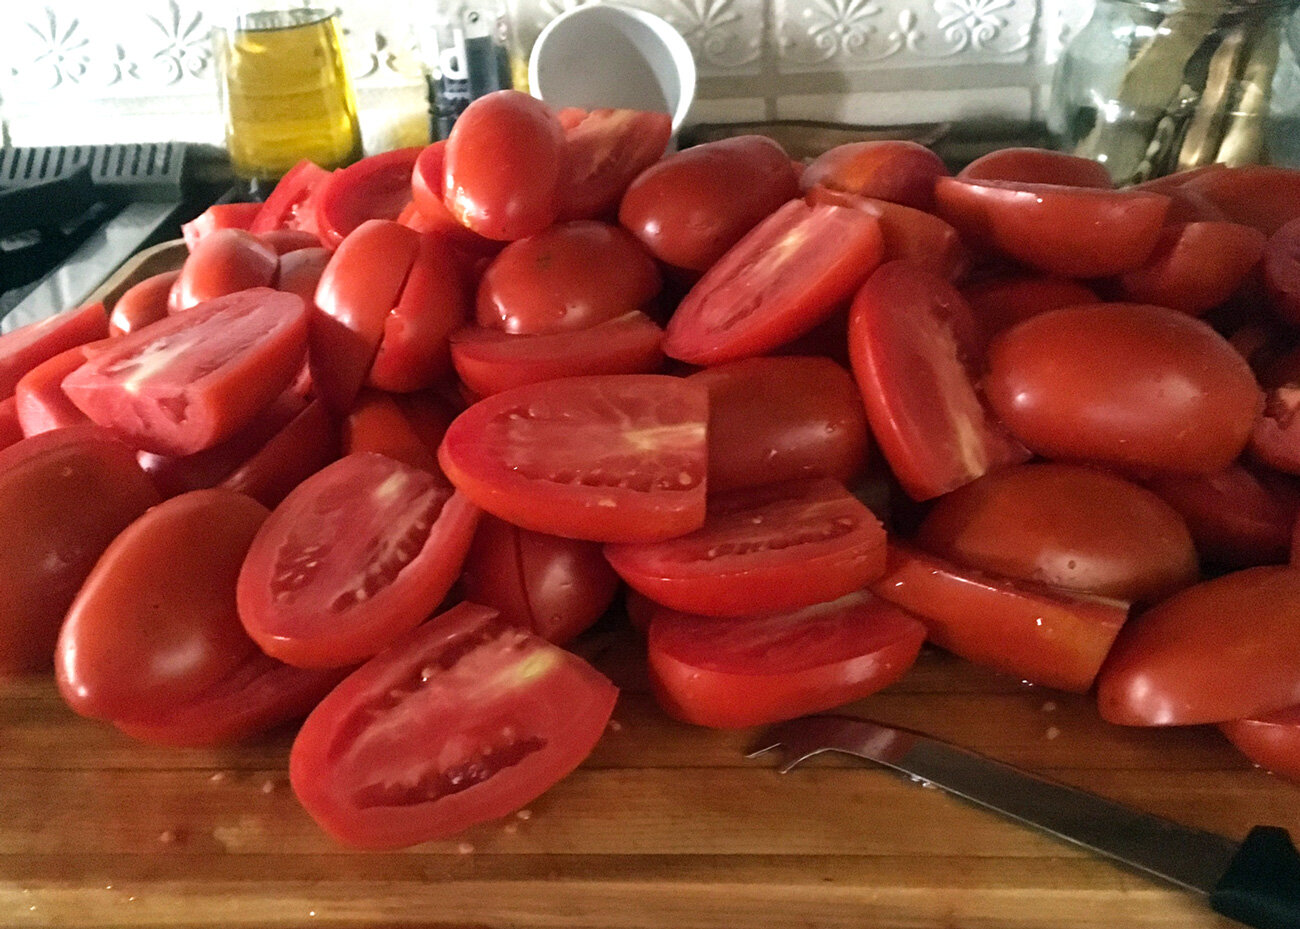
Heirloom tomatoes in big slices, raw and pickled onions, fresh basil. Just that is a great salad!

My gluten & egg free salmon burgers. On this occasion, I encrusted them in cornmeal to give them an extra crunch.

Pea shoots and micro greens are more delicate for the salmon burgers. Plus I had leftover from the endive appetizer, so use what you have.

Our friend, Louisa, has celiac intolerance, and I am wheat intolerant. The gluten & egg free salmon burgers were ideal for us and the rest of our guests. While they enjoyed the burgers with a bun, we each choose a different way to stack our burger using a tomato slab; making it our own.

All the other guests enjoyed the bun.

Tomato on top…

Tomato on the bottom…

Spicy Slaw

I love serving this salad because it complements so many dishes. It pairs great with grilled meats or fish. It’s a natural with burgers. So it made sense to sit alongside my salmon burgers.

Click here for recipe.

Spicy Slaw, a crisp, refreshing and hearty salad.


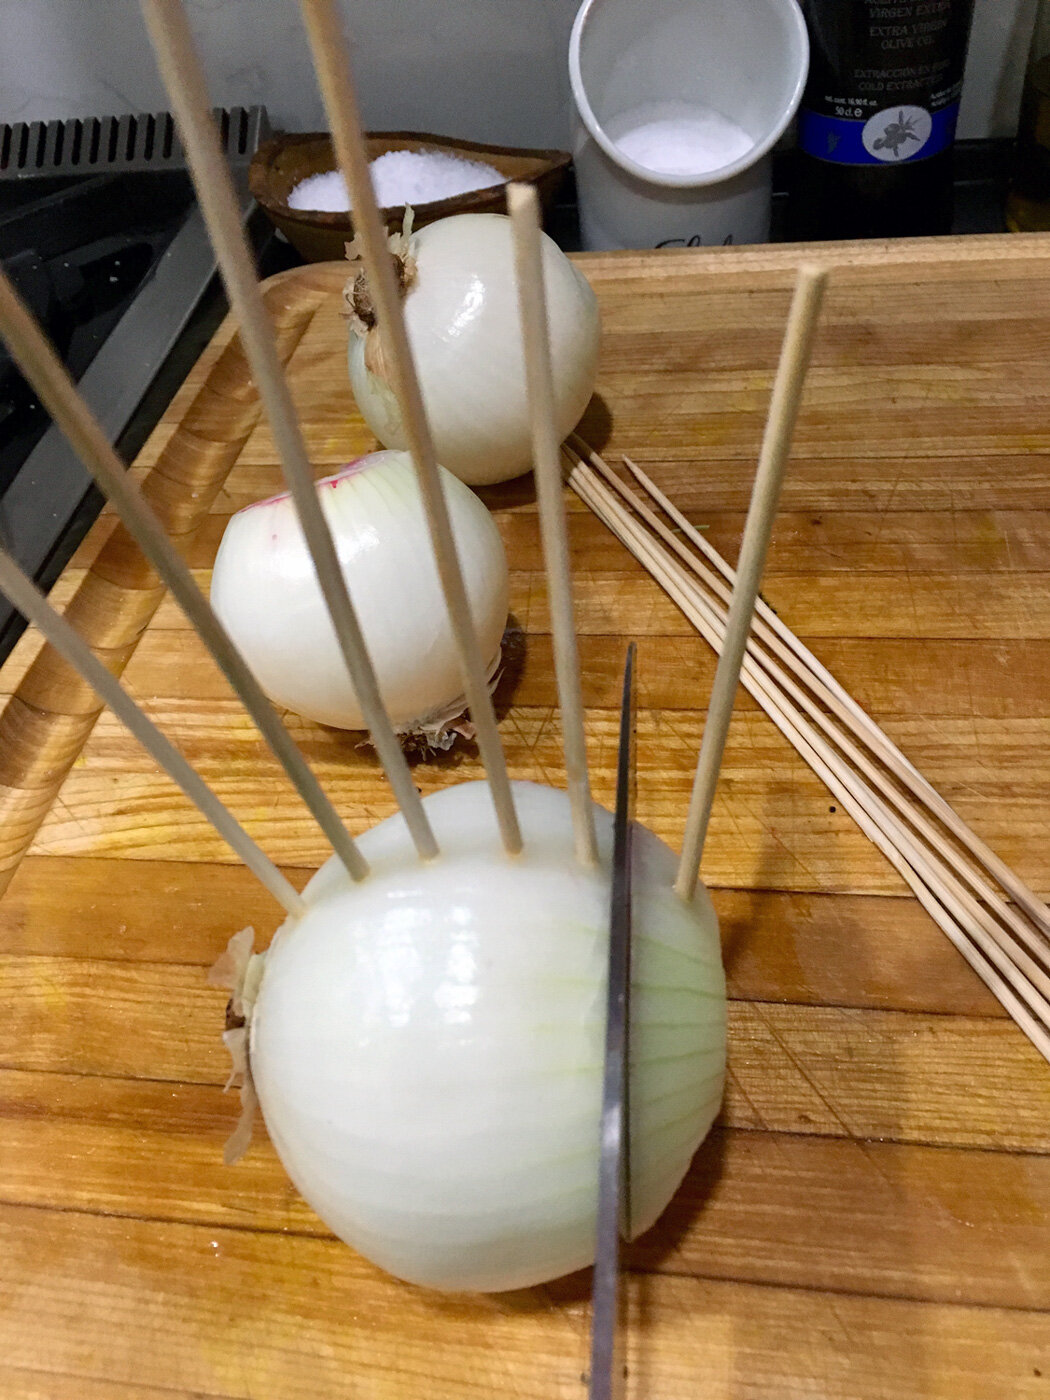
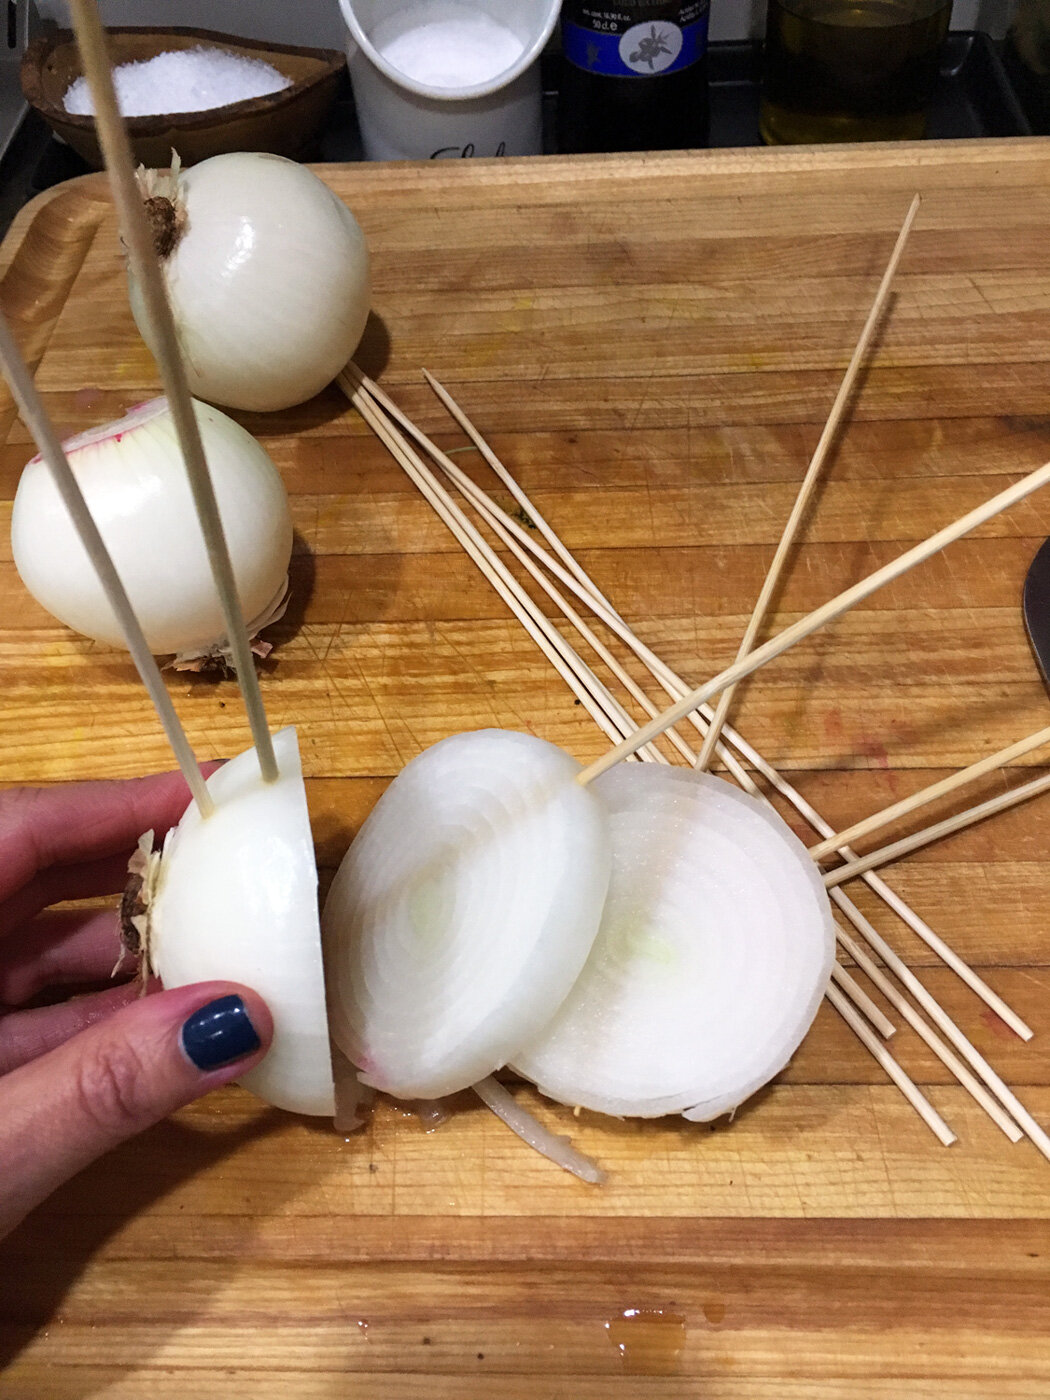
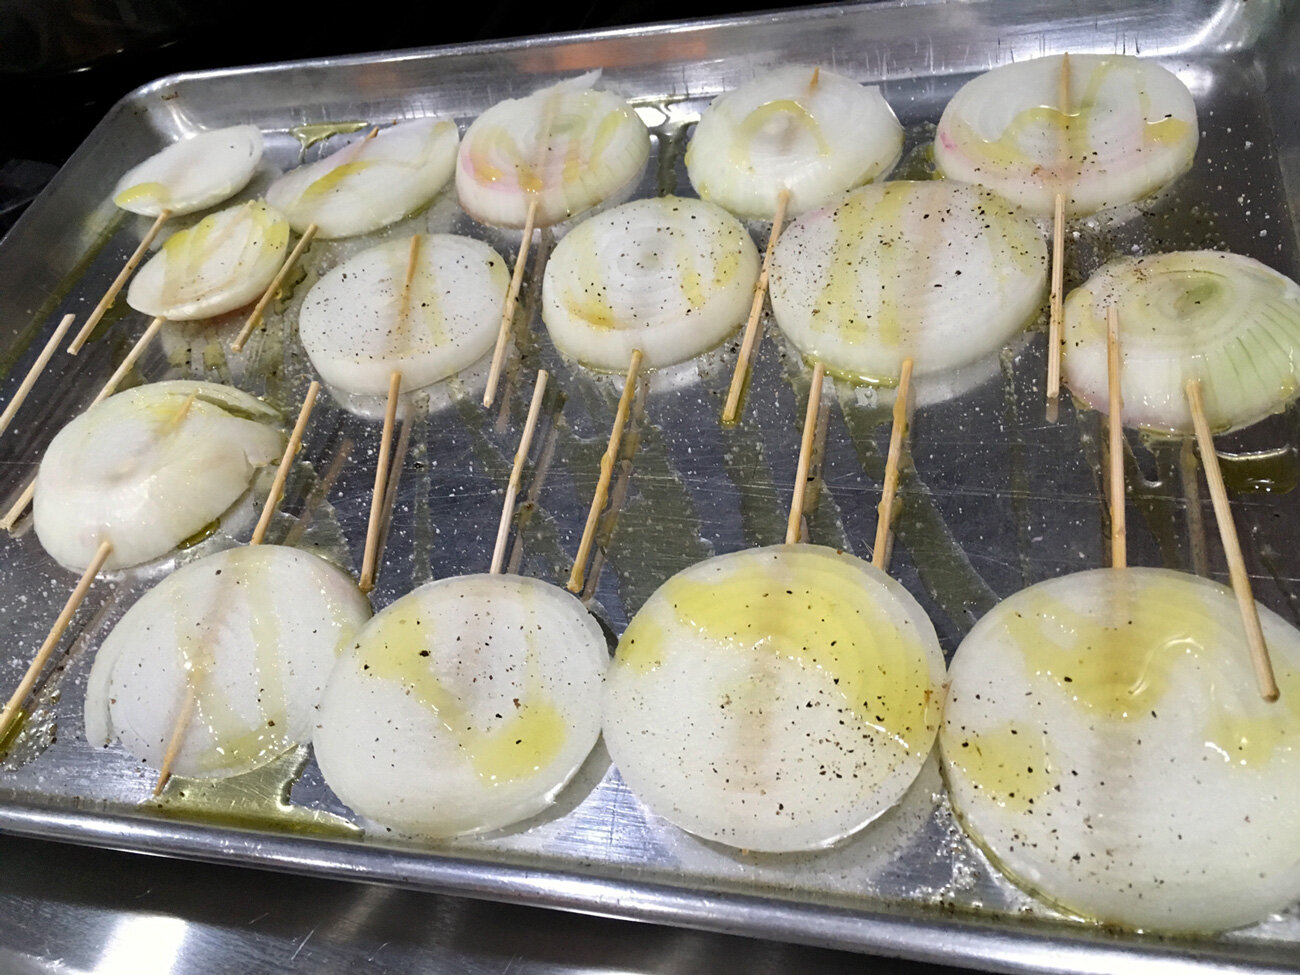
Smashed Baby Potatoes with herb garlic oil

Nothing hard about this one. And the best part is that the majority of this can be made ahead. I use new potatoes, but you really can use any potato you like. Boil them up fork tender but not overdone. Drain well and let them cool slightly on a baking tray. Then using the bottom of a glass or a measuring cup press down on each potato smashing them flat but still keeping them together. You don’t want to fully smash or they will completely fall apart. If making ahead, refrigerator until you are ready to fry them up. To finish them, you can either bake them at 400 degrees in the oven with a drizzle of oil, salt and pepper. You can fry them in a cast iron pan on the stove or on the grill, as we did.

I love serving these with either my marinated feta or a simple herb garlic oil, much like a chimichurri sauce. Simply mince cilantro, parsley, basil, chives, crushed garlic, lemon zest, squeeze of lemon juice, olive oil, salt and pepper. If you want to kick up the heat, add red pepper flakes. You can add whatever herbs you like or have. Make it your own.

Nothing better that the crispy skin of a potato with the soft interior. Slather with herb oil and you are in heaven!

Grilled Asparagus

If you have grill fired up, might as well throw on some asparagus. It’s a great summertime green BBQ vegetable.

Dessert was a variety of my ice cream sandwiches. More wine and after dinner drinks. We ate. We drank. We talked. We laughed and ate and drank some more. We love spending time with our Princeton pals, and feel so incredibly fortunate that they make the drive to our little haven in Westchester.

My chocolate chip cookie with vanilla chocolate chip ice cream. All homemade, of course.

Chocolate crisp cookie with vanilla chocolate chip ice cream.

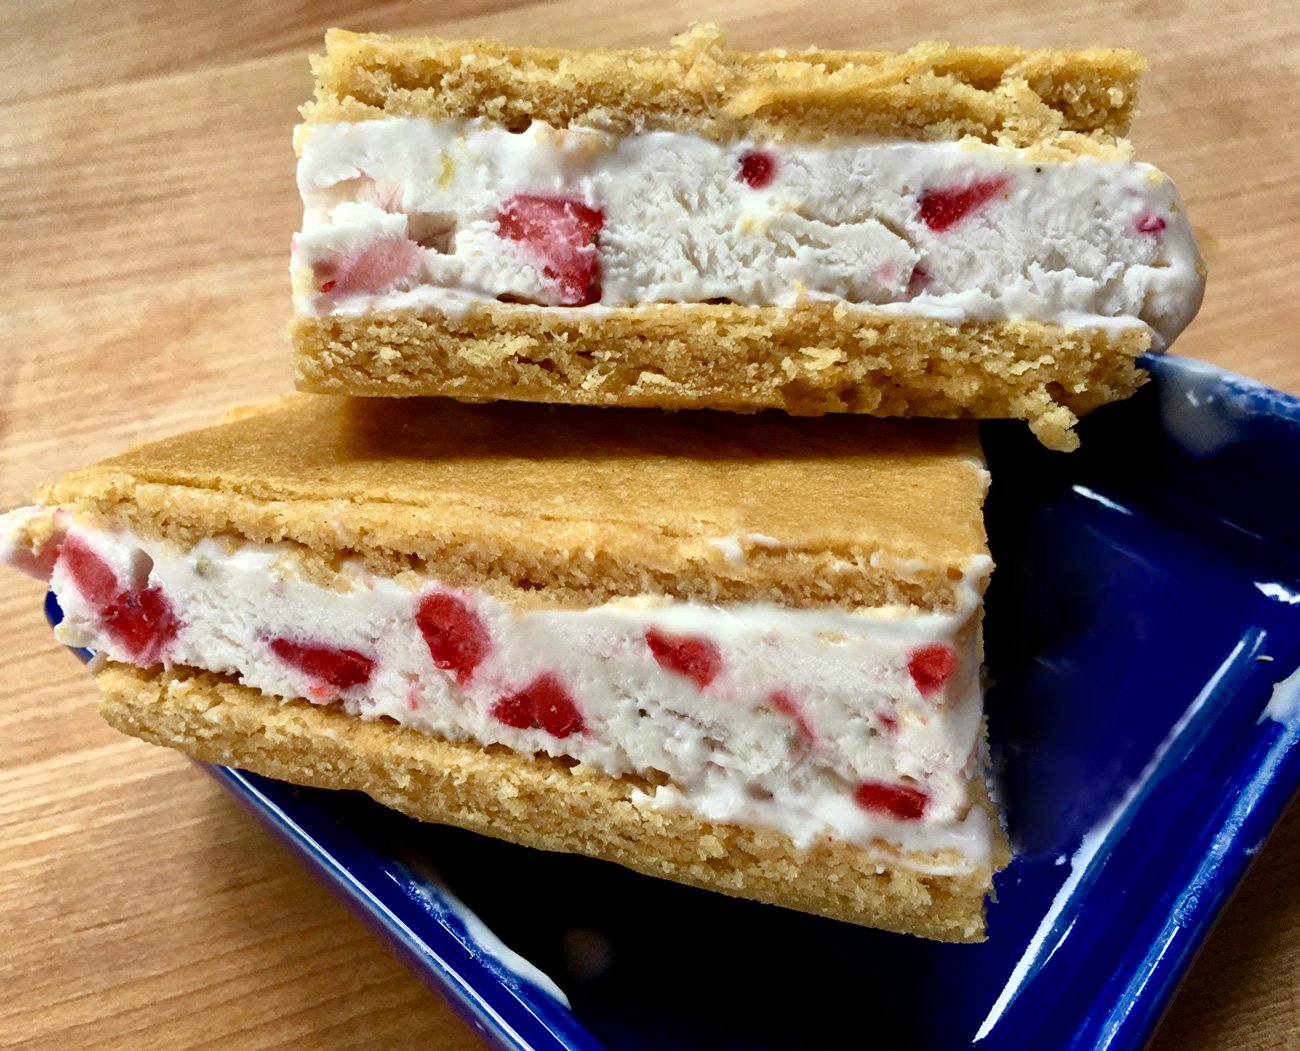
Lemon spice cookie with strawberry basil ice cream.

Now this may feel like a ton of food for 6 people. But remember we paced ourselves and were nibbling all day. You don’t have to make all of these. Try a few. But if you do want to tackle this entire menu check out the printable Prep list document for the entire shop, prep, to do rundown.
I hope you have friends that you would enjoy spending all day with. If you do, make it special. It’s worth every minute!

Endless Endive: Strawberry, Tomato, Basil and Peas, Shallots

Years back I posted Winter Fresh Endive Boats and promised that I would post about the variety of other ways to stuff endive.  And although it's been quite some time since that posting, I like to make good on my promises, even if it takes me years to come through. So here is my first round of fillings.  And I promise, there will be more, especially since the title is Endless Endive.

Endive seems to have been specifically made as the perfect carry vehicle for fillings.  I know most people cut them up and toss into salads, but I much prefer them as a big spoon! They are great for dipping and are literally the ideal shape to fill so guests can easily pick up and enjoy. Why in the world would anyone cut them up when their true purpose seems clear? Well, at least to me. That’s why I fill them, endlessly.

I entitled this Endless Endive because quite honestly the list of fillings is just that. The only limitation is one's lack of imagination.  But I know that together we can invent tons of fillings. I’ll do my part to start us off. For this post I’m keeping it to two different fillings that are perfect for Spring and Summer Time.

But first some tidbits about Belgian endive. It’s like a small head of lettuce but instead of being round like Boston lettuce it has a cylinder shape usually around 6 inches long. The most typical has pale yellow leaves that are tightly packed together with one end more sturdy (the filling end) and the top end feathering out to a more delicate whisper. There is also a purple toned version, Red Belgian, which when combined with the greenish yellow version makes quite a stunning plate. Being part of the chicory family, it has a mild bitter taste, but not nearly as much as radicchio. I find endive to be mild and neutral. You can actually cook endive and it mellow out the flavor to a more nutty tone.

Ok, onto the fillings.

As I mentioned, there are two different toppings but both versions use the same cheese filling. You can use any combination of cheese fillings or a single cheese. The most important part is that it is whipped so that it is light and fluffy.

Ingredients

3-5 Endive*
12 oz Cream Cheese**
10 oz Goat Cheese
**

Strawberry/Tomato Filling

1 qt Grape Tomatoes, chopped
1 qt Strawberries, chopped
1/4 c Basil, chiffonade

Peas/Shallot Filling

2-3 T Mint, chopped
1- 1.5 c Peas, frozen
1 small shallot, fine dice
Pea Shoots, for topping
Magic 3 (olive oil, salt, pepper)

* Depending on the size will determine how many leaves each one will yield. I always buy an extra one to be safe, especially since as you get closer to the center the leaves get smaller and smaller.

** You can use both cream and goat cheese combined. The cream cheese balances the tang of the goat. You can also use ricotta cheese with is lighter.


Instructions

  1. Whip cream cheese and goat cheese together until fluffy. Season with salt and pepper to taste. Place in a pastry bag or large Ziplock bag and refrigerate until ready to fill.

You can certainly stir it together but I find using a hand mixer creates a smooth, creamy consistency.

Fill a pastry bag or plastic bag for easy filling.

2. Carefully separate the leaves from the core. I like having a clean edge, so I cut the bottom until leaves naturally release. Then continue to cut across the core releasing more leaves. This method helps to have even clean edges as well as ensuring not to tear the leaf. Let them dry on a paper towel.

Look as those lovely natural boats.

3. Wash, core and chop the strawberries. Wash and chop the grape tomatoes, and chiffonade the basil. Set aside. Combine everything in a bowl, season with salt, pepper and a drizzle of olive oil and set in the fridge to marinate. Note: I recommend a small dice so you can get several pieces of each when you fill the endive

When you use fresh ingredients, you only need a few. Just let them shine and show their natural glory.

So appetizing.

4. Blanch the peas for 1-2 minutes and shock them in cold water to stop any further cooking.

Quickly blanch the peas. They don’t need much time.

Placing them in an ice bath stops the cooking and helps retain their vibrant green color.

5. In the same saucepan, sauté the shallots until softened. Season with salt and pepper

Shallots are milder then red onion and don’t overpower the sweet, tender pea. They also do not take long to sauté and soften.

6. Remove the peas with a spider, draining all the water and add them to the shallots. Taste for seasoning, and adjust if needed.

A tasty mixture.

7. Arrange the endive leaves on a platter and using the piping bag squeeze a hefty tablespoon amount of cheese into each leaf.

I like to arrange some greens on the bottom of the serving platter to finish the presentation.

Fill to your hearts content. If you like more cheese filling, then put more. I feel like a heaping tablespoon amount is just right.

8. Then fill with the leaves with each of the two toppings, separately.. Finish the pea version with pea shoots. I liked alternating the versions next to one another. But you can also arrange it so one side of the platter has the Pea/Shallot version, and the other side has the only the Strawberry/Tomato version.

So vibrant and fresh.

These can be made up to 1/2 hour prior to serving. However, you could prep all the components ahead of time (day before) and store airtight in the fridge. You can even fill the endive with the cheese filling hours ahead. Cover with plastic and then fill before serving.

A festive, refreshing Spring or Summertime appetizer.

I absolutely love the freshness of this appetizer. So crisp, so clean. So refreshing. The best part is it requires no dishes, no utensils. These are ‘pick up and devour’ apps. I hope you give these a try. With Spring sprung, we need a few fresh, cooling appetizers up our sleeves.


Shrimp & Fennel Lunch with a Friend - Casual Style Take 2

shrimp.meal.final.jpg

When I first starting writing this post, it was pre COVID-19 pandemic, and clearly my, and everyone else’s work life was significantly different. Also, our socializing style was absolutely different. That said, the premise behind what I originally wrote still remains the same; enjoying lunch with a friend. And so, let me continue on the thought and pleasure of sharing time with people you love - Take 2. And here’s to dreaming about the time when there will be a Take 3, 4 and beyond.

When you have your own company, and consult, it often times means you can create your own schedule. Work when others play, and play when others work. It creates an environment where you can be available for whatever opportunity lands on your doorstep. Work-Play balance is so important. I have never taken this for granted, and now more than ever I truly appreciate its freedom. I fully realize that many people do not readily have the ability to take a leisurely lunch with a friend mid week. But my work life affords me some awesome flexibility. So when my friend Donna, who is an ESL teacher, was going to be in my neighborhood, it was only natural that we lunch, as we have in the past. Now with the current pandemic situation, all of our work lives have been altered, and maybe it affords you a more flexible schedule and freedom as well. If it is, I highly recommend taking fully advantage. It is such a luxurious way to spend an afternoon; sharing a meal, a glass of wine and catching up time with a friend I adore.

Sure, one glass of wine at lunch can’t hurt.  Especially when you start with a hearty bowl of Cauliflower Soup.

Sure, one glass of wine at lunch can’t hurt. Especially when you start with a hearty bowl of Cauliflower Soup.

For this meal, I wanted to try out a recipe idea I had seen from Ina Garten. Her food and entertaining style are very similar to mine. (PS I didn’t copy her style. I discovered her long after my entertaining and cooking style was embedded in my heart.) I absolutely adore her!

JC and I love sautéing shrimp and getting a good sear on them, and so our go to method is usually cooking them in a cast iron pan to get a nice texture. But she cooked the shrimp in fennel which made them a bit softer in texture. I love fennel and I love shrimp. And so does Donna. That added up to - let’s give it a try. Since I was making this on the fly, and wasn’t actually thinking of sharing this on the blog, I didn’t measure anything (as is my typical style). However, Donna loved it so much and wanted to recreate it for her guests the following weekend, I had to come up with approximate measurements from my mind’s eye. I know you probably think that is an odd thing to say, but I can see and guestimate how much I’ve cut of an ingredient. And that is what I did went I sent Donna my approximations. I changed Ina’s recipe a bit to make it more my own.

Our Lunch Menu

A plate full of love.  Polenta topped with the shrimp, tomato & fennel plus roasted root veggies topped with Marinated Feta.

A plate full of love. Polenta topped with the shrimp, tomato & fennel plus roasted root veggies topped with Marinated Feta.

Faux Creamy Cauliflower Soup
Green Salad
Roasted Carrots, Onions & Parsnips with Marinated Feta
Creamy Polenta
Shrimp with Fennel & Tomatoes, see below
Homemade Coffee Ice Cream

Creamy Polenta

Creamy Polenta

Big Green Salad and Marinated Feta

Big Green Salad and Marinated Feta

Ingredients

1.5 lb shrimp
1 fennel bulb, cut in small pieces
4 large cloves of garlic, crushed
1.5 -2 c grape & heirloom cherry tomatoes
1/4 c parsley, chopped
1/8 c fennel fronds, chopped
pinch of red pepper flakes
1/3 c white wine
Magic 3 (salt, pepper, olive oil)

 
tomatoes.fennel.cookingCU2.jpg


Instructions

  1. Using about 1/4 c olive oil, sauté fennel until slightly softened.

  2. Add the tomatoes, salt and black pepper and let cook down.

  3. Then add the garlic and red pepper flakes and let cook for 5-7 minutes over medium low heat so not to burn the garlic.

  4. Salt and pepper the shrimp, then add them into the pan cooking for about 2-3 minutes.

  5. Add the wine and turn the shrimp over and cook until done.

  6. Add the parsley and fennel fronds.

Cook the fennel and tomatoes down until the are softened. Then add the garlic and red pepper flakes.

Cook the fennel and tomatoes down until the are softened. Then add the garlic and red pepper flakes.

Add the shrimp and wine and let cook for 3-4 minutes.

Add the shrimp and wine and let cook for 3-4 minutes.

It is such a lovely combo of flavors.

It is such a lovely combo of flavors.

I served this with polenta, but it plays just as nicely with rice or pasta.

A great way to start the lunch; warm soup and crisp white wine.

A great way to start the lunch; warm soup and crisp white wine.

Since my creamy cauliflower soup is so easy to make, I whipped up a batch and we started with that.

For the vegetables, I just roasted heirloom carrots, parsnips and onions at 425 degrees until nicely caramelized.

The feta mixture is easy to make. All it entails is cutting up some herbs and aromatics, stirring it together and then pouring it over feta cheese. Next step: spread it on everything!!

Marinated Feta

Marinated Feta

 
Now that is a lunch made with love.

Now that is a lunch made with love.

We finished the meal with some of my homemade coffee ice cream. Donna loved that too. It’s so easy to please a food lover. Just make yummy things and stir it with love. That’s how you create a ‘school day’ memory with a good friend.

 
Coffee.scoop copy.jpg


Pro Tips & Time Saving Ideas Part 2

IMG_2574.JPG

The last Pro Tip post seemed to be popular among readers, so in effort to be a people pleaser, I present you Pro Tips and Time Savings Ideas Part 2.

Like most ideas I have, they stem from wanting to be more efficient. Whether it’s cooking, baking, or organizing, my brain is always figuring out how I can achieve the goal quicker, more effectively and with the best results.

Perfect example is the history of me making my ‘Acorn’ Shortbread cookies. I put acorn in quotation marks because originally the cookie was shaped like an acorn with the bottom portion dipped in chocolate. If you’ve ever worked with shortbread you know how dry and crumbly it is. To hand shape each cookie into an acorn used to take me hours. Until I figured out that the cookie tastes the same no matter what form it takes. Naturally, it still needs to look appetizing, but since we’re not squirrels, most any other shape would suffice, and without all the extra hand shaping work. The first couple of years I was still hand shaping but not so intricately. Then I realized that I could ratchet up my efficiency level up a few notches. I packed all the dough into a baking sheet and rolled it out evenly. Then I cut squares or rectangle shapes, and using a spatula, lifted them onto another baking sheet. Voilà, the process now takes minutes instead of hours. And instead of dipping each cookie, I use a piping bag and drizzle the chocolate across dozens of cookies at the same time. In my opinion, I like the look so much better.

I thought I would share that anecdote to illustrate how thinking things through can lead to working smarter rather than harder. I’m all about that x10! I hope these next set of tips do the same for you.

Pro Tips #1 - Roasting or grilling onion slices evenly: Onion Lollipops

I love onions. I make them in tons of ways including using them as a side vegetable. So, when I had a private chef gig out in the Hamptons last summer, I included onions as part of the menu. I wanted the onion slices to look composed and kept together, and of course, evenly cooked. By using this trick, you achieve just that.

First, peel the onion. Then place skewers into the onion spacing them the thickness you want for each slice. Then using a sharp knife, simply slice between the skewers. You wind up with onion lollipop sticks that can be roasted in the oven or grilled on a cast iron skillet. Drizzle with olive oil, salt and pepper then cook as you wish. Of course, you remove the skewers before serving. Unless, of course, you devise an interesting way to serve them keeping their lollipop look. Up to you. The beauty of this method… Let me count.

  • The onions cook evenly

  • It is easy to turn because all the rings are corralled together

  • They can be used in a sandwich or on a burger without onion flying all over the place

  • They look beautiful

Should I go on.

Pro Tip #2 - Rice is Nice but More is Better.

When you make rice, why not make 2 or 3 times what you need. If you are going to do the work once, why not take advantage of the efforts and make it easier at a later date. Cook the rice as you normally would. Set aside the portion you don’t need immediately by spreading it out on a sheet tray to cool for no more than an hour. Once cooled, place the extra portions in labeled plastic freezer bags. The best part about this is that when you need it in the future it doesn’t take 20 minutes to make. Remove the rice from the plastic bag and place it in a covered pan over a low flame and gently let it steam. If you have a microwave, which I do not, then you can warm in a microwave safe container. If using for fried rice, just throw in in the wok or pan directly. No need to steam since you want the rice to be cold. That’s the best way to make fried rice.

Various Uses:

  • Use for Stir Fry dishes like chicken and broccoli or shrimp and mushrooms

  • Add to soups

  • Use for Fried Rice

  • Rice cakes

* Storing and reheating rice needs special attention. Please refer to this link for important information to ensure that you safely store and reuse rice.

Pro Tip #3 - Buy in Season & Enjoy All Year Long.
Oven Roasting Tomatoes & Freezing

Some of you may recall the summer I bought 100 lbs. of tomatoes at the end of the season. Granted that is an inordinate amount, but I continue to reap the benefits of roasting these ruby red jewels. And that, my friends, is exactly what I’m talking about. Make the effort once and continue to feel the love.

For more on the various ways to oven roast or dry roast tomatoes, check out the links below.

The Great Tomato Caper

Tomatoes Galore

I hope that these few more tips and tricks will aid you in the kitchen, and make cooking easier and bring loads of benefits. For more ideas, check out:
Pro Tips & Time Saving Ideas Part 1

 
DP-stirredwlove-ID1.jpg

Squash, Tomato, Peppers & Onion Bake

ratatoulle.final2.jpg

What do you do when you are mandated to follow a food regimen that limits the ingredients you can consume? First, take a sedative. A big sedative. Next, check the food list and start getting creative.

As I mentioned a couple of months back, I started seeing a new naturopath. Among one of my main goals is to try to cure my 3 year sinus issue. Yes, 3 whole years. As we all know, the shin bone’s connected to the thigh bone, the thigh bone’s connected to the hip bone. The hip bone’s connected the backbone. And so on and so on. You get the point. Everything in our bodies is connected and related to one another. Which is why gut health is key. So among one of the paths to curing my sinuses is getting my gut better. To recap, I’ve been following the GAPS* regimen which cuts out all carbs, grains and starchy vegetables. I had been following this diet for weeks, so when I say sedative, there wassn’t enough sedation to calm my aching pasta brain. But I was a trooper, and wanted to get better so I stuck with it and came up with yummy things to eat.

* Links for more info on GAPS at the end of the post.

I decided to visit my happy place, AKA the farmer’s market, where I picked up as many of the things I could eat. Zucchini, Yellow Squash, Onions, Peppers, Tomatoes, Herbs. These immediately reminded me of those baked dishes with swirls of zucchini. So, I thought I would give it a spin.

The vegetable line up. Zucchini, yellow squash, red and yellow peppers and onions.

The vegetable line up. Zucchini, yellow squash, red and yellow peppers and onions.

Now you know I couldn’t just leave it at that. On this ‘diet’, I can actually have goat and sheep cheeses. Thank goodness, or a crime might have been committed without this one saving grace! With curds in hand, this veggie swirl was going to be topped with cheese glorious cheese.

Ingredients

2 medium zucchini, sliced
2 yellow squash, sliced
2 medium onions, sliced
2 red peppers, sliced
2 yellow peppers, sliced
4-5 plum tomatoes, sliced
3 T dry oregano
Salt, pepper, olive oil
3/4 - 1 cup feta cheese & goat

(The first time I made this dish I used a combo of both. Next time I only had feta,
so used 3/4 c)

I like using plum tomatoes for this dish.

I like using plum tomatoes for this dish.

You’ve all heard to talk about the mise en place. And I’m a true believer, but there is a delicate balance between having everything ready, and multi-tasking. Using your time wisely to prep some items while others cook is the perfect harmony of mise en place and smart prep.

Use your time wisely. While one thing is cooking, prep the next.

Use your time wisely. While one thing is cooking, prep the next.

Instructions

1. Thinly slice onions and peppers. Sauté peppers first in a pan with olive oil. Once they start to soften add the onions, salt, pepper and 1 teaspoon of oregano. Let cook slowly over medium low heat until they are completely softened and nicely caramelized. Approximately 45 minutes.

Cook the peppers down first a bit. They take a bit longer than the onions.

Cook the peppers down first a bit. They take a bit longer than the onions.

2. Meanwhile, cut the zucchini, yellow squash, tomatoes in even slices. You can assemble on the board as you go. Or assemble in the baking dish. Whichever you prefer.

Try to make the slices the same width so everything cooks evenly.

Try to make the slices the same width so everything cooks evenly.

Assemble on the board and then just transfer to the baking dish.

Assemble on the board and then just transfer to the baking dish.

3. Once the peppers and onions have cooked down, place them on the bottom of a baking dish (11” x 8”).

Caramelized to sweet goodness. This creates a bottom layer that add both another texture and flavor to the dish.

Caramelized to sweet goodness. This creates a bottom layer that add both another texture and flavor to the dish.

4. Then begin to assemble your vegetables on top. I like alternating one of each in rows. Or if you only have a round baking dish, you can swirl the design around. Drizzle with olive oil, sprinkle with salt, pepper and 1 tsp of oregano. Bake at 400 for 35 minutes.

Beautiful colors, beautifully arranged and ready for baking.

Beautiful colors, beautifully arranged and ready for baking.

Only have a round baking dish. No problem, just create a swirl.

Only have a round baking dish. No problem, just create a swirl.

5. After 35 minutes, pull of out the oven and crumble the cheese over top. Drizzle a bit more oil and the final oregano. Bake for another 25-30 minutes until its golden brown, the veggies are softened and the liquid is bubbly.

Once the vegetables are partially baked, then you can add the cheese.

Once the vegetables are partially baked, then you can add the cheese.

That’s some crumbled yum right there. Back in the oven to get yummier!

That’s some crumbled yum right there. Back in the oven to get yummier!

The first time I made this I inhaled it... I mean, enjoyed it as the main meal. It was a pretty big dish so naturally there were leftovers which I ate for lunch the next day with a piece of sautéed fish. Which is how I ate it the second time, too. Naturally, this dish begs for something starchy to accompany it. Believe me when I say the irony of that thought slays me. Only I would cook up something that pairs perfectly with shit I couldn’t eat at the moment. This combo of flavors would be great with pasta or rice, but my growling stomach thinks that thick slices of roasted or grilled potatoes would the ideal companion. Plate it up alongside a lovely piece of protein like chicken, fish or meat and a complete meal is a done deal.

I like this dish for several reasons. And not because one day soon I’ll be eating it with pasta. But because this recipe is equally suitable for an informal dinner party as it is for a weeknight meal with leftovers for the week. It’s delish piping hot, but I’ve enjoyed it at room temperature as well. I even relished it topped with poached eggs. Which is why I’m posting this right before New Year’s Eve. I think this is a fantastic recipe to make for a New Year’s Day Brunch or even on the buffet table on the eve. And those are just a few good reasons to give this a try. I’m sure there are more. So what are you waiting for?

Ratatoulle.eggs.fina.jpg

For those interested in learning more about the GAPS diet and anti-inflammatory methods below are a few links. As a foot note, I stayed on this regime for 6 weeks, and I although it was difficult, and I truly craved some warm, soft starch in my tummy, I stuck with it and did find that it helped my gut. It is meant to help heal, and not necessarily meant for a lifetime regime, unless of course you have a more serious gut issue.

GAPS Diet
GAPS Protocol
GAPS Overview
GAPS Outline
What is GAPS Diet